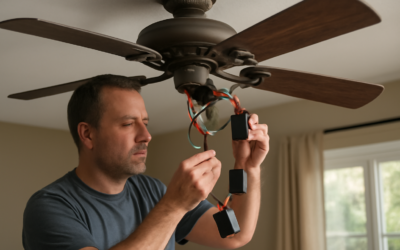
When a ceiling fan suddenly runs on only one speed, hums without spinning, or turns slowly no matter the setting, the culprit is almost always one small, cheap component. The Hunter ceiling fan capacitor controls how much current reaches the motor windings at each speed, and when it fails, the fan misbehaves in very predictable ways. The good news is that a replacement capacitor costs only a few dollars, and swapping it is a straightforward repair that saves you from buying a whole new fan. Here’s how to diagnose and fix it.
- What the Capacitor Does
- Signs Your Capacitor Is Failing
- Where the Capacitor Lives
- Safety First
- How to Test and Confirm
- Replacing the Capacitor
- When It Isn't the Capacitor
- Understanding Capacitor Ratings
- Why Capacitors Fail
- Tools You'll Need
- How Long Will the New Capacitor Last?
- A Cheap Fix Worth Doing
What the Capacitor Does
A ceiling fan’s motor needs a phase shift in the electrical current to start turning and to run at different speeds. The capacitor provides that shift. It stores and releases energy to give the motor the push it needs to start, and multi-speed fans use a capacitor with several values so the pull chain or remote can select low, medium, and high.
Because the capacitor handles this constant electrical stress, it’s the most common part to fail on an otherwise healthy fan. When it goes, the motor still gets power but can’t start properly or can’t reach all its speeds.
Signs Your Capacitor Is Failing
- The fan hums but won’t spin. Power reaches the motor, but without the capacitor’s push it can’t start. Sometimes a manual nudge starts it, a classic sign.
- Only one speed works, or some speeds are missing while others function. Multi-value capacitors often fail on one section.
- The fan spins slowly on every setting, with no real difference between low and high.
- Speeds are erratic or the fan changes speed on its own.
- A burnt smell or visible bulging from the capacitor, a failed capacitor sometimes swells or leaks.
If your Hunter fan shows any of these and the light still works fine, the capacitor is the prime suspect.
Where the Capacitor Lives
On most Hunter fans, the capacitor is a small black box, roughly the size of a large stick of gum, tucked inside the switch housing at the bottom of the motor, near where the pull chains and wiring connect. It has several colored wires leading to the pull-chain switch and motor. On remote-controlled models, it may sit near the receiver in the canopy or switch housing.
You’ll need to remove the light kit or the bottom switch-housing cover to reach it. Take a photo before disconnecting anything so you can match the wiring exactly on reassembly.
Safety First
Before touching any wiring, turn off the power at the wall switch and, to be safe, at the breaker. Capacitors can hold a charge even with power off, so discharge it by touching a insulated screwdriver across its terminals, or simply handle it carefully by the body. Never work on the fan with the breaker live.
How to Test and Confirm
You can often diagnose by symptoms alone, but to be certain, use a multimeter with a capacitance setting:
- Disconnect the capacitor and note the microfarad (µF) values printed on it, multi-speed units list several, such as “4.5uF + 5uF + 6uF.”
- Set the meter to capacitance and probe each pair of terminals.
- Compare the reading to the printed value. A healthy capacitor reads within about 10 percent of its rating. A reading near zero, or wildly off, confirms a failed section.
If you don’t have a meter, the symptoms plus a visual check for bulging or burn marks are usually enough to justify a cheap replacement.
Replacing the Capacitor
- Buy a matching capacitor. Match the microfarad values and the number of wires exactly. The printed rating on the old part (for example CBB61, 5-wire, 4.5/5/6 µF) tells you what to order, often for just a few dollars.
- Power off at the switch and breaker.
- Open the switch housing and photograph the wiring.
- Note or label each wire connecting to the old capacitor, then disconnect it, usually via wire nuts or a small connector.
- Wire the new capacitor in exactly the same configuration, matching wire colors to the switch and motor.
- Tuck everything back in, reattach the housing, and restore power.
Test each speed. If the fan now runs correctly across low, medium, and high, the capacitor was the problem and you’ve saved the cost of a new fan.
When It Isn’t the Capacitor
If a new capacitor doesn’t fix it, look at a few other suspects. A worn pull-chain switch causes similar single-speed problems, and it’s another cheap part. A failing motor bearing makes the fan noisy or slow but usually with grinding sounds. On remote models, a bad receiver can mimic capacitor symptoms, try resetting or replacing it. If the motor itself has burned out, which is rare on Hunter fans given their lifetime motor warranty, replacement or a warranty claim is the path.
Understanding Capacitor Ratings
The printed markings on a capacitor tell you everything you need to buy the right replacement, so it’s worth decoding them. A typical multi-speed fan capacitor reads something like “CBB61, 4.5uF + 5uF + 6uF, 250VAC, 5 wires.” Here’s what that means:
- CBB61 is the capacitor type common in ceiling fans, a film capacitor.
- The µF values are the capacitance for each speed section; a five-wire unit has multiple values in one package.
- 250VAC is the voltage rating, match or exceed it.
- Wire count (often 2, 3, or 5) must match your fan’s wiring.
When you order, match the µF values and wire count exactly. A slightly higher voltage rating is fine, but the capacitance and number of wires must be correct or the speeds won’t work properly.
Why Capacitors Fail
Capacitors wear out because they handle constant electrical and thermal stress every minute the fan runs. Heat is the main enemy, a fan in a hot room or an enclosed housing runs its capacitor hotter, shortening its life. Voltage spikes from the electrical grid or nearby appliances can also stress or fail a capacitor suddenly. Age simply takes its toll: the internal film degrades over years of charging and discharging thousands of times a day.
This is why the capacitor, not the motor, is usually the first thing to go on a quality fan. Hunter motors are built to last decades under their lifetime warranty, so when a Hunter fan acts up, the odds strongly favor the cheap capacitor over the expensive motor.
Tools You’ll Need
- Replacement capacitor matched to your fan’s markings
- Screwdrivers (Phillips and flat) to open the switch housing
- Wire nuts or the appropriate connectors
- Wire strippers, if you need to trim leads
- A multimeter with a capacitance setting (optional but helpful)
- A phone camera to photograph the wiring before you disconnect anything
None of these are specialized, and the whole repair typically takes 30 to 60 minutes once you have the matching part in hand.
How Long Will the New Capacitor Last?
A quality replacement capacitor should last many years, often as long as the original did, typically 5 to 15 years depending on how hard the fan runs and how hot the room gets. To get the most life out of it, buy a reputable capacitor rather than the cheapest unbranded part, and make sure the fan’s motor isn’t overheating from a lack of lubrication or an obstruction, since excess heat is what kills capacitors early.
If a fan burns through capacitors unusually fast, replacing one after only a year or two, that can hint at a deeper issue: an overheating motor, voltage problems on the circuit, or a fan being run harder than it’s rated for. In most cases, though, a fresh capacitor simply restores the fan and you won’t think about it again for a decade.
A Cheap Fix Worth Doing
A failing Hunter ceiling fan capacitor is one of the most satisfying DIY repairs because the part costs almost nothing and the fix is quick. Match the microfarad rating and wire count exactly, kill the power before you start, and photograph the wiring so reassembly is foolproof. In under an hour and for a few dollars, you can bring a humming, single-speed fan back to full multi-speed life instead of hauling it to the curb.