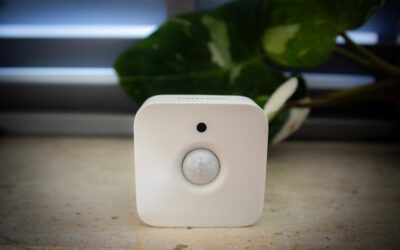
An indoor motion sensor light is one of those small upgrades that quietly changes how you move through your home. Walk into a dark laundry room with an armful of towels and the light snaps on before you fumble for a switch. Head down the hall at 2 a.m. and a soft glow guides you without blinding you. Beyond the convenience, these lights trim energy waste by shutting off automatically in rooms people forget about, and they add a real layer of safety on stairs and in entryways.
Part of our Windows & Doors guide — explore the full guide →
- How Indoor Motion Sensors Actually Work
- Types of Indoor Motion Sensor Lights
- Key Settings to Understand
- Best Rooms and Uses Inside the Home
- Wiring and Installation Basics
- Energy Savings and Bulb Choice
- Common Problems and How to Fix Them
- Smart vs. Standalone: Which to Buy
- Placement Tips That Make or Break Performance
- How Motion Lighting Compares to Timers and Switches
- Motion Detector Lights Indoor: Ceiling vs. Wall Mounting and Occupancy vs. Vacancy Modes
How Indoor Motion Sensors Actually Work
The vast majority of residential motion lights use passive infrared, or PIR, technology. A PIR sensor detects the heat signature of a person moving across its field of view. It does not emit anything; it simply reads changes in infrared energy. That is why PIR sensors respond best to movement across the beam rather than straight toward it, and why they can occasionally miss very slow motion.
Some higher-end fixtures use microwave or dual-technology sensing. Microwave sensors emit low-power radio waves and read the reflection, so they can detect motion through thin materials and cover larger areas, but they can also trigger on movement in an adjacent room. Dual-tech units require both PIR and microwave to agree before switching on, which dramatically reduces false triggers in busy homes.
Types of Indoor Motion Sensor Lights
- Screw-in sensor sockets. An adapter that screws into an existing bulb socket, then accepts a standard bulb. The cheapest entry point at $8 to $20, ideal for closets, pantries, and utility fixtures.
- Integrated LED fixtures. Ceiling or wall fixtures with the sensor built in. Cleaner look, longer life, priced around $25 to $70.
- Motion sensor wall switches. Replace a standard toggle switch; the sensor controls whatever fixture is wired to it. Great for garages, basements, and bathrooms, typically $20 to $45.
- Battery-powered stick-on lights. No wiring required, rechargeable or AA-powered, perfect for closets, cabinets, and under-stair nooks at $15 to $40 for a multi-pack.
- Smart motion lights. Wi-Fi or Zigbee fixtures that integrate with Alexa, Google Home, or a hub for scheduling and dimming, usually $30 to $90.
Key Settings to Understand
Nearly every motion light gives you a few adjustable dials or app controls, and dialing them in is the difference between a helpful light and an annoying one:
- Time delay (hold time). How long the light stays on after it last detects motion, adjustable from about 10 seconds to 30 minutes. Set short delays for closets and longer ones for rooms where you sit still, like a home office.
- Sensitivity. How much movement is required to trigger. Turn it down in rooms with pets or HVAC vents that push warm air.
- Ambient light threshold (lux). Lets the light stay off during daylight and only activate in the dark. Useful for hallways with windows.
- Detection range and angle. Most PIR sensors reach 15 to 30 feet with a 120- to 180-degree spread. Aim the sensor across the traffic path, not down at the floor.
Best Rooms and Uses Inside the Home
Some spaces benefit far more than others. Prioritize where hands-free lighting pays off:
- Closets and pantries where you often have full hands and no easy switch reach.
- Hallways and stairwells for nighttime safety, ideally with a low lux threshold and dim output.
- Laundry and utility rooms that are easy to leave lit for hours by accident.
- Bathrooms, especially guest baths and powder rooms, using a motion switch with a vent-fan timer.
- Garages and basements where you enter with tools or boxes and want immediate light.
- Kids’ rooms and nurseries for gentle nightlight-style guidance.
Wiring and Installation Basics
Screw-in and battery lights require zero electrical work. A motion switch or hardwired fixture is a straightforward swap for anyone comfortable turning off a breaker. Always cut power at the panel and verify with a non-contact voltage tester before touching wires. Motion switches connect line (hot) and load, and many require a neutral wire, so check the switch box before buying; older homes sometimes lack a neutral at the switch, which rules out certain smart models.
When mounting a ceiling fixture, position it so the sensor sees the doorway, since you want the light on as you enter. Avoid pointing PIR sensors directly at heat sources like radiators, registers, or sunny windows, which can cause nuisance activations. If a fixture keeps false-triggering, lower the sensitivity or reposition it before assuming it is defective.
Energy Savings and Bulb Choice
The efficiency win comes from lights that would otherwise stay on. A 60-watt-equivalent LED already sips about 9 watts, but a light burning needlessly for hours every day still adds up across a whole house. Auto-off in low-use rooms can cut those fixtures’ runtime by half or more. Always pair sensors with LED bulbs rated as compatible; some screw-in sensor sockets warn against CFLs because the frequent on-off cycling shortens CFL life. LEDs handle rapid switching without any lifespan penalty.
Common Problems and How to Fix Them
- Light won’t turn off. The time delay is set too long, or the sensor keeps seeing motion from a vent or pet. Shorten the delay and lower sensitivity.
- Light won’t turn on. The lux setting thinks the room is bright enough, or you are approaching the sensor head-on. Adjust the daylight threshold and reposition.
- Flickering. Often an incompatible bulb or a switch that needs a neutral. Swap to a confirmed-compatible LED.
- Short range. PIR performance drops in warm rooms because the contrast between body heat and background shrinks. Consider a dual-tech unit for large, warm spaces.
Smart vs. Standalone: Which to Buy
If you just want a light that turns on when you walk in, a standalone PIR fixture or switch is reliable, cheap, and needs no network. If you already run a smart-home ecosystem, a connected motion light lets you set schedules, dim to 10 percent at night, group lights together, and get alerts when motion is detected while you are away, effectively doubling as a low-key security sensor. Just remember that smart fixtures depend on your Wi-Fi and, in some cases, a hub, so keep at least the essential safety lights on simple, non-networked hardware.
Placement Tips That Make or Break Performance
Where and how you mount the sensor matters more than the price of the fixture. Because PIR sensors respond best to movement crossing the beam, position the unit so people walk past its field of view rather than straight at it; a light aimed down a hallway catches you far better than one staring at the doorway head-on. Keep the sensor away from heating registers, radiators, and sunny windows, since a blast of warm air or a shifting sunbeam reads as motion and causes nuisance triggers. In rooms with pets, mount the sensor higher and angle it slightly upward so a passing dog or cat stays below the detection zone. Mirrors and glossy surfaces can bounce infrared and confuse a sensor, so account for reflections in bathrooms and closets. A few minutes spent aiming the sensor correctly eliminates the vast majority of complaints people have about motion lights.
How Motion Lighting Compares to Timers and Switches
Motion sensing is not the only way to automate a light, and it helps to know when it wins. A simple timer switch works well for a bathroom fan or a porch light on a fixed schedule, but it cannot respond to whether anyone is actually present. A smart switch controlled by an app gives you scheduling and remote control but still relies on you to think about it. Motion sensing shines precisely because it is automatic and presence-based: the light responds to what is happening in the room, not to a clock or a command. For high-traffic, hands-full, or intermittently used spaces, that presence-awareness is unbeatable. The ideal home often blends all three, using motion for closets and halls, timers for exhaust fans, and smart switches where you want scheduling and dimming.
For most homeowners, the smartest approach is to match the technology to the room: inexpensive screw-in or battery units for closets, dependable motion switches for garages and baths, and a few smart fixtures in main hallways where scheduling and dimming genuinely help. Dial in the time delay, sensitivity, and lux settings after installation, and an indoor motion sensor light will fade into the background exactly the way good technology should, doing its job every time you walk in the door.
Motion Detector Lights Indoor: Ceiling vs. Wall Mounting and Occupancy vs. Vacancy Modes
Two decisions shape how motion detector lights indoors behave day to day, and both are easy to overlook when shopping: where the sensor is mounted and which switching mode it uses. Getting them right matters as much as the fixture itself.
Ceiling-Mounted Sensors vs. Wall-Mounted Sensors
A ceiling-mounted sensor looks straight down and typically offers a circular, all-around detection pattern. That makes it the better choice for open, square rooms such as laundry rooms, garages, and large walk-in closets, where people may enter from more than one direction or work in the middle of the space. Mount it roughly centered in the area where people actually move, not simply in the geometric center of the ceiling.
A wall-mounted sensor, including a motion switch in the standard switch box, sees a fan-shaped zone in front of it. It suits narrow rooms, hallways, and small bathrooms, but it can struggle when furniture, shelving, or an open door blocks its line of sight. Higher ceilings stretch a ceiling sensor’s footprint but reduce its sensitivity at floor level, so in tall stairwells or vaulted rooms, check the product’s rated mounting height before buying and plan on turning sensitivity up slightly after installation.
Occupancy Mode vs. Vacancy Mode
- Occupancy (auto-on/auto-off): the light turns on when you enter and off when the room is empty. Best for closets, pantries, and utility spaces where hands are full.
- Vacancy (manual-on/auto-off): you press the switch to turn the light on, and the sensor only turns it off. This prevents the light from switching on every time someone walks past an open doorway, and it saves more energy in rooms with daylight. Some local energy codes favor vacancy mode in certain rooms, so check requirements if you are renovating under a permit.
Many motion switches can be set to either mode, and switching a hallway or bedroom to vacancy mode often solves the complaint that the light comes on when it is not wanted.
Wiring a Hardwired Sensor Safely
For three-way locations such as a stairway with switches at the top and bottom, buy a sensor specifically rated for multi-location use; a standard single-pole motion switch will not work correctly in a three-way circuit. Before replacing any switch or fixture, turn off the breaker for that circuit and confirm the wires are dead with a non-contact voltage tester, checking every conductor in the box. If the box lacks a neutral or the wiring does not match the sensor’s instructions, stop and call a licensed electrician.