Plenty of homeowners have laid ordinary carpet squares on a porch, watched them fade to gray and grow mildew in a single season, and concluded carpet tile “doesn’t work outside.” The real problem was the product, not the concept. True indoor outdoor carpet tiles are engineered differently from indoor-only squares — solution-dyed fibers, marine-grade backing, and drainage-friendly construction — and when you buy the right spec, they survive sun, rain, and freeze-thaw for years. This guide explains exactly what separates outdoor-rated tile from the indoor stuff, and how to choose and install it.
Part of our Tile & Grout guide — explore the full guide →
- What Makes a Carpet Tile Genuinely Outdoor-Rated
- Indoor-Only vs. Indoor/Outdoor: The Practical Differences
- Best Applications Around the Home
- Pile Styles and What They Feel Like
- Installation: Easier Than Almost Any Other Flooring
- Cleaning and Longevity
- The Bottom Line
- Solution-Dyed Polypropylene vs. Dyed Nylon: Why the Fiber Choice Decides Everything
- Backing, Drainage, and Beating Mold and Mildew Outdoors
- Adhesives and Fasteners for Outdoor Conditions
What Makes a Carpet Tile Genuinely Outdoor-Rated
Three construction features do the heavy lifting. First is the fiber: outdoor tiles use solution-dyed polypropylene (olefin) or solution-dyed nylon, meaning the color is mixed into the molten polymer before the fiber is extruded. The color goes all the way through the strand — like a carrot rather than a radish — so UV light cannot bleach it the way it strips surface-dyed yarns. Quality outdoor fiber carries a UV-stability rating, often expressed as retaining color through thousands of hours of accelerated sunlight testing.
Second is the backing. Indoor tiles typically ride on cushioned PVC or fiberglass-reinforced backings designed for climate-controlled floors; many delaminate or curl after repeated soakings. Outdoor tiles use marine backing — a non-absorbent rubber or polypropylene layer that will not rot, wick moisture, or harbor mold. Third is drainage and dry-out: outdoor constructions are either needlepunch (a dense felt-like surface), flat woven, or low loop piles that hold little water and dry fast, sometimes with drainage channels or perforations so rain passes through rather than pooling in the pile.
Once your patio flooring is in place, think about how you’ll use the space. A gazebo adds shade and structure, while a good outdoor furniture set turns it into a spot you’ll actually want to hang out in. A deck box is also worth considering if you need somewhere to stash cushions and outdoor gear.
We may earn a commission when you purchase through our links.
Indoor-Only vs. Indoor/Outdoor: The Practical Differences
- Fade resistance: solution-dyed outdoor fiber shrugs off direct sun; indoor tiles beside a sliding door can fade in one summer.
- Moisture behavior: outdoor tiles tolerate rain and hose-downs; indoor cushion backings absorb water and breed mildew.
- Cleanability: olefin is nearly stain-proof against wine, sunscreen, and clay soil, and you can literally bleach-clean many outdoor tiles — impossible with indoor nylon.
- Comfort: the trade-off. Outdoor tiles feel flatter and firmer; indoor squares with cushion backs feel plusher underfoot.
- Cost: outdoor-rated squares generally run $2 to $5 per square foot, overlapping with mid-grade indoor tile.
The “indoor outdoor” label earns its name in transitional spaces: the same tile can run from a finished basement out to a covered patio, or carpet a screened porch, sunroom, and pool cabana with one product.
Best Applications Around the Home
Covered porches and screened rooms are the sweet spot — protection from standing water plus plenty of UV exposure plays exactly to these tiles’ strengths. Basements are the biggest indoor use case: over concrete that occasionally sweats or takes minor seepage, a non-absorbent outdoor tile is far safer than broadloom, and individual squares lift out to dry after a water event. Other strong fits include garage gyms and workshops, boat docks and deck surfaces (confirm the tile is rated for full exposure, not just covered areas), playrooms, mudrooms, and rental-unit stairs and hallways where bleach-cleanability matters.
For fully exposed patios with no roof, be choosy: only tiles explicitly rated for full sun and standing water belong there, ideally perforated designs over a slab pitched to drain. On flat surfaces that pond, even good tile traps moisture beneath it — sweep standing water off or lift sections occasionally.
Pile Styles and What They Feel Like
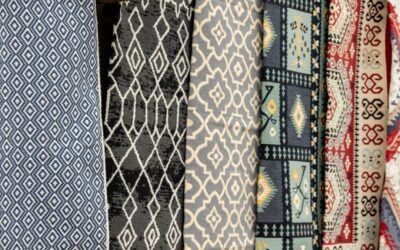
Outdoor carpet tile comes in three main textures. Needlepunch is the classic marine carpet feel — dense, felt-like, very flat, extremely durable, and the cheapest, though the least residential-looking. Low-level loop mimics commercial office tile with a tidy, structured surface that handles furniture legs and foot traffic gracefully; this is the best all-around choice for basements and porches. Flat-woven or ribbed styles offer the most pattern and color interest — stripes, herringbone effects, heathered tweeds — and look the most like an intentional design choice rather than a utility surface. Pile heights across all three usually stay under 1/4 inch, which keeps doors swinging freely and furniture stable.
Installation: Easier Than Almost Any Other Flooring
Carpet squares — usually 18×18 or 24×24 inches — are among the friendliest DIY floors going. Over concrete, clean and dry the slab, snap chalk lines off the room’s center so cut tiles land evenly at the walls, then install with peel-and-stick backing, dots of pressure-sensitive adhesive, or the included adhesive tabs depending on the product. Outdoors, use a full spread of outdoor-rated pressure-sensitive adhesive or the manufacturer’s tape system so wind and thermal movement cannot lift corners; indoors, many installations rely on nothing more than perimeter tiles being glued.
Practical tips from the field: let cartons acclimate 24 hours on site, rotate tile direction per the arrow on the backing (quarter-turning creates a checkerboard sheen that hides seams), cut from the back with a fresh utility blade against a straightedge, and keep 5 percent extra tiles for future swap-outs. A 12×12 room is a comfortable half-day job for a first-timer.
Cleaning and Longevity
Routine care is a vacuum indoors and a broom or leaf blower outside. Spills on olefin wipe up with dish soap and water; stubborn mildew or sunscreen stains tolerate a 10:1 water-bleach solution on most solution-dyed products — test a spare tile first. Hose tiles off a couple of times a season outdoors and let them dry fully before heavy rugs or furniture go back. The replaceability is the quiet superpower: when the grill drops grease or a planter stains a corner, you swap one $8 square instead of re-carpeting the porch. Expect 8 to 15 years outdoors under cover and longer indoors, with fade — not wear — being the eventual retirement reason in sunny exposures.
The Bottom Line
Indoor outdoor carpet tiles work exactly as promised when the spec sheet says solution-dyed fiber, marine or non-absorbent backing, and UV stability — and disappoint when someone puts cushion-backed indoor squares in the weather. Match the exposure level (covered vs. full sun), pick a low loop or woven texture you would be happy to see indoors, glue the perimeter properly, and keep a few spares. Done that way, one product carries you from the basement rec room to the screened porch with no transition in look or worry.
Solution-Dyed Polypropylene vs. Dyed Nylon: Why the Fiber Choice Decides Everything
The single most consequential line on an outdoor carpet tile spec sheet is the fiber, and the contest is really between solution-dyed polypropylene and conventionally dyed nylon. Nylon is the stronger, more resilient fiber indoors — it springs back from crushing and takes rich colors — but most nylon carpet is dyed after the yarn is made, meaning pigment sits on the surface of the strand. Under ultraviolet light that surface pigment breaks down, and the fiber itself, being more absorbent, holds moisture that feeds mildew and dye migration. That is why a nylon square that looks luxurious in a hallway turns chalky and blotchy on a sun-washed porch within a season or two.
Solution-dyed polypropylene inverts those weaknesses for outdoor use. Because the color pigment is compounded into the liquid polymer before extrusion, every cross-section of the fiber is the same shade straight through, so surface UV fading has almost nothing to strip away. Polypropylene is also inherently hydrophobic — it absorbs well under one percent of its weight in water — so spills bead and wick to the surface instead of soaking in, and there is little internal moisture for mold to colonize. The practical outcome is a fiber you can flush with a hose, scrub with diluted bleach, and leave in direct sun without watching the color drift. The trade-off is resilience: polypropylene crushes more easily than nylon, which is exactly why outdoor tiles are built as dense, low needlepunch or tight loop constructions where there is little pile height to crush in the first place. When you see solution-dyed nylon offered for outdoor use, it is engineered to close that UV gap, but for the money most homeowners are best served by solution-dyed olefin.
Backing, Drainage, and Beating Mold and Mildew Outdoors
Fiber gets the attention, but backing failure is what actually ends most outdoor carpet-tile installations. An indoor tile’s cushioned PVC or bitumen backing is a closed, absorbent sandwich; once water gets trapped between it and a slab, it has nowhere to go, and the underside becomes a petri dish. Genuine outdoor tiles solve this two ways. Solid marine or vulcanized-rubber backings are completely non-absorbent, so they cannot rot or wick, and they grip a wet slab without curling. Permeable or perforated backings take the opposite approach — they let rainwater pass straight through the tile into the substrate below, so water never ponds in the pile at all. On a covered porch a solid marine back is usually ideal; on a fully exposed deck or a slab that occasionally gets rained on, a permeable drainage backing paired with a substrate pitched to drain is the smarter choice.
Mold and mildew control is a system, not a single feature. Choose non-absorbent components top to bottom, install over a surface that actually sheds water rather than holding it, and give the assembly a way to dry — air circulation underneath matters as much as the material itself. This is why lifting a few squares after a heavy storm, or choosing raised interlocking outdoor tiles with airflow channels for permanently damp locations, pays off. Antimicrobial treatments woven into some outdoor products help at the margins, but they are a supplement to good drainage, not a substitute for it. If you remember one rule, make it this: outdoors, the goal is never to keep water out of the carpet — it is to make sure water that gets in has an easy, fast way back out.
Adhesives and Fasteners for Outdoor Conditions
Indoors, outdoor-rated tiles can often float with nothing more than a few peel-and-stick tabs or a glued perimeter, because temperatures and humidity stay stable. Outdoors, the same shortcut invites trouble. Sun-baked slabs swing through wide daily temperature ranges, and tiles expand and contract with them; wind gets under any lifted corner and peels tiles like a deck of cards. For exposed and covered exterior installs alike, use a full spread of outdoor-rated pressure-sensitive adhesive or the manufacturer’s specified outdoor tape grid rather than relying on interior peel-and-stick, whose factory adhesive can soften and creep in heat or let go in the cold. Make sure the slab is genuinely dry and free of dust before adhering, because moisture and grit are the two things that defeat almost every carpet adhesive. On surfaces where you may want to lift tiles seasonally to clear water or dry them out, a lighter tab or hook-and-loop system is a reasonable compromise, but accept that it will need occasional re-seating after storms. Whatever the method, weight the tiles down or roll them after installation so the adhesive achieves full contact, and give it the manufacturer’s stated cure time before exposing the floor to rain or heavy furniture.