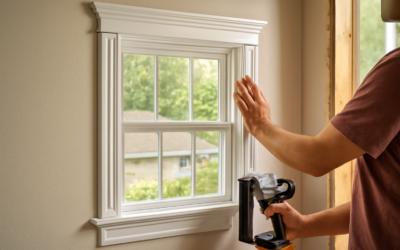
Door casing is one of those details you never notice when it is right and cannot unsee when it is wrong. The trim framing your interior doors sets the architectural tone of a room, and the wrong profile can make a beautiful house feel builder-basic. Understanding the main interior door casing styles helps you match trim to your home’s period, scale it correctly, and get a finished look that reads as intentional. This guide walks through the major styles, materials, and the practical decisions that go into choosing casing.
Part of our Windows & Doors guide — explore the full guide →
What Door Casing Actually Does
Casing is the molding that surrounds a door opening, covering the gap between the door jamb and the wall. Beyond hiding that rough transition, casing frames the door as a design element, adds visual weight, and ties a room’s woodwork together with the baseboards and window trim. Because doors appear in every room, casing is one of the highest-impact trim decisions in a house, and getting it consistent throughout creates a sense of quality and cohesion.
The Major Casing Styles
Craftsman
Craftsman casing is defined by clean, flat boards and squared-off corners rather than curved profiles. The vertical legs are typically flat 1×4 stock, topped by a wider, thicker header board that may include a small cap or backband. There are no mitered corners; the pieces butt together squarely. This style suits bungalows, Arts and Crafts homes, farmhouses, and modern interiors that favor simple, honest lines. It is also forgiving to install because square butt joints are easier than miters.
Colonial and Traditional
Colonial casing uses a contoured, tapered profile that is thicker at the outer edge and steps down toward the door. The corners are mitered at 45 degrees. This is the most common casing in American homes and reads as timeless and traditional. Variations include the more ornate “princess” and clamshell profiles. Colonial trim pairs naturally with paneled doors and works in the widest range of home styles.
Ranch and Modern
Ranch casing is a simple, gently curved profile that is subtle and understated, common in mid-century and contemporary homes. It provides a soft edge without the busyness of ornate molding. For truly modern interiors, some homeowners go further with minimal or “trimless” reveals, where a thin metal or drywall bead replaces visible casing entirely for a crisp, frameless look.
Victorian and Ornate
Victorian casing brings elaborate detail, deep profiles, decorative rosette corner blocks, and plinth blocks at the base. Rosette blocks let the vertical and horizontal casing butt into a decorative square rather than mitering, a hallmark of period homes. This style fits Victorian, Queen Anne, and other historic houses, and it makes a dramatic statement, though it costs more and demands taller ceilings to look balanced.
Farmhouse and Board Casing
Modern farmhouse interiors often use wide, flat board casing, essentially a beefed-up craftsman look with 1×4 or wider flat stock and a chunky header. Painted in crisp white, it delivers that clean, substantial trim look that defines the farmhouse aesthetic.
Getting the Proportions Right
Style matters, but scale can make or break the result. Casing that is too narrow looks skimpy against tall doors and high ceilings, while overly wide trim can overwhelm a small room. A few guidelines help:
- Standard width: Most casing runs 2 1/4 to 3 1/2 inches wide. Rooms with 8-foot ceilings usually look best with casing around 2 1/2 to 3 inches.
- Taller ceilings: With 9- or 10-foot ceilings, step up to 3 1/2-inch or wider casing so the trim holds its own.
- Relationship to baseboard: Casing typically should be slightly thinner in profile than the baseboard so the two meet cleanly at the floor, with the baseboard dying into the casing.
- Reveal: Leave a consistent 1/8 to 3/16-inch reveal, the small setback between the jamb edge and the casing, for a crisp, professional look.
Casing Materials
The material affects cost, durability, and whether you can stain or must paint.
- MDF: Medium-density fiberboard is smooth, stable, affordable, and takes paint beautifully. It is the default for painted trim but swells if it gets wet, so avoid it in bathrooms and basements.
- Finger-jointed pine: Made from short pieces glued together, it is economical and stable, but only for painted applications since the joints show through stain.
- Solid wood (poplar, pine, oak): Necessary if you want a stained, natural-wood look. Poplar paints well; oak and other hardwoods showcase grain under stain.
- PVC and composite: Moisture-proof options for wet areas, though less common for interior door casing.
Paint or Stain?
The finish is as much a style choice as the profile. Painted casing, usually in white or off-white, is the dominant look today; it brightens rooms, hides seams, and works with any wall color. Stained wood casing shows off grain and suits craftsman, rustic, and traditional interiors, but it requires solid-wood trim and careful finishing. A rising trend pairs stained wood doors with painted casing, or vice versa, for contrast. Whatever you choose, keep the finish consistent across all doors in a space for a unified look.
What Casing Costs
Material for interior door casing is relatively inexpensive. Basic MDF or pine casing runs roughly $1 to $3 per linear foot, while solid hardwood and ornate profiles climb to $4 to $10 or more. A single standard door opening uses about 17 linear feet of casing. Installation by a finish carpenter typically runs $2 to $6 per linear foot in labor, or a flat $50 to $150 per opening. Rosette and plinth blocks, decorative headers, and stained finishes push costs higher.
Installation Tips
Casing installation rewards patience. Cut miters slightly long and shave to fit rather than cutting short. Use a brad nailer to fasten casing to both the jamb and the wall framing. Maintain that consistent reveal all the way around. For square craftsman corners, a well-cut butt joint looks clean and is far easier than a tight miter. Caulk the gaps between casing and wall, fill nail holes, and sand before painting for a seamless result. If your walls or jambs are out of square, which is common in older homes, expect to fine-tune each cut rather than relying on a single angle.
Coordinating Casing with Windows and Baseboards
Door casing does not exist in isolation. For a cohesive interior, the same casing profile should frame both doors and windows, and the baseboard should relate to it in scale and style. In craftsman and farmhouse homes, flat window casing with a stool and apron below the sill echoes the flat door casing beautifully. In traditional homes, the same colonial profile wraps both. A common mistake is mixing casing styles between doors and windows in the same room, which reads as unplanned. Choose one trim vocabulary and repeat it throughout a space, then let the baseboard, typically a bit taller than the casing is wide, ground the walls consistently.
Upgrading Casing Without Replacing Everything
If your home has thin, dated ranch or clamshell casing, you do not always have to tear it out to modernize. One budget-friendly approach is to add a backband, a small L-shaped molding, around the outside edge of existing casing to bulk it up and add depth. Another is to simply replace the casing while keeping the door and jamb, a manageable weekend project that dramatically updates a room. For the biggest impact at the lowest cost, switching from a narrow colonial profile to wider flat craftsman boards, painted crisp white, instantly gives a room a more current, substantial feel without touching the doors themselves.
Choosing the Right Style for Your Home
Let your home’s architecture lead. Craftsman and flat-board casing suit bungalows, farmhouses, and modern interiors. Colonial trim is the safe, timeless default for most traditional houses. Ranch profiles fit mid-century and contemporary spaces. Save ornate Victorian casing for period homes that can carry it. Above all, keep the casing consistent throughout the house, scale it to your ceiling height, and match the finish to your doors and baseboards. Get those fundamentals right, and the trim around every door will quietly make the whole house feel more finished.