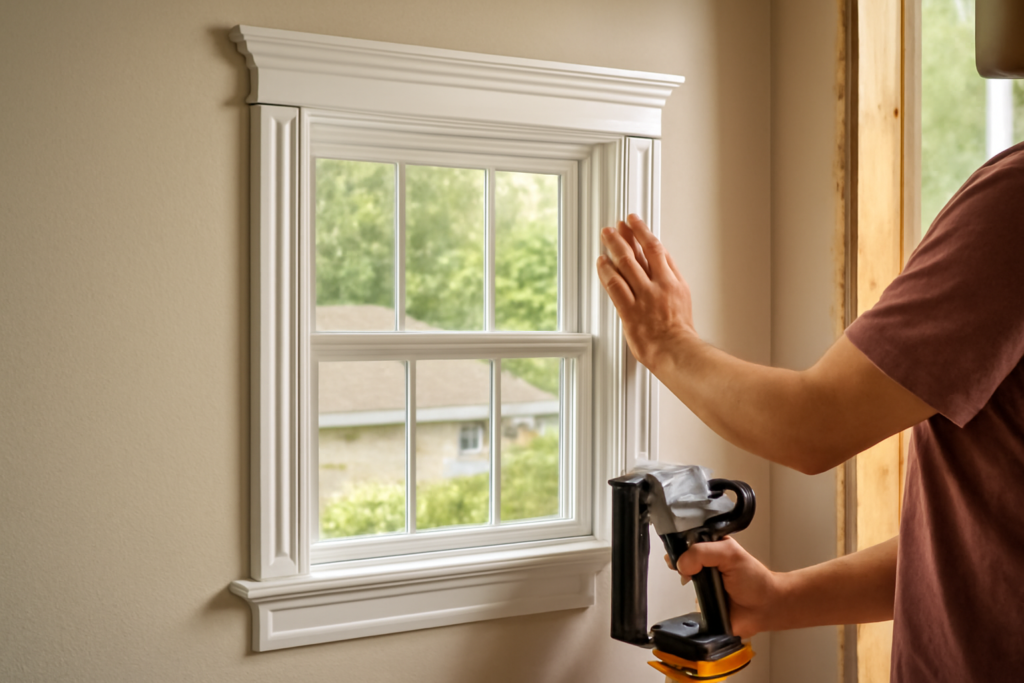
The molding that frames a window does more than decorate it, and understanding window casing trim is the key to giving any room a finished, intentional look. Casing is the trim that surrounds the window on the interior, covering the gap between the window frame and the wall, hiding the rough construction beneath, and providing the decorative frame that ties the window into the room’s style. Whether you are trimming out a new window, updating dated molding, or adding character to a plain builder-grade room, this guide covers the styles, materials, installation, and costs.
Part of our Windows & Doors guide — explore the full guide →
- What Window Casing Trim Is
- Common Casing Styles
- Stool-and-Apron Versus Picture-Frame
- Materials to Choose From
- What It Costs
- Tools You Will Need
- How to Install Window Casing
- Getting Tight Corners
- Common Mistakes to Avoid
- Matching Casing to Your Home's Age and Style
- Coordinating Casing With Baseboards and Doors
- Painting and Finishing Tips
- The Payoff
What Window Casing Trim Is
Casing is the flat or profiled molding installed around the perimeter of a window’s interior. Its practical job is to conceal the gap and any shims between the window’s jamb and the framing, and to protect that transition. Its aesthetic job is to frame the window attractively and coordinate with the room’s baseboards, door casings, and overall trim style. Casing typically runs along the two sides and the top of a window, and depending on the style, either continues across the bottom or meets a stool and apron, the interior sill and the trim beneath it.
Common Casing Styles
- Colonial and traditional: Profiled molding with curves and steps, mitered at the corners. Classic and warm, suited to traditional homes.
- Craftsman or mission: Flat, wide boards with clean square corners, often with a header board across the top and a stool below. Bold and architectural, popular in bungalows and modern farmhouse interiors.
- Modern and minimalist: Simple flat stock or even trimless drywall returns for a clean, contemporary look with no visible molding.
- Picture-frame: Casing mitered on all four sides so the window is framed like a picture, with no stool or apron, giving a symmetrical, clean appearance.
The style should match your doors and baseboards so the whole room reads as coordinated rather than piecemeal.
Stool-and-Apron Versus Picture-Frame
The biggest layout decision is whether the bottom of the window gets a stool and apron or is picture-framed. The stool-and-apron approach installs a horizontal sill, the stool, that projects into the room, with decorative apron trim beneath it, and the side and top casings sit on top of the stool. This is the traditional look and gives you a small ledge. The picture-frame approach runs casing around all four sides with mitered corners and no projecting sill, a cleaner, more contemporary look that is also a bit simpler to install. Choose based on your home’s style and whether you want a sill ledge.
Materials to Choose From
Solid wood such as pine, poplar, or oak is the traditional choice, paintable or stainable, and it holds crisp detail. MDF is smooth, stable, and inexpensive, excellent for painted trim, though it dents more easily and dislikes moisture. Primed finger-joint pine offers a paint-ready surface at a moderate price. PVC and composite trim resist moisture and suit bathrooms, kitchens, and other damp areas where wood or MDF would swell. Match the material to the finish and location: paint-grade MDF for most rooms, moisture-resistant options where humidity is high, and hardwood where you want a stained natural look.
What It Costs
Casing material is affordable. Basic trim runs $1 to $4 per linear foot for pine or MDF, and $4 to $10 per linear foot for hardwoods and elaborate profiles. A single standard window needs roughly 15 to 20 linear feet of casing plus stool and apron material, putting material cost commonly at $25 to $100 per window. If you hire a finish carpenter, labor typically adds $50 to $150 per window depending on complexity, so a professionally trimmed window often runs $100 to $300 all in. Because material is cheap and the skill is learnable, casing is a rewarding DIY project.
Tools You Will Need
- A miter saw for accurate angle cuts, essential for tight corners.
- A brad nailer or finish nailer, with a hammer and nail set as a backup.
- A tape measure, pencil, and a combination or speed square.
- A level to keep everything plumb and true.
- Wood filler, paintable caulk, and sandpaper for finishing.
How to Install Window Casing
- Mark a reveal. Draw a light line about 1/8 to 1/4 inch back from the inner edge of the window jamb all the way around; the casing aligns to this reveal line so a consistent sliver of jamb shows.
- If doing stool-and-apron, install the stool first, notching it to fit and extend past the opening, then the side and top casings sit on it.
- Cut and install the side casings, aligning to the reveal lines. For picture-frame, cut 45-degree miters at the top; for a Craftsman header, cut square.
- Cut and install the top casing to meet the sides, whether mitered or a flat header, dry-fitting for tight joints before nailing.
- Nail the casing into both the window jamb and the wall framing, spacing nails every 12 to 16 inches.
- For stool-and-apron, install the apron beneath the stool last.
- Fill nail holes, caulk the gaps where casing meets wall and jamb, sand smooth, and paint or finish.
Getting Tight Corners
Miter joints are where beginners struggle. Cut each piece a touch long and shave to fit rather than cutting short. If a miter shows a gap, small adjustments to the angle or a thin shim behind the trim close it. Glue the mitered corners and pin them with a brad from the top so they stay tight as the wood moves. For square Craftsman joints, a clean butt joint with the header sitting on the sides looks intentional and forgiving. A little caulk and filler hides minor imperfections, but aim for tight cuts first.
Common Mistakes to Avoid
The usual errors are forgetting the reveal and butting casing flush to the jamb, which looks cramped and highlights any unevenness. Cutting miters slightly off leaves gaps that even caulk cannot fully hide. Nailing only into the jamb and not the framing leaves the trim loose. And rushing the caulk-and-fill step betrays the whole job; the difference between amateur and professional trim is often just careful caulking and filling of every seam and nail hole before painting.
Matching Casing to Your Home’s Age and Style
The most convincing trim looks like it belongs to the house, so let the home’s era and architecture guide your profile. A 1920s bungalow calls for wide, flat Craftsman casing with a substantial header and stool; a colonial or traditional home suits stepped, profiled molding with mitered corners; a mid-century or modern home looks best with simple flat stock or minimal trim. If your home already has casing on some windows or doors that you like, match it so the whole house reads consistently. Mixing an ornate Victorian profile on one window with a flat modern casing on the next makes a room feel disjointed. When in doubt, wider and simpler tends to look more intentional and upscale than narrow, fussy builder-grade trim.
Coordinating Casing With Baseboards and Doors
Window casing does not live in isolation; it should relate to the baseboards and door casings in the same room. A common guideline is that baseboards are taller than the casing is wide, giving a grounded, balanced look, though many modern homes run them at similar dimensions. Use the same profile family for window casing and door casing so the trim package feels unified. Where window casing meets a stool that sits near the floor, or where casing runs down to meet the baseboard, plan how those pieces intersect so the transition looks deliberate. Thinking about the whole trim package, rather than one window at a time, is what gives a room that cohesive, custom-built feeling.
Painting and Finishing Tips
For the best-looking painted casing, prime the trim before installation if it is not pre-primed, then apply the finish coats after it is nailed, filled, and caulked. A semi-gloss or satin sheen is traditional for trim because it wipes clean and subtly catches light, distinguishing the trim from flatter wall paint. Use a quality angled sash brush for crisp lines where casing meets the wall, and consider painting the trim before the walls get their final coat so you can cut in cleanly. For stained wood casing, apply the stain and a couple of coats of clear protective finish before or after installation depending on your workflow, and touch up nail holes with a matching wood putty. A careful finish elevates even inexpensive MDF trim to a rich, built-in appearance.
The Payoff
Window casing trim is a high-impact, budget-friendly upgrade that instantly makes a room look finished and custom. For $25 to $100 in material per window and a weekend of careful cutting, plain windows gain the framed, architectural presence that ties a room together. Match the style to your doors and baseboards, choose the right material for the location, keep a consistent reveal, and take your time at the corners and the caulk. The result is trim that looks like it was there when the house was built, which is exactly the finished feeling casing is meant to deliver.