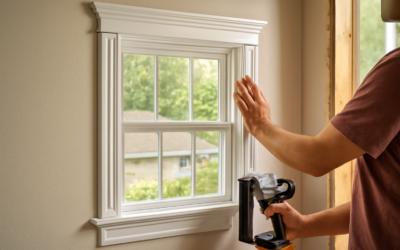
The spot where your baseboard runs into a window that reaches near the floor is one of the most awkward joints in all of trim carpentry, and a botched one is impossible to unsee. Getting the window baseboard transition right, whether the casing runs all the way down or stops short, is what separates a professional-looking room from a DIY job that reads as amateur at every corner. This guide explains how the two trims are supposed to meet, the parts that make it easy, and the cutting technique that gives you tight joints every time.
Part of our Windows & Doors guide — explore the full guide →
- Understanding the Baseboard-to-Casing Relationship
- The Plinth Block Solution
- Common Window-to-Floor Situations
- Butt Joints vs Returns
- Cutting Tight Joints
- Matching Profiles and Proportions
- Handling the Window Apron and Baseboard
- Tools You'll Need
- Dealing With Out-of-Square Walls
- Order of Installation
- Installation and Finishing Tips
Understanding the Baseboard-to-Casing Relationship
In traditional trim carpentry, the window or door casing is the “boss” of the joint. Baseboard dies into the side of the casing rather than the casing being cut around the baseboard. That means the vertical casing leg runs to the floor, and the horizontal baseboard butts cleanly against it.
This hierarchy only works when the casing is thicker than the baseboard, which is the classic proportion. If your baseboard is thicker than your casing, the baseboard will stick out past the casing face and create an ugly step, which is exactly the problem a plinth block is designed to solve.
The Plinth Block Solution
A plinth block is a thick, slightly oversized block installed at the base of the casing where it meets the floor. The casing sits on top of it, and the baseboard dies into its side. Because the plinth is thicker and taller than both the casing and the baseboard, both trims butt cleanly into it with no awkward step.
Plinth blocks are the traditional fix for tall windows and doors that run to the floor, and they add a crisp, architectural detail that looks intentional and refined. You can buy them premade or rip your own from thicker stock. For a formal or craftsman-style room, they are often the cleanest solution.
Common Window-to-Floor Situations
How you handle the transition depends on where the window sits:
- Window well above the floor: Baseboard runs continuously beneath the window with no interruption. The easiest case.
- Full-height or floor-length window: Casing runs to the floor and baseboard dies into the casing leg or a plinth block.
- Window with an apron and stool: The apron (the trim under the sill) sits above the baseboard, and the baseboard passes beneath undisturbed.
- Bay or picture window to the floor: Often gets a plinth or a thicker vertical trim to land the baseboard against.
Identify which situation you have before cutting anything, because each calls for a different approach at the joint.
Butt Joints vs Returns
When baseboard meets casing, a simple square butt joint is standard and correct. Cut the baseboard end square and push it tight against the casing. Caulk the seam and the joint disappears under paint.
Where baseboard ends at an open edge, such as a doorway with no casing to die into, cut a return, a small mitered piece that wraps the end grain back to the wall. Returns give a finished, professional look and hide the raw cut edge that would otherwise show. Skipping them is a telltale sign of rushed work.
Cutting Tight Joints
Tight joints come from accurate cuts and square walls, so start by checking both. Use a miter saw for clean square and angled cuts, and always cut a hair long, then shave to fit; you can remove material but you cannot add it back.
For inside corners where two baseboards meet, coping one piece over the other beats a miter almost every time, because a coped joint stays tight even when the corner is not perfectly 90 degrees. For the straightforward butt into casing, a dead-square end and a snug push are all you need. Test-fit before nailing.
Matching Profiles and Proportions
Trim looks best when the profiles relate to each other. A common formula keeps the casing slightly thicker than the baseboard and the baseboard taller than the casing is wide, giving a balanced, traditional proportion. Mixing a chunky modern baseboard with a thin colonial casing looks disjointed.
If you are matching existing trim, take a sample to the store or measure the profile carefully. Many rooms use a two- or three-piece built-up baseboard, and replacing one piece with a mismatched stock profile will stand out. Consistency across a room reads as quality.
Handling the Window Apron and Baseboard
When a window sits partway down the wall with a stool and apron, the baseboard and window trim rarely touch, but they should still relate visually. The apron, the horizontal trim piece beneath the sill, sits well above the baseboard in most rooms, so the baseboard simply runs across the wall beneath it undisturbed.
Problems arise only when a window reaches close to the floor and the apron nearly meets the baseboard. In that case, either extend the casing to the floor with a plinth block or let the apron die into the same vertical trim the baseboard butts against. The goal is to avoid a cramped, awkward gap where two trim pieces almost but not quite meet. A little planning of the vertical trim solves it cleanly.
Tools You’ll Need
A clean trim job comes down to having the right tools ready:
- Miter saw: For accurate square and angled cuts
- Coping saw or jigsaw: For coping inside corners
- Finish nailer (15 or 16 gauge): To fasten baseboard to studs and plate
- Measuring tape and pencil: Measure twice, cut once
- Caulk gun and paintable caulk: To seal seams and joints
- Wood filler and sandpaper: To hide nail holes
A coping saw is the one tool beginners skip and then regret, because coped inside corners stay tight where mitered ones open up. It is worth the few dollars and the short learning curve.
Dealing With Out-of-Square Walls
Almost no wall or corner in a real house is perfectly square, and pretending otherwise is why DIY trim gaps. Check each corner with a speed square before cutting, and expect to fine-tune your angles rather than relying on a dead-45 miter. For inside corners, coping one piece to fit the profile of the other absorbs the imperfection and hides gaps.
Where the baseboard meets the window casing, a slightly out-of-plumb casing can leave a wedge-shaped gap. Cut the baseboard end with a hair of back-bevel so the front face touches tight, and fill any remaining hairline gap with caulk. These small adjustments are exactly what separate professional-looking trim from work that looks forced.
Order of Installation
Sequence matters when trimming a window that meets the baseboard, and getting it wrong forces awkward cuts later. As a rule, install the window casing and any plinth blocks first, since the casing is the boss that the baseboard dies into. With the vertical trim set and plumb, you have a clean, solid target to butt the baseboard against.
Run the baseboard last, working around the room and landing each run tight against the casing legs or plinth blocks. This order lets you measure the baseboard to fit the trim that is already in place, rather than guessing at gaps. Painting is the final step, after all nail holes are filled and every seam is caulked, so the whole assembly reads as one continuous, finished detail.
Installation and Finishing Tips
Nail baseboard into the wall studs and the bottom plate with a finish nailer, keeping nails about every 16 inches to match stud spacing. Set the nails slightly below the surface, fill the holes with wood filler, and sand smooth before painting. A bead of paintable caulk along the top edge and at the casing joint hides any small gaps and gives that seamless painted look.
Prime and paint after caulking, since caulk needs a coat over it to blend in. Done carefully, a clean window baseboard transition, whether with a simple butt joint or a proper plinth block, is the kind of quiet detail that makes an entire room look professionally finished.