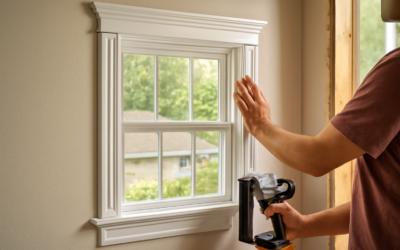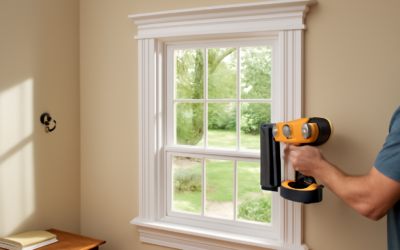
The trim around a window does more than look pretty — it covers the rough gap between the window frame and the wall, seals out drafts, and defines the entire character of a room. Window casing is the decorative molding that frames each window, and choosing the right profile can shift a space from builder-basic to genuinely custom. Whether you are updating dated trim or finishing a new install, understanding casing styles, materials, and installation lets you get a crisp, professional result.
Part of our Windows & Doors guide — explore the full guide →
- What Window Casing Actually Does
- Popular Casing Styles
- Casing Materials Compared
- Butt Joint vs. Mitered Corners
- Installing Window Casing Step by Step
- Stool-and-Apron vs. Picture Frame
- What Window Casing Costs
- Matching Casing to Your Home's Era
- Painted vs. Stained Casing
- Common Installation Mistakes
- Finishing Touches That Make It Look Pro
What Window Casing Actually Does
When a window is installed, there is always a gap between the window unit and the framed opening in the wall — filled with insulation and covered by drywall that rarely meets the window cleanly. Casing hides that transition, giving a finished edge. Beyond looks, it adds a layer of air sealing and protects the drywall edge from bumps and wear.
Casing also carries architectural weight. A wide, layered casing signals traditional craftsmanship, while a thin, flat profile reads modern and minimal. Because windows are focal points in most rooms, their trim strongly influences how finished the whole space feels.
Popular Casing Styles
Casing profiles range from utterly simple to elaborate. The style you pick should harmonize with your home’s era and the other trim in the room:
- Colonial: A traditional stepped and curved profile, timeless and common in older homes.
- Craftsman: Flat, wide boards with clean lines and often a thicker header on top, suited to bungalows and modern farmhouse looks.
- Ranch (clamshell): A simple rounded profile found in mid-century and builder-grade homes.
- Modern/flat stock: Plain rectangular boards for a crisp, contemporary edge.
- Victorian: Ornate, layered casing with decorative corner blocks and rosettes.
Consistency matters. Matching your window casing to your door casing and baseboard style ties a room together, while a mismatch looks unintentional.
Casing Materials Compared
Casing comes in several materials, each with trade-offs in cost, durability, and workability:
- Pine and softwood: Affordable and easy to cut, ideal for painted trim. Prone to dents.
- MDF: Smooth, stable, and cheap — excellent for painting, but swells if it gets wet, so avoid it in bathrooms.
- Hardwood (oak, poplar, maple): Durable and beautiful for stained, natural finishes; more expensive and harder to cut.
- PVC and composite: Moisture-proof, perfect for humid areas and exterior applications, and won’t rot.
For painted interior trim, primed MDF or finger-jointed pine offers the best value. For a stained look that shows the grain, choose a solid hardwood that matches your desired tone.
Butt Joint vs. Mitered Corners
How the casing pieces meet at the corners defines the look. A mitered corner joins the side and top casing at matching 45-degree angles, forming a clean picture-frame miter — the standard for most profiled casings. A butt joint, used in Craftsman and modern styles, has the side casings run straight up to meet a flat header board laid across the top, sometimes with a small reveal.
Mitered corners demand precise angle cuts and can open up as wood moves seasonally. Butt joints are more forgiving for beginners and match flat-stock styles perfectly. Pick the corner treatment that fits your chosen profile.
Installing Window Casing Step by Step
Casing installation is one of the more approachable finish carpentry projects. Here is the general sequence:
- Mark a consistent reveal — typically an eighth to a quarter inch — around the inside edge of the window jamb so the casing does not sit flush.
- Measure and cut the side casings, mitering the tops if using a picture-frame style.
- Nail the side pieces to the jamb and wall studs with finish nails.
- Cut and fit the top casing to close the frame, checking the miters for tight seams.
- Add the bottom stool and apron if your style includes them, or run casing all four sides for a picture-frame look.
A miter saw and a brad nailer make this dramatically faster and cleaner than hand tools. Fill nail holes with wood putty, caulk the seams against the wall, and prime and paint for a seamless finish.
Stool-and-Apron vs. Picture Frame
Two main approaches define how the bottom of the window is trimmed. The traditional stool-and-apron style includes a horizontal sill (the stool) that the window sits on, with a decorative apron board beneath it. It is the classic look for double-hung windows and gives you a small ledge.
The picture-frame approach runs identical casing around all four sides with no stool, creating a clean, symmetrical rectangle. It suits modern interiors and is simpler to build. Choose stool-and-apron for traditional charm or picture-frame for contemporary simplicity.
What Window Casing Costs
Material costs are modest. Basic pine or MDF casing runs $1 to $3 per linear foot, while hardwood or intricate profiles climb to $4 to $8 per foot. An average window needs roughly 15 to 20 linear feet of casing, putting DIY material cost at $20 to $60 per window.
Hiring a finish carpenter typically adds $50 to $150 in labor per window depending on complexity and whether old trim must be removed. For a whole-house re-trim, buying in bulk and doing it yourself saves substantially — and the skills carry over to doors and baseboards.
Matching Casing to Your Home’s Era
Casing that fits your home’s architectural period looks intentional; casing that clashes looks like a mistake. A 1920s bungalow calls for wide, flat Craftsman casing with a substantial header, while a colonial or Cape Cod suits stepped, profiled colonial trim. Mid-century and ranch homes wear simple clamshell or flat stock comfortably, and a contemporary build looks sharpest with clean, square-edged flat casing and minimal reveals.
The width of the casing also communicates a lot. Narrow two-and-a-quarter-inch casing reads as builder-grade and modest, while three-and-a-half-inch or wider trim signals quality and substance. If you are re-trimming to add character, going wider is one of the most effective and affordable upgrades. Just keep the scale consistent — pairing wide door casing with skinny window casing looks unbalanced, so plan the whole room’s trim as a set.
Painted vs. Stained Casing
Deciding between paint and stain shapes both your material choice and the final look. Painted casing — typically bright white or a soft off-white — is crisp, timeless, and forgiving, since paint hides the seams and lets you use inexpensive materials like MDF or finger-jointed pine. It brightens a room and pairs with almost any wall color. For most homeowners, painted trim is the safe, clean default.
Stained casing shows off natural wood grain and brings warmth, working beautifully in craftsman, rustic, and traditional interiors. But it demands solid hardwood with attractive grain, careful cutting since stain reveals every gap, and more skill to achieve a uniform tone. Stained trim also ties the room to a specific wood species, so it should coordinate with your flooring and doors. Choose paint for versatility and ease, stain for natural warmth and a more custom, high-end feel.
Common Installation Mistakes
A few recurring errors separate amateur trim from professional work. The most common is inconsistent reveals — that small margin between the inside edge of the jamb and the casing. If it varies from an eighth of an inch at the top to a quarter at the bottom, the eye catches it immediately. Mark and maintain a uniform reveal all the way around.
Loose or gapping miters are the next culprit, usually from cuts that are a degree or two off. Test-fit before nailing and shave the angle if needed. Other mistakes include nailing only into drywall instead of hitting the stud or jamb, which lets the casing work loose over time, and skipping the caulk-and-fill step that hides seams and nail holes. Slow down on measuring and cutting, and the installation itself becomes straightforward.
Finishing Touches That Make It Look Pro
The difference between amateur and professional trim is almost entirely in the finishing. Caulk every seam where casing meets the wall and where miters join, then wipe it smooth for crisp, shadow-free lines. Fill and sand nail holes flush before painting. Two coats of quality trim paint or stain, sanded lightly between coats, give the surface a factory-smooth finish.
Take your time on the miter cuts — a corner that is off by even a degree shows badly once painted. Nail down these details and your window casing will frame each view like a well-hung picture, elevating the entire room for a very reasonable investment.