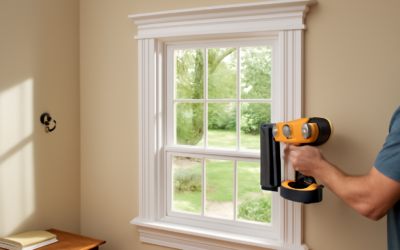
The stool is the one piece of window trim people actually touch, lean on and set plants on, so sloppy cuts there show more than anywhere else. Window stool molding is the flat interior shelf that sits at the bottom of the window opening, extending past the side casings with short “horns” on each end. Most people call it the sill, but the true sill is the sloped exterior part of the window frame. The stool caps the inside.
Part of our Windows & Doors guide — explore the full guide →
Installing one comes down to four moves: measure the horn length from the casing reveal, notch the stool to fit between the jambs, finish the edges with a bullnose or return ends, and support it with an apron underneath. With a miter saw, a jigsaw and careful layout, a stool takes about an hour per window once you have done the first.
- What Window Stool Molding Does and How It Fits With Casing
- Tools and Materials
- Step 1: Measure the Stool and Horns
- Step 2: Lay Out and Cut the Notches
- Step 3: Shape the Front Edge and Return Ends
- Step 4: Install the Stool
- Step 5: Add the Apron and Casing
- Troubleshooting Common Problems
- Cost and When to Call a Pro
- Frequently Asked Questions
What Window Stool Molding Does and How It Fits With Casing
Window stool molding bridges the gap between the window frame and the finished wall, giving the bottom of the opening a solid ledge. The side casings stand on top of the stool, and the apron sits directly under it against the wall. Together they form the traditional trim package found in most older homes and many new craftsman-style builds.
Stock is usually 3/4 to 1-1/16 inches thick and comes in widths from about 2-1/2 to 5-1/2 inches. Some window stool moulding profiles are sold pre-rabbeted on the underside to sit over the window’s sill; others are flat boards you shape yourself. Primed pine, poplar, oak and moisture-resistant PVC are all common. For painted trim, poplar mills cleanly; for stain, match the species of your casing.
Tools and Materials
- Stool stock, long enough for the opening plus both horns and a few inches of waste
- Miter saw (a 10 or 12 inch model handles wide stool stock easily)
- Jigsaw or coping saw for notches
- Router with a bullnose or roundover bit, or a profile bit to match existing trim
- Combination square, tape measure, sharp pencil and a sliding bevel
- Block plane and sanding block
- Finish nailer with 2 to 2-1/2 inch nails, wood glue, wood filler and caulk
- Safety glasses and hearing protection
A window sill router bit set (bullnose or roundover in a matching radius) lets you shape the front edge and ends the same way, which is what makes a stool look factory made.
Step 1: Measure the Stool and Horns
Start with the casing plan. Decide the casing width and the reveal, the small step (usually 3/16 to 1/4 inch) between the inside edge of the jamb and the edge of the casing. Then figure the horn: most carpenters let the stool extend about 3/4 inch past the outside edge of the casing on each side.
Overall stool length equals the opening width between jambs, plus two reveals, plus two casing widths, plus two horn overhangs. For a 30-inch opening with 3-1/2 inch casing, 1/4 inch reveals and 3/4 inch overhangs, that is 30 + 0.5 + 7 + 1.5 = 39 inches.
Depth matters too. The stool should project past the wall surface by roughly the thickness of the casing plus about 1/2 to 3/4 inch, so the casing sits comfortably on it and the front edge reads as a shelf.
Step 2: Lay Out and Cut the Notches
The stool has to fit between the jambs at the back and cover the wall at the ends, so each end gets an L-shaped notch. Hold the stool against the wall, centered on the opening, with its back edge touching the window sash or sill.
- Mark where the inside face of each jamb crosses the stool. These marks set the width of the tongue that fits into the opening.
- Measure from the window sash (or the sill’s front edge) to the wall surface at each side. This is the notch depth. Measure both sides; openings are rarely square.
- Transfer both measurements to the stool with a combination square. Leave about 1/16 inch of clearance against the sash so windows still operate.
- Cut the long, crosscut leg of each notch on the miter saw, then finish the rip with a jigsaw. Stay on the waste side and clean up with a block plane.
- Dry fit. Adjust until the stool sits flat, touches the wall evenly and leaves a consistent gap at the sash.
If the window sill slopes, you may need to bevel the underside of the tongue with a block plane or table saw so the top of the stool stays level.
Step 3: Shape the Front Edge and Return Ends
An unshaped stool looks like a plank. The front edge and the two horn ends need a finished profile, and you have two good options.
Router bullnose
Run a bullnose or roundover bit along the front edge and around both horns, top and bottom. Use a window stool router bit with a bearing, take two light passes rather than one heavy one, and rout the end grain first so any tearout gets cleaned up by the long-grain pass. Practice on scrap to confirm the profile matches the casing.
Mitered return ends
If the stool profile is complex, cut the horns at 45 degrees and glue on small mitered returns so the profile wraps around the end. Cut the return piece from the same stock, glue it, and hold it with tape or a pin nail until the glue sets. Returns hide end grain and look crisp on stained trim.
Sand all edges smooth to 150 or 180 grit before installation. It is much easier to finish the stool off the wall.
Step 4: Install the Stool
Run a bead of construction adhesive or wood glue along the window sill where the stool will rest. Set the stool in place, check it with a level, and shim beneath it at the wall if needed. Nail through the stool into the window sill or framing below with 2 to 2-1/2 inch finish nails, angling a few nails slightly for holding power. Keep nails at least 3/4 inch from the ends to avoid splitting the horns.
Do not rely on nails alone at the front edge. The apron provides the support that keeps a stool from sagging over time.
Step 5: Add the Apron and Casing
The apron is the trim board directly under the stool. Its length usually matches the outer edges of the side casings, so the apron ends line up visually with the casing above. Return the apron ends with small mitered pieces or cut them square and shape them to match the casing profile.
Push the apron up tight under the stool and nail it into the framing. Some carpenters add a few nails down through the stool into the top edge of the apron to lock the two together. With the stool and apron set, install the side casings standing on the stool, then the head casing. Fill nail holes, caulk the joints to the wall and paint or finish.
Troubleshooting Common Problems
- Gap between stool and wall: walls are rarely flat. Scribe the back edge to the wall with a compass and plane to the line, or caulk small gaps under paint-grade trim.
- Stool not level: shim under the stool at the wall, or plane the tongue if the window sill is out of level.
- Sash rubs the stool: plane a bit more clearance off the back edge.
- Split horns: pre-drill near the ends and keep nails back from the edges.
- Uneven horn lengths: recheck the centering mark before cutting notches; measuring from the jamb centerline avoids this.
Cost and When to Call a Pro
Materials for a single window stool and apron are generally modest, often under the cost of a new casing set, with hardwoods and PVC on the higher end. A trim carpenter installing a full window trim package typically charges per window, and the price rises for custom profiles or old, out-of-square openings.
DIY makes sense if you have a miter saw and are comfortable with layout. Call a finish carpenter for many windows at once, deep jamb extensions, stain-grade hardwood where mistakes are costly, or windows in old plaster walls that are badly out of plane. If the existing molding around window openings shows rot or water stains, have the window flashing inspected before new trim goes on.
Frequently Asked Questions
What is the difference between a window stool and a window sill?
The sill is the sloped exterior bottom of the window frame that sheds water. The stool is the flat interior trim shelf that sits over it and extends into the room.
How far should a window stool extend past the casing?
Most carpenters let the horns extend about 3/4 inch beyond the outer edge of each side casing, though 1/2 to 1 inch is common depending on the trim style.
What router bit is used for a window stool?
A bullnose or roundover bit with a bearing is most common. Choose a radius that matches the thickness of the stock and the style of the casing.
Do I need an apron under the window stool?
An apron is strongly recommended. It supports the front of the stool, hides the gap at the wall and completes the traditional trim look.
Can I install a stool on a window with drywall returns?
Yes. You can add a stool and apron below drywall returns on the sides and top, which gives a finished ledge without full casing.