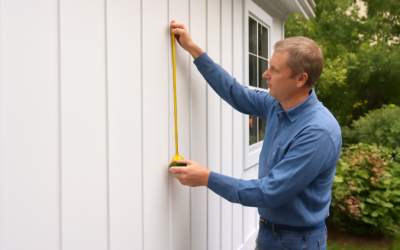
Board and batten walls look simple until you hit the first window. Suddenly your perfect 16-inch batten spacing lands 2 inches from the casing, the sill horn sticks out past the wall trim, and the whole layout looks off. Getting board and batten around windows right comes down to planning the layout from the windows outward, choosing how the casing and battens meet, and handling thickness differences before you glue a single board. Here is how experienced finish carpenters approach it.
Part of our Windows & Doors guide — explore the full guide →
- Planning Board and Batten Around Windows Before You Cut
- Three Ways to Treat the Window Casing
- Dealing With Thickness and Depth
- Handling Sills, Aprons, and Stools
- Materials and Tools You Will Need
- Step-by-Step Installation Around a Window
- Common Mistakes to Avoid
- Exterior Board and Batten Around Windows
- Frequently Asked Questions
Planning Board and Batten Around Windows Before You Cut
The single most important rule: lay out the wall on paper or with painter’s tape before buying lumber. Windows are the fixed elements you cannot move, so the battens have to work around them, not the other way around.
- Measure the full wall width and mark the location of every window’s outer casing edge.
- Decide on a target spacing, usually 12 to 24 inches on center depending on the look you want.
- Center the layout on the most prominent window, or on the wall if there are two symmetrical windows.
- Adjust spacing slightly so battens land either directly against the window casing or a consistent distance from it.
Small adjustments go unnoticed. A spacing of 15-3/4 inches instead of 16 is invisible to the eye, but a 3-inch sliver of wall between a batten and a window casing is glaringly obvious. Aim to avoid any gap narrower than about half your standard spacing.
Three Ways to Treat the Window Casing
How your window casing interacts with the battens determines the entire finished look. There are three common approaches.
Battens Butt Into Existing Casing
The easiest method leaves the existing window casing in place and runs vertical battens into it. Horizontal rails or top caps stop at the casing edge. This works well when the casing is at least 3/4 inch thick so it stands proud of the battens. If your battens are thicker than the casing, the joint looks awkward and the batten edges become visible from the side.
Replace Casing With Flat Stock That Matches the Battens
For a clean, craftsman or farmhouse look, remove the existing molded casing and replace it with flat 1×4 stock around the window. The window trim then becomes part of the grid. Use the same material and thickness as your battens, or go one size wider, such as 1×4 casing with 1×3 battens, so the window still reads as a distinct frame.
Picture-Frame the Window
In a picture-frame approach, battens frame the window on all four sides, with vertical battens on each side and horizontal pieces above and below. The window appears boxed into the pattern. This suits grid-style or square board and batten designs particularly well.
Dealing With Thickness and Depth
Thickness mismatches cause more headaches than anything else in board and batten around windows. Adding a backer panel changes the wall plane and can leave casing and sills looking recessed.
- Battens only, no backer: battens of 1/2 to 3/4 inch go directly on drywall. Standard casing (usually 11/16 to 3/4 inch thick) typically still stands slightly proud, which looks correct.
- With a backer panel: 1/4-inch MDF or plywood panels behind battens push the wall out. Casing might end up nearly flush with the battens, so consider adding a 1/4-inch backband or replacing casing with thicker stock.
- Window stool and apron: the stool (interior sill) projects past the casing. Battens below the window should stop under the apron, or the apron should be replaced with a board that matches the batten width.
Hold a batten scrap against the casing in several spots before committing. If the reveal between the batten face and casing face is less than about 1/8 inch, either thicken the casing or choose thinner battens.
Handling Sills, Aprons, and Stools
The area under the window is where most DIY board and batten jobs go wrong. The window stool usually has “horns” that extend 3/4 to 1 inch beyond the casing on each side, and the apron beneath it may be a decorative molding that clashes with flat battens.
A few proven solutions:
- Swap a molded apron for a flat 1×3 or 1×4 that matches the batten profile.
- Run vertical battens up to the underside of the apron, keeping spacing consistent with the rest of the wall.
- If a batten would hit the stool horn, shift the layout so the batten lands just outside the horn, or cope the batten top to fit neatly beneath it.
- On half-height or wainscot-style board and batten, set the top rail height to align with the window stool or the bottom of the apron. A cap rail that dies into the side of the casing looks intentional; one that stops an inch short does not.
Materials and Tools You Will Need
Most interior board and batten uses primed MDF or finger-jointed pine, both of which paint well and stay straight. Poplar is a step up for durability. For bathrooms or humid areas, choose PVC or moisture-resistant MDF.
- Primed MDF 1×3 or 1×4 battens: about $1 to $2 per linear foot
- Poplar or finger-jointed pine: $2 to $4 per linear foot
- 1/4-inch MDF backer panels (optional): $25 to $40 per 4×8 sheet
- Construction adhesive, 18-gauge brad nailer with 1-1/2 to 2-inch nails
- Miter saw, laser level or 4-foot level, stud finder
- Paintable caulk, wood filler, primer, and semi-gloss or satin enamel
A typical 12-foot accent wall with two windows needs roughly 80 to 120 linear feet of batten stock and costs $150 to $350 in materials. Professional installation adds $500 to $1,500 depending on complexity, with windows increasing labor time because of the extra cuts and fitting.
Step-by-Step Installation Around a Window
- Prep the wall: remove outlet covers, fill holes, and lightly sand. If replacing casing, carefully pry it off with a flat bar, protecting the drywall with a putty knife.
- Install the window trim first: set new casing, stool, and apron, or confirm the existing trim is secure. Everything else references off these pieces.
- Add horizontal rails: install the bottom rail on top of the baseboard or in place of it, then the top rail or cap. Make sure both meet the window casing cleanly.
- Place the battens beside the window: fasten the verticals nearest each window casing first so the spacing radiates outward.
- Fill in the remaining battens: use a spacer block cut to your exact spacing to keep everything even. Check plumb with a level every few boards.
- Handle short battens: cut the pieces above and below the window to length individually, since headers and sills are rarely perfectly level.
- Caulk and fill: caulk every seam where battens meet the wall and casing, fill nail holes, and sand smooth once dry.
- Prime and paint: use a bonding primer on bare wood edges, then two coats of satin or semi-gloss enamel.
Common Mistakes to Avoid
- Starting the layout from a corner: corners are rarely where the eye goes; windows are. Starting in the corner almost guarantees an awkward sliver at the window.
- Ignoring out-of-level windows: older homes often have windows that are 1/4 inch or more out of level. Split the difference on horizontal rails so the error is not concentrated in one spot.
- Using too-thin casing: casing that ends up flush or recessed behind battens looks unfinished.
- Skipping caulk: uncaulked joints show shadows and gaps once painted, especially around the window.
- Forgetting window hardware: make sure new trim does not interfere with blinds, shade brackets, or window cranks.
Exterior Board and Batten Around Windows
On exterior siding, the principles are similar but weather protection comes first. Window trim must be flashed and installed before siding, with a drip cap or Z-flashing over the head trim to shed water. Leave a 1/4-inch gap between siding and window trim for caulk or sealant, and use fiber cement, engineered wood, or cedar rated for exterior use. Because exterior work involves the building envelope, improper flashing can lead to rot and hidden water damage; if your windows lack proper flashing or show signs of leaks, have a licensed siding or window contractor correct it before new board and batten goes on.
Whether inside or out, patience at the layout stage makes the difference. Treat each window as the anchor, plan the grid around it, and your board and batten wall will look custom-built rather than improvised.
Frequently Asked Questions
Should battens touch the window casing?
Either approach works if it is intentional. Battens can butt directly against the casing, or stop a consistent distance away. Avoid narrow gaps of just 1 to 3 inches, which look like layout errors.
Do I need to remove window trim for board and batten?
Not always. If existing casing is flat and at least as thick as your battens, you can keep it. Ornate or thin casing often looks better replaced with flat stock that matches the batten style.
What spacing is best for board and batten with windows?
Most walls use 12 to 24 inches on center, but always adjust spacing to fit the window positions. Small spacing tweaks of 1/4 to 1/2 inch are invisible and prevent awkward slivers.
How high should board and batten go on a wall with windows?
Full-height treatments run to the ceiling. For half-height designs, align the top rail with the window stool or apron so the lines connect visually.