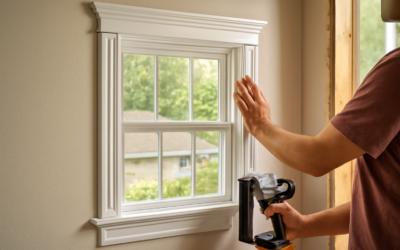
Door casing is one of those details people don’t consciously notice until it’s done well — then a whole room looks more finished. The right door trim molding ideas can take a plain builder-grade doorway and give it character, whether that’s the clean horizontals of Craftsman style or the ornate corners of traditional rosette blocks. Casing frames the opening, hides the gap between jamb and wall, and sets the architectural tone, so it’s worth choosing deliberately. Here are the main styles and materials to consider.
Part of our Windows & Doors guide — explore the full guide →
Mitered Casing: The Standard
The most common door trim is mitered casing, where two vertical legs and a horizontal header meet at 45-degree angles in the top corners, forming clean diagonal seams. It’s versatile, works with virtually any door, and suits everything from contemporary to traditional homes depending on the profile you choose. Modern looks lean on flat, simple stock; traditional looks use profiled trim with curves and steps. Crisp miter joints are the mark of good craftsmanship here, so tight 45s matter.
Craftsman Style: Clean and Architectural
Craftsman casing is having a long moment, and for good reason. Instead of mitered corners, it uses square-cut, butt-jointed pieces: flat vertical legs topped by a horizontal header that often extends slightly past the legs, sometimes capped with a small piece of cap molding or a backband. The result is bold, geometric, and timeless, pairing perfectly with shaker doors and farmhouse or bungalow interiors. Because the joints are simple square cuts, it’s also one of the more DIY-friendly styles to install.
Rosette and Plinth Block Casing
For a traditional or Victorian look, decorative corner blocks let you skip the miter entirely. Rosette blocks are square, often carved decorative blocks placed at the top corners where the vertical and horizontal trim meet, so the legs and header simply butt into them. At the floor, matching plinth blocks give the base of the casing a heavier, formal foundation. This approach reads as classic and elegant and makes installation simpler since the blocks hide the joints.
Profile and Width Choices
Beyond the joinery style, the profile shapes the whole feel:
- Flat/square stock — modern, minimal, easy to keep clean.
- Colonial profile — gentle curves and steps, a traditional all-purpose look.
- Stepped or layered casing — building up multiple pieces for depth and a high-end appearance.
- Backband added — a thin frame around flat casing for a beefier, more substantial edge.
Wider casing (3.5 inches and up) feels more substantial and traditional, while narrow trim suits modern spaces. Keep door, window, and base trim coordinated so the room reads cohesively.
Material Options
The material affects cost, durability, and finish:
- MDF — affordable, smooth, and perfect for painted trim; not for damp areas.
- Pine and softwood — paintable or stainable, easy to work, budget-friendly.
- Poplar — a popular paint-grade hardwood that’s stable and takes paint cleanly.
- Hardwoods (oak, maple) — for stained, natural-wood looks that show grain.
- PVC or composite — moisture-proof, ideal for bathrooms, basements, and exteriors.
For painted casing, MDF or poplar gives the smoothest result; for stained trim, choose a quality hardwood that matches your doors and floors.
Matching Trim to Your Home’s Style
Let the architecture guide you. A Craftsman bungalow calls for flat, square-headed casing; a colonial or Victorian home suits profiled trim with rosettes and plinths; a modern build looks best with slim, flat stock or even reveal-style minimal trim. Consistency matters more than complexity — picking one casing language and repeating it on every door and window does more for a home than mixing fancy styles room to room.
Installation Basics
Casing isn’t a difficult DIY project if you take it step by step. Start by setting a consistent reveal — the small, even margin (typically 3/16 to 1/4 inch) where the jamb edge shows beyond the casing — and mark it on all three sides of the opening. Cut the legs first, then the header, fitting joints carefully. For mitered casing, accurate 45-degree cuts are everything, so dial in your miter saw and test on scrap. For Craftsman or block styles, square cuts make the job more forgiving. Nail the casing to both the jamb and the framing with finish nails, working from the joints outward to keep them tight.
Common Mistakes to Avoid
A few errors separate amateur trim from clean work. Inconsistent reveals are the most common — eyeballing it leads to wandering margins that look sloppy, so mark a uniform reveal everywhere. Gappy miter joints come from imprecise cuts or skipping a test fit; even a tight joint can open later if not glued and nailed properly. Forgetting to account for out-of-square openings in older homes causes frustration, so check for square before cutting and adjust as needed. And rushing the finishing — leaving nail holes unfilled or joints uncaulked — undoes good carpentry, since those flaws jump out once paint goes on.
Coordinating With the Whole Room
Door casing rarely lives in isolation, so think about how it relates to your baseboards, window trim, and crown molding. The cleanest results come from a consistent trim package where profiles and proportions relate to one another — for instance, baseboards roughly equal to or slightly taller than the door casing width, and window casing that matches the doors. Mixing wildly different styles in one room reads as unplanned. Choosing one trim language and carrying it through every opening gives a home that cohesive, custom feel that buyers and guests notice even if they can’t name why.
Finishing Touches
Small decisions elevate the final look. Paint trim in a crisp semi-gloss or satin for durability and a clean line against the wall, or go with a bold contrasting color (black trim against white walls is a striking modern choice). For stained wood, a clear or tinted finish that complements your flooring ties the space together. Caulk the gap between casing and wall, fill nail holes, and sand joints smooth before painting — these finishing steps separate a professional result from a rushed one.
Whether you choose simple mitered casing, bold Craftsman trim, or classic rosette blocks, door trim molding is a high-impact, relatively affordable way to add architectural character to your home. Match the style and material to your home’s era and your finish goals, keep it consistent throughout, and your doorways will look intentional and polished rather than builder-basic.