
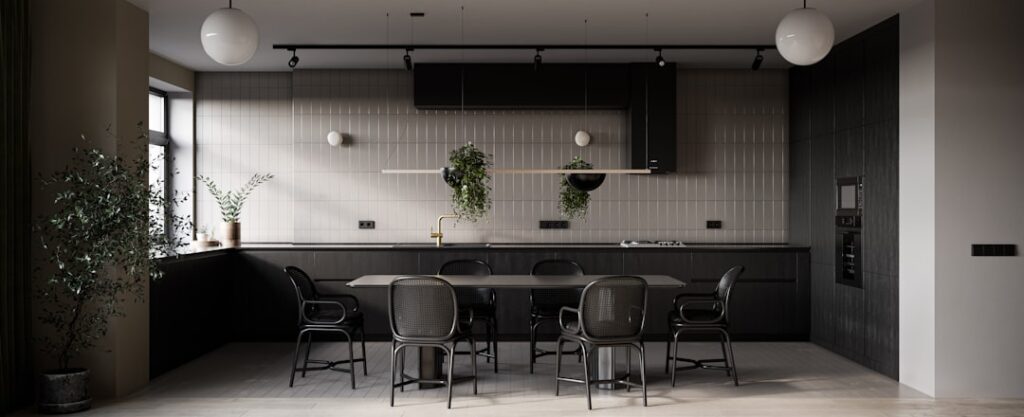
The most expensive kitchen mistakes happen on paper, or worse, in someone’s head, long before a single cabinet is ordered. A good kitchen cabinet planner forces you to confront the real dimensions, clearances, and workflow of your space before you spend thousands on boxes that might not fit. Whether you use free software or graph paper and a tape measure, planning carefully is the difference between a kitchen that flows and one you fight every day. Here is how to do it right.
Part of our Kitchen Remodeling guide — explore the full guide →
- Why Use a Kitchen Cabinet Planner
- Understand Standard Cabinet Sizes First
- Measure Your Space Accurately
- Apply the Work Triangle and Zones
- Critical Clearances You Must Respect
- Choosing Planning Software
- Step-by-Step Planning Process
- Stock, Semi-Custom, or Custom Cabinets
- Don't Forget Storage and Accessories
- Turning Your Plan into a Kitchen
Why Use a Kitchen Cabinet Planner
Cabinets are the biggest single expense in most kitchen remodels, often $10,000 to $30,000, and they are the hardest thing to change once installed. A planner lets you test layouts, verify that appliances fit, confirm clearances, and generate an accurate order list before you commit. It catches the classic errors: a dishwasher too close to a corner to open, a refrigerator that blocks a walkway, or a cooktop with no landing space beside it.
Planning also produces a cut list and cost estimate, so you walk into a showroom or big-box store knowing exactly what you need instead of guessing.
Understand Standard Cabinet Sizes First
You cannot plan a kitchen without knowing the modular sizes cabinets come in. Stock cabinets follow industry standards, which is what makes planning possible.
- Base cabinets: 34 1/2 inches tall (36 with countertop), 24 inches deep, widths from 9 to 48 inches in 3-inch increments
- Wall cabinets: 12, 15, 18, 24, 30, 36, and 42 inches tall, 12 to 13 inches deep
- Tall/pantry cabinets: 84, 90, and 96 inches tall, 12 or 24 inches deep
- Standard countertop height: 36 inches; backsplash gap to wall cabinets: 18 inches
Cabinets come in 3-inch width increments, and filler strips bridge the leftover gaps against walls. Knowing this lets your plan snap to real, orderable sizes rather than fantasy dimensions.
Measure Your Space Accurately
Accurate measurements are the foundation. Measure each wall at the floor, at counter height, and near the ceiling, since walls are rarely perfectly plumb. Record the exact locations of:
- Windows and doors, including trim, with height off the floor
- Electrical outlets, switches, and the panel
- Plumbing supply and drain locations for the sink
- Gas line for the range, and any vents or ductwork
- Ceiling height and any soffits or bulkheads
Note the swing of every door and appliance. Draw the room to scale on graph paper or in software, marking all of these. The old carpenter’s rule applies: measure twice, order once.
Apply the Work Triangle and Zones
Good layout is not decoration, it is workflow. The classic work triangle connects the sink, refrigerator, and range, and each leg should be between 4 and 9 feet, with the three legs totaling 13 to 26 feet. Keep the triangle clear of major traffic paths so cooks are not colliding with people passing through.
Modern planning also uses zones: a prep zone with counter space and knives, a cooking zone at the range, a cleaning zone at the sink and dishwasher, and storage zones for food and dishes. Group related items where they are used. Put drawers for utensils near the prep area and dishes near the dishwasher, and the kitchen practically organizes itself.
Critical Clearances You Must Respect
These clearances separate a comfortable kitchen from a cramped one:
- Walkways: at least 36 inches, and 42 to 48 inches in work aisles where two people pass
- Landing space beside the range: 12 to 15 inches on at least one side
- Landing space beside the refrigerator: 15 inches on the handle side
- Counter beside the sink: 18 to 24 inches for prep and drying
- Island clearance: 42 inches minimum around all sides, 48 if it seats diners
- Dishwasher: 21 inches of standing room in front, clear of corners
Corner cabinets need special attention. Plan a lazy-Susan or blind-corner pull-out, and make sure two cabinet doors or a dishwasher and an oven cannot collide when both are open.
Plan around the countertop and backsplash too, since they interact with cabinet dimensions. A standard countertop overhangs the base cabinet face by about 1 inch, and an island counter often overhangs 12 to 15 inches on the seating side to allow knee room for stools. The backsplash zone between the counter and the wall cabinets is typically 18 inches, but if you cook with tall pots or want a pot filler, confirm your appliances and habits fit that gap. Getting these clearances into the plan prevents a range hood mounted too low or a microwave with no room to open.
Choosing Planning Software
Several tools make DIY planning approachable. Many big-box retailers like IKEA (its kitchen planner) and Lowe’s and Home Depot offer free online planners tied to their cabinet lines, which output an order list. General design tools like SketchUp, Planner 5D, and RoomSketcher let you model any layout in 3D. Some are browser-based and free; others charge $10 to $30 for premium features or renderings.
The advantage of a retailer’s planner is that it only lets you place cabinets that actually exist in their catalog, so your plan is directly orderable. A general tool gives more creative freedom but requires you to translate the design into real cabinet sizes yourself.
Step-by-Step Planning Process
Put it all together in a repeatable sequence:
- Measure the room precisely and note every fixture, outlet, and obstruction.
- Draw the empty room to scale, then place appliances first, since they anchor the layout.
- Establish the work triangle and zones around those appliances.
- Fill in base cabinets, then wall cabinets, using standard sizes and fillers.
- Verify every clearance and door swing, then adjust.
- Generate the cut or order list and price it before buying anything.
Live with the plan for a few days. Tape the island outline on your floor and walk the space. You will discover clearance problems standing in the room that never showed up on the screen.
Stock, Semi-Custom, or Custom Cabinets
Your planner also has to account for the type of cabinets you will buy, because it affects sizes and price dramatically. Stock cabinets come in fixed 3-inch increments and ship fast, at roughly $60 to $200 per linear foot. Semi-custom cabinets offer more sizes, door styles, and modifications, running about $150 to $650 per linear foot. Full custom cabinets are built to your exact dimensions with no filler needed, from $500 to $1,200 per linear foot and up.
For a typical 25-linear-foot kitchen, that spread means anywhere from $1,500 in basic stock to $30,000 in custom. When you plan, decide early which tier you are working in, because a custom shop can build a 37-inch cabinet to fill a wall exactly, while stock forces you to use a 36-inch cabinet plus a 1-inch filler. Building fillers into the plan from the start prevents the frustrating gap discovery at install.
Don’t Forget Storage and Accessories
A good plan does more than place boxes; it plans what goes inside them. Modern cabinets offer accessories that transform usability, and they need to be specified when you order. Consider working these into the plan:
- Deep drawers instead of doors on base cabinets for pots and pans
- A pull-out or lazy-Susan for corner base cabinets to reach the dead space
- A tray divider cabinet beside the oven for baking sheets
- A pull-out trash and recycling cabinet, usually 15 to 18 inches wide
- A spice pull-out or drawer near the range
- Under-cabinet lighting rough-in for task light on the counter
Plan at least one bank of large drawers; homeowners consistently rank deep drawers as their favorite feature because they beat bending into a dark lower cabinet. Also verify that your plan leaves a landing counter of at least 15 inches next to the refrigerator and cooktop, and 24 inches beside the sink, since those working surfaces are what make a kitchen pleasant to cook in.
Turning Your Plan into a Kitchen
A thorough kitchen cabinet planner saves money, prevents ordering errors, and produces a kitchen that actually works for how you cook. Start from accurate measurements, respect the standard cabinet sizes and the clearances above, and place your appliances and work triangle before you place a single cabinet. Use a retailer planner if you want a directly orderable list, or general software if you want design freedom. Whatever tool you choose, the goal is the same: catch every problem on paper, where fixing it costs nothing, instead of after the cabinets arrive and the mistakes are bolted to the wall.


