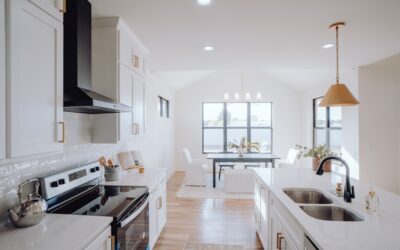
The back and sides of a kitchen island are the most-seen and least-considered surfaces in the whole room, and leaving them as bare cabinet boxes is a missed opportunity. Kitchen island panels are the decorative coverings that finish those exposed ends and backs, turning a plain run of cabinets into a piece of furniture that anchors the space. Whether you want shaker detailing, beadboard charm, or sleek slab modernity, kitchen island panels are one of the highest-impact, lowest-cost upgrades you can make.
Part of our Kitchen Remodeling guide — explore the full guide →
This guide covers the panel types, materials, how to choose a style that fits your kitchen, installation basics, and rough costs so you can dress up your island with confidence.
What Kitchen Island Panels Are
When cabinets are manufactured, the finished fronts get doors and drawer faces, but the exposed sides and back, called the end panels and back panel, often ship as plain, unfinished box material. Island panels cover those surfaces so every visible side looks intentional and complete.
They serve two purposes. First, aesthetics: panels hide the utilitarian cabinet box and let you add trim, molding, and detail that make the island feel custom. Second, protection: on a high-traffic island, panels shield the cabinet sides from scuffs, stool scrapes, and moisture. Because an island is usually visible from multiple angles and often from the adjoining living space, finishing it properly matters more than on wall cabinets tucked into a corner.
There is a distinction worth clearing up between two kinds of panels. Some are structural, meaning they finish the exposed side of a stock cabinet that was never meant to be seen; these are what most homeowners add when dressing up a builder-grade island. Others are purely decorative, applied over an already-finished surface to add a shaker frame, beadboard texture, or board-and-batten look. Many upgrades combine both: you cover the raw cabinet sides with a finished panel, then apply decorative trim on top for depth. Understanding which job you are doing helps you buy the right thickness and plan how the panel meets the countertop overhang and the floor.
Common Types of Island Panels
Panels come in several forms, from simple flat coverings to elaborate decorative treatments. The type you choose sets the island’s character.
- Flat (slab) panels: Clean, unadorned surfaces for a modern or minimalist look. Easiest to install and finish.
- Shaker or recessed-panel: Framed panels with a recessed center that match shaker cabinet doors for a cohesive, timeless style.
- Beadboard panels: Narrow vertical grooves that bring cottage or farmhouse charm and hide fingerprints well.
- Raised-panel: Traditional framed panels with a beveled center, formal and dimensional.
- Board-and-batten or shiplap: Applied trim over a flat base for a trendy, textured farmhouse feel.
- Decorative appliqué and corbels: Molding, feet, and corbels that make the island read as freestanding furniture.
Many homeowners combine a base panel type with added trim, molding at the top, a toe kick or furniture feet at the bottom, to elevate a basic panel into a designer look.
Material Choices
Panels are made from several materials, each with tradeoffs in cost, durability, and finish. Match the material to how the panel will be finished and how much abuse the island takes.
- MDF (medium-density fiberboard): Smooth, stable, and ideal for painted panels. The most popular choice for painted islands. Avoid heavy moisture exposure.
- Plywood: Strong and moisture-tolerant, good for both paint and stain, and less prone to swelling than MDF.
- Solid wood: Beautiful for stained finishes and very durable, but pricier and can expand and contract with humidity.
- Manufacturer matching panels: Panels supplied by your cabinet maker in the exact door style and finish, giving a seamless factory match.
For a painted island, MDF gives the smoothest result. For a stained wood look, solid wood or veneered plywood is the way to go. If your cabinets are a specific brand and finish, ordering matching end panels from the same line guarantees the color and grain align perfectly.
Choosing a Style That Fits
The panel style should either match your cabinets for a unified look or intentionally contrast to make the island a statement. Both approaches work; the key is deciding on purpose rather than by accident.
For a seamless, built-in look, match the panel style and color to your perimeter cabinets, shaker panels on shaker cabinets, same paint color throughout. For a furniture-like island that stands out, use a contrasting color or a more decorative panel, such as a navy island with beadboard sides against white perimeter cabinets. A contrasting island has become one of the most popular kitchen design moves because it adds depth and a focal point. Consider the countertop overhang too: if stools tuck under one side, a durable, wipeable panel finish there resists scuffs from shoes and bags.
Installation Basics
Adding panels to an existing island is a very doable DIY project, while a full custom-trim treatment may warrant a finish carpenter. The basic process is straightforward.
- Measure each exposed surface precisely and account for any overhang, toe kick, or countertop lip.
- Cut the panel to size, or order pre-sized panels, so it covers the cabinet side or back cleanly.
- Attach using construction adhesive plus finish nails or brad nails into the cabinet frame, keeping edges flush.
- Add trim such as inside corner molding, base trim, or a top rail to hide seams and add detail.
- Fill and caulk nail holes and seams, then prime and paint or stain for a seamless finish.
The caulk-and-fill step is what separates a professional result from an amateur one, just as with wainscoting. Take time sealing seams and corners so the panels read as one continuous, built-in surface. For intricate raised-panel or heavy furniture-style trim, hiring a carpenter often pays off.
What Kitchen Island Panels Cost
Cost depends on material, style, and whether you DIY. A simple DIY panel-and-trim upgrade is remarkably affordable, while custom carpentry runs higher.
- DIY flat or beadboard panels: Roughly $50 to $250 in materials for a typical island, plus paint.
- Manufacturer matching end panels: About $50 to $200 each depending on the cabinet line.
- Custom carpentry with decorative trim: $500 to $2,000-plus installed, depending on complexity and corbels or feet.
For most homeowners, a DIY panel and trim treatment in the $150 to $400 range delivers a dramatic upgrade for very little money, one of the best returns in the kitchen. Ordering factory-matched panels costs a bit more but guarantees a flawless color match.
Factor in the finishing supplies when you budget, since they are easy to overlook. Beyond the panels themselves, plan for construction adhesive, brad nails, wood filler, a tube or two of paintable caulk, primer, and quality enamel paint, which together might add $50 to $100. If you do not own a brad nailer, renting one for a day is cheaper than buying for a single project. None of this changes the fundamental value proposition: even at the top of the DIY range, dressing up an island costs a fraction of replacing it, and the visual payoff, turning a plain box into a furniture-quality centerpiece, is out of all proportion to the modest outlay.
Design Ideas to Elevate Your Island
Once you understand panels, a few finishing touches take the island from covered to custom. Adding furniture feet or a decorative base molding makes the island look like a freestanding piece rather than a cabinet run. Corbels supporting a countertop overhang add craftsmanship and a spot for seating.
Painting the island a bold contrasting color, deep green, navy, charcoal, or black, against light perimeter cabinets is a proven way to create a focal point. Beadboard or shiplap panels lend farmhouse warmth, while flat slab panels with a waterfall countertop read sleek and modern. Bringing paneling around all four sides, including any open shelving ends, ensures the island looks finished from every vantage point, which matters in open-concept homes where the island faces the living area.
Pay special attention to the seating side, since that is where the island most reads as furniture. If stools tuck under an overhang, the panel behind them is on full display from the living room, so it deserves the most decorative treatment, whether that is a paneled apron, applied molding, or contrasting paint. Adding corbels or turned legs to support a 12-inch counter overhang not only looks custom but provides real structural support for the stone. Consider durability there too: a bead of caulk where the panel meets the floor and a scuff-resistant enamel keep the most-kicked surface in the kitchen looking crisp far longer than a bare cabinet side ever would.
Final Thoughts
Kitchen island panels are a small detail that makes a big difference, transforming plain cabinet boxes into a polished, furniture-quality centerpiece. Choose a panel type and material suited to your finish, decide whether to match your cabinets or contrast for a focal point, and take care with the caulk-and-fill work that makes panels look seamless. Whether you tackle simple beadboard yourself for a couple hundred dollars or bring in a carpenter for custom trim, finishing your island’s sides and back is one of the highest-impact upgrades in the kitchen. Confirm any manufacturer-matched panel specs before ordering so the finish lines up perfectly.