Luxury vinyl plank takes a beating and usually shrugs it off, but drag a refrigerator across it or drop a cast-iron skillet and you will find its limit. A good LVP repair kit lets you erase most of that damage in under an hour, often for less than $25, instead of replacing a whole plank or hiring an installer. I have patched everything from pet scratches to forklift gouges in showrooms, and the trick is matching the right fix to the right damage. Get that pairing wrong and the repair stands out worse than the original scratch.
What a Repair Kit Actually Includes
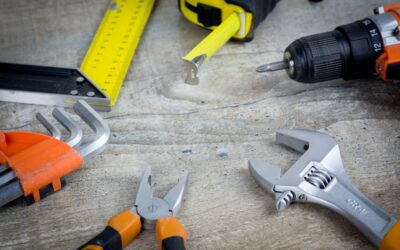
Most kits are built around a set of colored hard waxes or fill sticks, a melting tool or a friction stick, a leveling blade, and a few tint markers. Brands like Coconix, FORTIVO, and Picobello all follow this template, priced between $15 and $40. The hard-wax kits are the workhorses: you melt a blend of colors, press it into the gouge, and scrape it flush. Marker-based kits work only on shallow surface scuffs where color is missing but the wear layer is intact.
Higher-end kits add a graining tool and a clear sealer. The graining tool lets you press a fake wood texture back into the filled area so it does not read as a glossy blank spot. If your floor has a strong embossed grain, skip any kit that lacks this step. The clear topcoat matters too, because raw wax fill picks up dirt and dulls faster than the surrounding wear layer.
Matching the Fix to the Damage
Surface scratches that catch a fingernail but do not go through the wear layer respond best to a fill marker or a dab of clear wax buffed in. Deep gouges that expose the beige core need the melt-and-fill approach with color blending. If a plank has a chip missing entirely, you are into hard-wax filler territory, and you may need two or three color layers to match a multi-tone woodgrain.
Lifting edges and peaking seams are a different animal. No wax fixes those. For a lifting glue-down plank, warm it with a hairdryer, lift gently with a putty knife, and re-adhere with a bead of urethane flooring adhesive, then weight it down for 24 hours. For click-lock LVP that has peaked, the problem is almost always expansion pressure, and the real fix is opening the perimeter expansion gap, not patching the surface.
Step-by-Step: Filling a Gouge
- Clean the damaged area with rubbing alcohol and let it dry fully. Grease or wax residue kills adhesion.
- Scrape any raised burrs flat with a razor held at a low angle so the fill sits below the surface.
- Melt the wax sticks and blend two or three colors to match the plank’s lightest and darkest tones.
- Overfill the gouge slightly, then draw the leveling blade across at a 45-degree angle to scrape it flush.
- Press the graining tool into the soft fill to mimic the surrounding texture.
- Seal with the included topcoat or a matte polyurethane and let it cure for at least two hours before walking on it.
Color Matching Without Guesswork
The single biggest reason repairs look bad is a flat, one-note color where the plank has three or four tones. Real wood-look LVP is rarely a single brown. Hold the wax blend against the plank in daylight, not under kitchen lighting, because LED and incandescent bulbs shift the tone. Build the base color to match the mid-tone of the plank, then flick a darker marker across the fill in the direction of the grain to fake the streaking. A cotton swab dipped in the topcoat softens hard edges.
The Best Kits for Common Situations
For pet owners fighting claw marks, a marker-and-wax combo kit around $20 handles the volume of small repairs without breaking the budget. For a single deep gouge in a plank you cannot replace, a hard-wax melt kit with a graining tool gives the most convincing result. If you have leftover planks from the original install, honestly, the cleanest fix is often a full plank swap on a floating floor rather than any repair kit.
One product worth keeping on hand is a tube of color-matched vinyl seam sealer, sold for around $12. It is not marketed as a repair kit, but for hairline splits at plank ends it fills and welds better than wax. Keep it away from the wear layer surface, though, because it dries glossy.
When to Replace Instead of Repair
A repair kit buys you time and hides damage, but it is not structural. If water has gotten under the planks and the subfloor is soft, no surface fix helps. If more than a few planks are gouged in a high-visibility area like a kitchen entry, the repairs will start to look like a scattering of patches. Floating click-lock floors are designed to come apart, so swapping a damaged plank from the nearest wall is frequently faster than blending wax, especially on textured, high-variation products.
Glue-down LVP is harder to swap because you have to cut out the bad plank and scrape the old adhesive, so that is where a quality kit earns its keep. Either way, save two or three spare planks from every install. That single habit makes future repairs painless.
Preventing Damage in the First Place
The best repair is the one you never have to make, and luxury vinyl responds well to a few simple habits. Grit is the primary culprit behind fine scratches, acting like sandpaper underfoot, so place walk-off mats at every exterior door and sweep or dust-mop a couple of times a week. Stick felt pads on the bottom of chair legs, table feet, and anything that gets dragged, and replace them when they wear thin and expose the nail head. For rolling office chairs, swap hard casters for soft rubber wheels or lay down a chair mat rated for vinyl.
Moving appliances is where the worst gouges happen. Never drag a refrigerator, washer, or stove across LVP; slide a sheet of luan plywood or an appliance dolly under it and roll it out instead. When bringing in new furniture, lift rather than shove, and set heavy pieces down gently. High heels, dropped knives, and pet claws all leave their mark, so trim your dog’s nails and sweep up dropped hardware promptly.
Sunlight is a quieter threat. Prolonged direct UV can fade and, in extreme cases, distort vinyl near south-facing windows, so use blinds or UV-filtering film in sun-drenched rooms. Keep the floor within normal indoor temperatures too, since parking a space heater inches away can soften the surface. Clean with a pH-neutral vinyl cleaner rather than abrasive powders or harsh solvents that dull the wear layer over time. None of this is difficult, and together these habits dramatically cut how often you reach for the repair kit at all. A floor that gets basic protection often goes years without a single visible mark, which beats even the most skillful patch.
Pro Tips That Save Time and Money
Warm the wax slightly in your hands before melting so it flows evenly rather than clumping. Work in natural light and step back after each layer, because color that looks perfect at six inches can look off from across the room. Always seal the fill, since unsealed wax attracts grime and telegraphs the repair within weeks. Finally, resist the urge to buff the whole area with polish to blend the sheen, because that shifts the gloss of good planks and makes the repair more obvious, not less. A patient LVP repair kit job done in three thin layers beats a rushed one every time.
Prefer to explore on your own?
See how new flooring looks in your actual room in seconds — free, no signup.
Try the free Floor Studio →