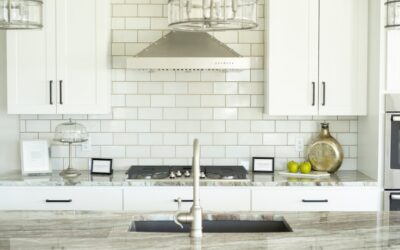
Few finishes make a kitchen feel more custom for the money than a marble subway tile backsplash. The soft gray veining of real stone catches light in a way that ceramic can only imitate, and the classic 3×6 brick shape keeps the look timeless rather than trendy. But natural marble also behaves differently than the porcelain most people are used to: it is softer, more porous, and it needs sealing. This guide covers the marble varieties worth knowing, the layout choices that change the whole feel of a room, honest cost numbers, and the maintenance reality so you go in with eyes open.
Part of our Countertops guide — explore the full guide →
- Which Marble Should You Choose?
- Cost Per Square Foot
- Layout Patterns That Change the Look
- Grout Color Makes or Breaks It
- Honed vs Polished Finish
- The Sealing Reality
- Installation Steps in Brief
- Where a Marble Backsplash Works Best
- Cleaning and Everyday Care
- Is a Marble Subway Backsplash Right for You?
Which Marble Should You Choose?
Not all white marble is the same, and the differences show up in both price and personality.
Carrara
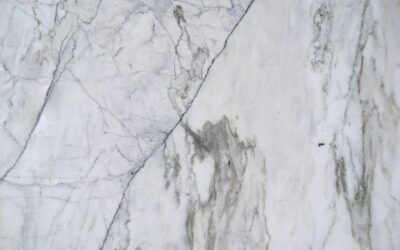
The workhorse of marble backsplashes. Carrara has a softer gray background with fine, feathery gray veining. It reads as light and casual, pairs beautifully with white shaker cabinets, and is the most affordable of the premium marbles. If you want the marble look without a designer budget, this is the one.
Calacatta
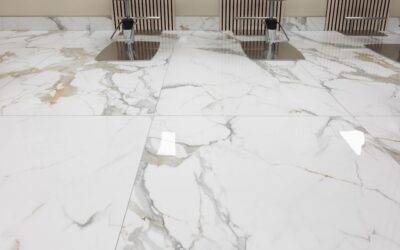
Whiter background, bolder and more dramatic veining that often runs thick and gold- or gray-toned. Calacatta is quarried in smaller quantities, so it commands a premium, sometimes double the price of Carrara. It makes a statement in a high-end kitchen but can overwhelm a small space.
Statuario and Thassos
Statuario splits the difference, with a bright white field and defined gray veining. Thassos is nearly pure white with almost no veining, giving a clean, crisp look that leans modern. Both sit at the higher end of the price range.
Cost Per Square Foot
Real marble subway tile typically runs $10 to $30 per square foot for the tile alone, with Carrara at the low end and Calacatta or Statuario at the top. A standard kitchen backsplash covers 25 to 40 square feet, so material lands around $300 to $1,000. Add these to budget the full project:
- Tile: $10-$30 per sq ft
- Thinset mortar and grout: $50-$100 total
- Stone sealer: $20-$40
- Professional installation: $8-$15 per sq ft labor
DIY brings a 30-square-foot backsplash in around $400 to $900 all-in. Hiring a tile setter pushes a comparable job to $900 to $1,800. Marble installs a bit slower than ceramic because the stone is easily scratched and edges may need honing, so labor tends to run higher than a standard tile job.
Layout Patterns That Change the Look
The subway shape is versatile, and the pattern you choose sets the mood more than most people expect.
- Classic 50% offset (running bond): Each row shifts half a tile. The default, and for good reason. Timeless and forgiving of small wall imperfections.
- 33% offset: A one-third stagger. Subtler, slightly more current, and it downplays the repetitive brick rhythm.
- Stacked (grid): Tiles line up in straight vertical columns. Clean and modern, but it demands a dead-flat wall because any misalignment is obvious.
- Herringbone: Tiles set at 45 degrees in a zigzag. Dramatic and labor-intensive, with more cuts and waste. Stunning behind a range.
- Vertical stack: Turning the subways on end elongates the wall and feels fresh in a small kitchen.
Grout Color Makes or Breaks It
Grout is a design decision, not an afterthought. A white or bright gray grout blends into the marble for a soft, seamless field that emphasizes the stone’s veining. A darker gray grout outlines each tile and gives a crisp, graphic look popular in modern farmhouse kitchens. Avoid stark contrasts like black grout on white marble unless you specifically want the tile shapes to dominate; it can read busy over a large wall.
Use an unsanded grout with marble. Sanded grout can scratch the polished or honed stone surface during application. A quality sealer on the grout lines also keeps them from staining, especially behind a cooktop where grease flies.
Honed vs Polished Finish
Marble tile comes in two surface finishes, and this matters more for a backsplash than people realize. Polished marble has a glossy, reflective surface that shows off veining and bounces light, but it also shows water spots and etching more readily. Honed marble has a matte, satin surface that hides minor wear and etching far better, which is why many pros recommend honed for kitchen backsplashes. In a bathroom, polished can be lovely; over a stove, honed is more practical.
The Sealing Reality
This is the part that scares people off marble, and it deserves a straight answer. Marble is calcium carbonate, so it reacts with acids. A splash of lemon juice, vinegar, wine, or tomato left on unsealed marble can etch a dull spot into the surface. Sealing helps against staining but does not fully prevent etching, which is a physical reaction, not just a stain.
For a backsplash, the practical protection plan is: seal the tile before grouting, seal again after grouting, and reseal once a year. Wipe up acidic splashes promptly. Realistically, a backsplash sees far less abuse than a countertop, so most homeowners find marble backsplashes very livable. If you are a nervous cook or want zero maintenance, a porcelain marble-look tile mimics the veining convincingly for less money and no sealing.
Installation Steps in Brief
- Prep the wall. It must be clean, dry, and flat. Fill dents, and prime raw drywall.
- Dry-lay and plan. Find the center, snap level lines, and lay out a row to see where cuts fall. Balance the pattern so you avoid slivers at the ends.
- Seal first. Pre-sealing bare marble keeps thinset and grout from staining the porous stone.
- Set the tile. Use white thinset (gray can show through translucent marble), a 3/16-inch notched trowel, and 1/16-inch spacers.
- Cut carefully. A wet saw with a diamond blade gives clean edges. Marble chips, so go slow around outlets.
- Grout and seal again. Let thinset cure 24 hours, grout with unsanded grout, then seal the whole surface once cured.
Where a Marble Backsplash Works Best
Marble subway tile is at home in more than just kitchens. Behind a bathroom vanity, it turns an ordinary mirror wall into a spa-like focal point, and because a bathroom backsplash rarely meets acids or grease, sealing worries all but disappear. In a powder room, a full wall of marble subway tile reads as pure luxury. Around a fireplace surround, the stone’s veining catches firelight beautifully, and here it faces no moisture at all. Even a laundry room or wet bar benefits from the material’s classic look. The kitchen remains the most popular home for it, but knowing marble performs even better in low-acid rooms can help you plan where to splurge.
Consider your overall design, too. Marble subway tile leans traditional-to-transitional, pairing naturally with shaker cabinets, brass or polished-nickel fixtures, and warm wood tones. In an ultra-modern kitchen, a large-format marble slab or a stacked vertical subway layout keeps the stone feeling contemporary rather than dated. Matching the veining direction and picking tiles from the same lot number also matters, since natural stone varies batch to batch. Buy 10 to 15 percent extra so your cuts and any future repairs come from the same coloring.
Cleaning and Everyday Care
Day-to-day upkeep of a marble backsplash is simple as long as you avoid the wrong products. Wipe it with a soft cloth and warm water, or a pH-neutral stone cleaner. Never use vinegar, lemon-based cleaners, bleach, or generic bathroom sprays, all of which are acidic or harsh enough to etch or dull the surface over time. Blot spills rather than letting them sit, especially anything acidic near the cooktop. A quick wipe-down after cooking, plus that annual reseal, keeps the stone looking fresh for decades. If a dull etch mark does appear on polished marble, a marble polishing powder can often buff it back to shine, one more reason many homeowners choose a honed finish that hides such marks in the first place.
Is a Marble Subway Backsplash Right for You?
Choose real marble if you love the depth and slight imperfection of natural stone and you accept light maintenance. It rewards you with a surface that never looks dated and adds a genuine sense of quality to a kitchen. Choose a porcelain marble-look alternative if you want the appearance with zero sealing and a lower price. Either way, a marble subway tile backsplash remains one of the most reliably classic choices in kitchen design, and the running-bond layout you pick today will still look right a decade from now.
Prefer to explore on your own?
See how new flooring looks in your actual room in seconds — free, no signup.
Try the free Floor Studio →