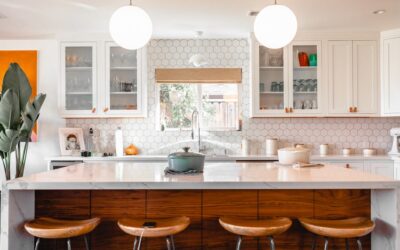
Mixing knobs and pulls on kitchen cabinets is one of those designer moves that looks effortless in magazines but leaves homeowners paralyzed at the hardware aisle wondering whether they are about to make an expensive mistake. The good news is that combining the two is not only acceptable, it is the professional standard in most well-designed kitchens. There is a simple logic behind which pieces go where, and once you understand it, the choice becomes obvious rather than agonizing. Done right, the mix adds visual rhythm and improves how the kitchen actually functions. Done randomly, it reads as indecision. The difference comes down to a few consistent rules.
Part of our Kitchen Remodeling guide — explore the full guide →
- The Classic Rule: Knobs on Doors, Pulls on Drawers
- Why the Mix Works Better Than Matching
- Keeping Finish Consistent
- Sizing Knobs and Pulls Correctly
- Placement That Looks Professional
- Matching Hardware to Your Kitchen Style
- Budgeting Your Hardware
- Installation Tips for a Clean Result
- When to Break the Rules
- How to Mix Gold and Silver Cabinet Pulls on Purpose
The Classic Rule: Knobs on Doors, Pulls on Drawers
The foundational convention, and the one that never looks wrong, is to put knobs on cabinet doors and pulls on drawers. Designers have followed this for decades because it matches how you actually use each.
A door swings open from a single point, so a knob gives you exactly the grip you need. A drawer slides straight out and often carries weight, so a horizontal pull lets you grab it comfortably with your whole hand and distribute the force evenly. Following this pattern instantly makes a mix look intentional because it follows function, not whim.
Why the Mix Works Better Than Matching
Using a single hardware type throughout can look flat, especially in a large kitchen with many doors and drawers. The knob-and-pull mix introduces variety while keeping order.
- Visual interest: two shapes create rhythm across the cabinet faces
- Better ergonomics: each piece suits how its cabinet opens
- Defined zones: pulls draw the eye to drawer banks, knobs to upper cabinets
- Design flexibility: you can splurge on statement pulls and economize on simple knobs
Think of it like a well-composed outfit: variety within a consistent palette looks styled, while everything identical looks like a uniform.
Keeping Finish Consistent
Here is the rule that keeps a mix from turning chaotic: vary the shape, but keep the finish consistent. If your knobs are matte black, your pulls should be matte black too. Mixing shapes is sophisticated; mixing finishes randomly usually looks accidental.
That said, there is an advanced version where designers deliberately mix two finishes, such as aged brass pulls with polished nickel knobs, but this requires a deliberate, repeated pattern and a confident eye. For most homeowners, one finish across all hardware is the safe, elegant choice. Popular options include matte black, brushed brass, satin nickel, and oil-rubbed bronze, each of which pairs cleanly with a wide range of cabinet colors.
Sizing Knobs and Pulls Correctly
Scale is where a lot of otherwise good hardware choices fall apart. Undersized pulls on tall drawers look lost, and oversized knobs on small doors look clumsy.
General sizing guidance
- Knobs: 1 to 1.5 inches in diameter for standard doors
- Standard drawer pulls: 3 to 4 inch center-to-center for typical drawers
- Wide drawers (over 30 inches): pulls 5 to 8 inches, or two pulls, or a single long bar
- Large pantry or appliance panels: 12 inch or longer pulls look intentional
A good rule of thumb: a drawer pull should span roughly one-third the width of the drawer. On a very wide drawer, either center one long pull or install two pulls spaced evenly for both balance and grip.
Placement That Looks Professional
Consistent placement is what separates a builder-grade install from a polished one. Decide on a placement rule and apply it to every cabinet.
For door knobs, mount them on the corner opposite the hinges, typically 2.5 to 3 inches from the top corner on lower cabinets and from the bottom corner on upper cabinets. For drawer pulls, center them horizontally and vertically on the drawer face, or on very tall drawers, position them in the upper third. The key is repetition: measure and use a hardware jig so every piece lands in exactly the same relative spot. Nothing undermines nice hardware faster than knobs sitting at slightly different heights down a run of cabinets.
Matching Hardware to Your Kitchen Style
The shape and style of the knobs and pulls should echo the overall design of the room, not fight it. A sleek modern kitchen and a cozy farmhouse call for very different hardware even when both mix knobs and pulls.
- Modern and contemporary: slim bar pulls and simple round or square knobs, often in matte black or brushed nickel
- Farmhouse and transitional: cup or bin pulls on drawers with round knobs on doors, in aged brass or oil-rubbed bronze
- Traditional: ornate or beveled knobs with matching classic pulls
- Shaker (versatile): works with almost anything, from cup pulls to bar pulls to simple knobs
Cup pulls deserve special mention because they pair so naturally with knobs. Their half-moon shape reads as distinctly different from a knob, which reinforces the intentional look, and they suit farmhouse and transitional kitchens beautifully. Just remember cup pulls only work well on drawers, since you grip them from underneath.
Budgeting Your Hardware
Hardware is one of the few places a kitchen budget stretches or blows out based entirely on your choices, since piece counts add up fast. A typical kitchen has 25 to 40 pieces of hardware, so even a few dollars of difference per piece swings the total meaningfully.
Mixing knobs and pulls actually helps the budget, because knobs almost always cost less than pulls. Using inexpensive but attractive knobs on your many doors and reserving pricier statement pulls for the fewer drawers lets you get a designer look without buying 40 expensive pulls. Budget roughly $2 to $8 per knob and $4 to $15 per standard pull for solid, name-brand hardware, with premium and artisan pieces running higher. Always order one of each first to confirm the finish and feel in your actual kitchen light before committing to the full set, since finishes photograph differently than they look in person.
Installation Tips for a Clean Result
Even beautiful, well-chosen hardware looks amateur if it is installed crookedly or inconsistently. A cabinet hardware jig is the single tool that makes the difference, letting you drill every hole in exactly the same relative position across dozens of doors and drawers.
Mark and drill from the back of pilot holes where possible to avoid splintering the finish, and use a backer block behind the hole for a clean exit. For pulls, measure to the center of both screws and confirm the spacing matches your hardware’s center-to-center dimension before drilling, since a hole drilled wrong is difficult to hide. Work slowly on the first few pieces to dial in your jig settings, then the rest go quickly. This precision, more than the hardware price, is what makes a mix of knobs and pulls look professionally installed.
When to Break the Rules
Rules exist to be broken thoughtfully. Some kitchens benefit from putting pulls on everything, including doors, for a sleek, uniform modern look, especially with slab-front cabinets. Others use cup pulls or bin pulls on drawers alongside round knobs on doors for a farmhouse or transitional feel.
You can also add long pulls to tall pantry doors even while using knobs on standard doors, because those big vertical doors function more like drawers when you swing them open. The guiding principle throughout is intentionality: whatever combination you choose, apply it consistently so the eye reads a pattern. When mixing knobs and pulls on kitchen cabinets follows a clear internal logic, the result looks custom and considered, exactly the impression that quality hardware is meant to give.
How to Mix Gold and Silver Cabinet Pulls on Purpose
Gold and silver cabinet pulls can share a kitchen when each metal has a clear job. Assign one metal to a zone or a hardware type, repeat that rule on every cabinet, and tie each metal to something else in the room. Randomly scattered gold and silver looks like a mistake; a consistent pattern looks designed.
Four ways to split the metals
| Approach | How it works | Best for |
|---|---|---|
| By zone | Gold on the island, silver on the perimeter cabinets | Islands in a contrasting paint color |
| By hardware type | Silver knobs on doors, gold pulls on drawers | Kitchens with long drawer banks |
| By cabinet height | Silver on uppers, gold on lowers | Two-tone cabinets with light uppers |
| Two-tone pieces | Each pull combines both metals, such as a gold bar on silver posts | Small kitchens where splitting looks busy |
Choose a dominant metal
Let one metal cover most of the hardware, roughly two-thirds or more, and use the other as the accent. Equal amounts compete for attention. A practical way to choose: count what is already silver in the room, such as stainless appliances, the sink and the range hood. If silver already dominates, gold pulls become the accent, and the kitchen still feels balanced.
Match finish texture across both metals
A brushed gold beside a polished chrome looks mismatched even if the placement is logical. Pair brushed with brushed or satin with satin, such as brushed brass with brushed nickel. Keeping the same pull profile in both metals also helps, because the shape ties them together while the color changes.
Tie each metal to the room
- Repeat the gold in at least one other place: pendant lights, a faucet, bar stool legs or a mirror frame.
- Let stainless appliances and a silver faucet carry the silver side.
- Warm gold flatters white, cream, green and navy cabinets; cool silver reads cleanest on gray and white.
- Check undertones: a pale champagne gold mixes more easily with nickel than a strong yellow brass does.
Common mistakes
Avoid putting gold and silver side by side on the same cabinet face without a reason, and avoid adding a third metal such as black unless it already appears elsewhere. Buy one sample of each metal first and tape them to a door and drawer for a few days in morning and evening light before ordering the full set.