
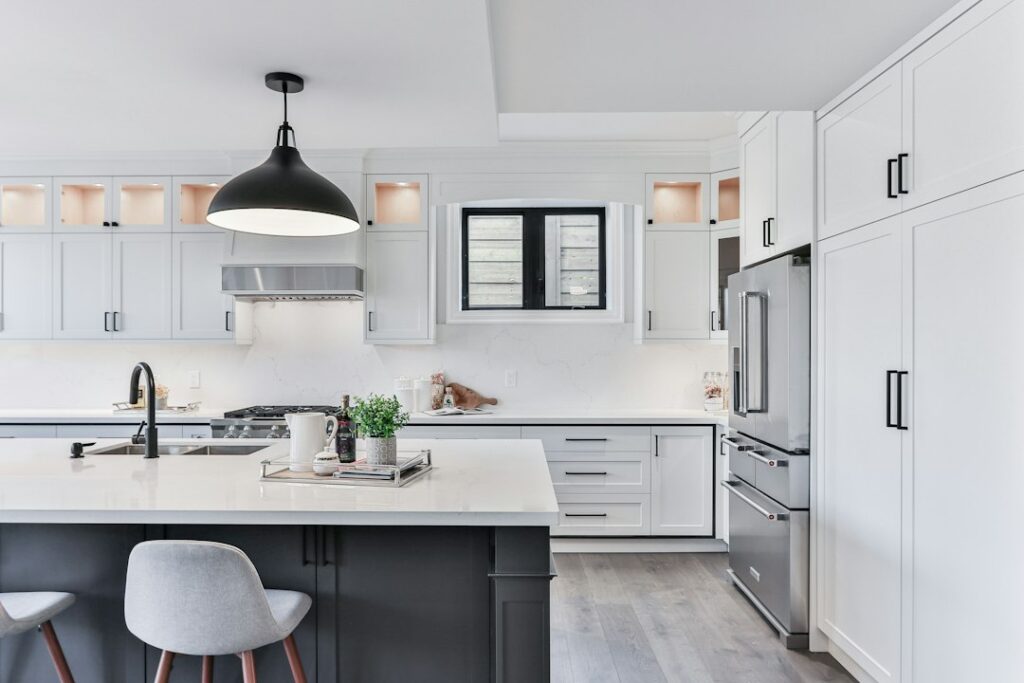
Most people start a mobile home remodel with the fun part, new cabinets or paint, and then tear it all out six months later when a soft spot in the floor reveals a leaking supply line. Manufactured homes are built differently from site-built houses, with lighter framing, thinner wall panels and plumbing that runs through the belly under the floor. That means the order of work matters more than the finishes you pick.
The short answer: start under the floor and work up. Fix the subfloor, plumbing and anything structural first, then move to walls, windows, the kitchen and bath, and save flooring, trim and paint for last. On older single and double wides, test for asbestos and lead and check for aluminum wiring before any demolition begins. Doing it in that order protects every dollar you spend on the visible upgrades.
- How a Mobile Home Remodel Differs From a House Remodel
- Step 1: Inspect and Test Before You Demo
- Step 2: Subfloor and Plumbing First
- Step 3: Walls, Windows and Doors
- Step 4: Kitchen and Bath
- Step 5: Flooring, Trim and Exterior
- Typical Costs for Single Wide and Double Wide Remodels
- Troubleshooting Common Problems
- When to Call a Licensed Professional
- Frequently Asked Questions
Call it a trailer home renovation, a double wide remodel or a full mobile home makeover: the same roadmap applies. Each stage gets its own checklist here: what to look for, what it typically costs and where a licensed pro is required.
How a Mobile Home Remodel Differs From a House Remodel
A mobile home remodel follows the same basic logic as any renovation, but the building itself plays by different rules. Homes built after mid-1976 follow the federal HUD code, which sets standards for construction, fire safety, wind zones and energy use. Each section carries a data plate and a red certification label, and many local building departments expect structural, electrical and plumbing changes to keep the home compliant with that standard. Before you move a wall or add a window, call your local building office and ask what permits apply to manufactured homes in your area.
Several construction details also change how you plan:
- Thinner framing: Many older homes have 2×2 or 2×3 wall studs instead of 2x4s, which limits insulation depth, outlet box choices and how much weight a wall can carry.
- VOG wall panels: Vinyl-over-gypsum panels with battens over the seams are common. They are thin (often 5/16 inch) and do not patch like standard drywall.
- Belly wrap and underfloor plumbing: Supply and drain lines run under the floor, protected by a fabric or vinyl bottom board. Leaks often go unnoticed until the subfloor rots.
- Marriage line: Double wides join two sections along a center seam. Walls and beams along that line often carry roof load.
- Particleboard subfloors: Many homes from the 1970s through 1990s used particleboard decking that swells and crumbles when wet.
Step 1: Inspect and Test Before You Demo
Walk the whole home with a flashlight and a notebook before you buy a single material. Look for soft floors near the toilet, tub, kitchen sink and exterior doors. Check the ceiling for water stains, which point to roof or vent leaks. Crawl the perimeter and inspect the belly wrap for sagging, tears or damp insulation. Confirm the home is level and that piers and tie-downs are intact.
Asbestos and Lead in Older Homes
If you are renovating an old mobile home built before 1980, assume some materials may contain asbestos until a test says otherwise. Sheet vinyl, floor tile, mastic adhesive, ceiling texture, joint compound and some roof coatings are common suspects. Have samples tested by an accredited lab before you scrape, sand or tear out. Homes built before 1978 may also have lead-based paint on trim, doors or exterior surfaces; test it and follow lead-safe practices (wet methods, plastic sheeting, HEPA cleanup) if it is present. Testing is inexpensive compared to the cost of contaminating the whole home.
Aluminum Wiring
Many homes from the mid-1960s to late 1970s were wired with aluminum branch circuits. Aluminum expands and contracts more than copper, which can loosen connections and create heat at outlets and switches. If you see dull silver conductors or “AL” markings on the cable jacket, have a licensed electrician evaluate it. Approved repair methods exist, but this is not a DIY job. Any time you remove a cover plate or fixture, turn off the breaker and confirm power is off with a non-contact voltage tester before touching anything.
Step 2: Subfloor and Plumbing First
Floors and plumbing come first because almost every other upgrade sits on top of them. Cut out damaged particleboard back to solid floor joists and replace it with 3/4 inch tongue-and-groove plywood or OSB rated for floors, glued and screwed to the joists. Add blocking where the old panels end between joists so every edge is supported.
While the floor is open, deal with the plumbing. Many older homes used polybutylene supply lines (gray plastic) that are prone to failure; replacing them with PEX is one of the smartest mobile home upgrades you can make. Shut off the water at the main and relieve pressure by opening the lowest faucet before cutting any line. Drain lines should slope about 1/4 inch per foot and be properly supported in the belly. If you are moving fixtures or are unsure about venting, bring in a licensed plumber, and pull permits where your jurisdiction requires them.
Patch the belly wrap with manufactured home bottom board tape or a new section of material, and replace wet or crushed insulation before you close it up. Gaps in the belly let in rodents and cold air.
Step 3: Walls, Windows and Doors
Once the floor is solid, move to the walls. You have two main options for VOG panels: paint them or replace them. Painting is the budget route; clean the panels, prime with a bonding primer and paint with a quality latex. To get rid of battens and get a smoother look, many owners replace the panels with 1/2 inch drywall, which is heavier and may require furring or adjustments at doors and windows. Remember that thinner studs limit what you can hang, so locate framing before mounting cabinets or shelves.
Interior walls in a manufactured home are not always just partitions. Walls along the marriage line in a double wide, and some walls in a single wide, may support roof trusses or carry beam load. Before removing or cutting any wall, have a structural engineer or the home’s manufacturer confirm what it does. Never cut into the marriage line framing on your own.
Windows are a big comfort upgrade. Older single-pane aluminum windows leak air and sweat in winter. Replacement windows sized for manufactured homes come in standard rough openings and often install with an exterior flange or an interior clamp design. Exterior doors should be rated for manufactured homes, which often swing outward and use specific rough openings. Seal new units carefully and flash the head so rain sheds outside the wall.
Step 4: Kitchen and Bath
The kitchen and bath eat the largest share of most budgets. In the kitchen, check that the floor under the sink and dishwasher is sound, then decide whether you are refacing, painting or replacing cabinets. Stock cabinets work in most homes, but measure carefully because ceiling heights can be lower than in a site-built house, often around 7 feet in older models. Lightweight countertops such as laminate or butcher block are easier on the floor system than thick stone slabs; if you want stone, ask whether the floor framing under it needs added support.
Bathrooms in manufactured homes often have one-piece tubs and showers sized to fit through the original openings. Replacements may need to be sectional or cut to fit. Waterproof every wet wall, use a properly vented exhaust fan ducted to the outside (not into the attic or belly), and keep bathroom outlets on GFCI protection. Any new circuit or new outlet location is work for a licensed electrician.
Step 5: Flooring, Trim and Exterior
Flooring goes in near the end so it is not damaged by the heavy work. For most rooms, luxury vinyl plank is a strong choice in a mobile home: it is lightweight, waterproof, comfortable underfoot and floats over a flat subfloor. Leave the expansion gap the manufacturer specifies and avoid pinning a floating floor under heavy built-ins. Carpet still works in bedrooms if you prefer it.
For a mobile home exterior makeover, new skirting, fresh siding paint, a covered entry step and updated lighting change curb appeal fast. Vented skirting is important because it lets moisture escape from under the home. Any exterior outlets must be GFCI protected and in weather-rated covers. Roof work is its own project; if the roof is leaking, fix it before you replace ceilings or insulation.
Typical Costs for Single Wide and Double Wide Remodels
Costs vary widely by region, condition and how much you do yourself, so treat these as general ranges:
| Project | Single wide | Double wide |
|---|---|---|
| Cosmetic refresh (paint, fixtures, flooring) | $5,000 to $15,000 | $10,000 to $25,000 |
| Mid-range remodel (kitchen, bath, windows) | $15,000 to $40,000 | $25,000 to $60,000 |
| Full gut renovation | $40,000 and up | $60,000 and up |
Hidden subfloor and plumbing repairs are the most common budget busters. Set aside 10 to 20 percent as a contingency, especially when remodeling old trailer homes where water damage is likely.
Troubleshooting Common Problems
- Floor still bounces after new decking: Joists may be undersized or damaged. Sister new lumber alongside them and check that piers under the main beams are tight and level.
- Doors stick after the remodel: The home may have settled. A leveling check and pier adjustment by a qualified setup crew usually solves it.
- Condensation on new windows: Indoor humidity is too high. Run bath and kitchen fans and check that the dryer vents outside.
- Breakers trip with new appliances: The original panel and circuits may be undersized. Have a licensed electrician assess load before adding more.
When to Call a Licensed Professional
You can handle a lot of a manufactured home remodel yourself: demolition of safe materials, subfloor patches, painting, cabinet installation and floating floors. Bring in licensed pros for the following:
- Electrical: Aluminum wiring repairs, panel upgrades, new circuits and new outlet locations.
- Plumbing: Moving fixtures, new drain venting or water heater replacement.
- Structural: Removing or altering walls along the marriage line, cutting new window or door openings, or adding heavy loads. A structural engineer should approve these changes.
- Hazardous materials: Asbestos abatement and large lead paint projects.
- Setup and leveling: Pier, anchor and tie-down work by a licensed installer.
Pull permits where required, keep receipts and inspection records, and leave the HUD label and data plate in place. Those documents matter for financing, insurance and resale.
Frequently Asked Questions
What should I remodel first in a mobile home?
Start with the subfloor, plumbing and any roof leaks. Those problems damage everything above them, so fix them before walls, cabinets or flooring.
Is it worth renovating an old trailer home?
It often is if the frame, roof and floor system are sound. If the frame is rusted badly or the home has major structural damage, compare the remodel cost to replacing the home.
Can I remove walls in a double wide?
Only after a structural engineer or the manufacturer confirms the wall is not load bearing. Walls along the marriage line usually carry roof load and should not be removed without an engineered plan.
What flooring works best in a mobile home?
Luxury vinyl plank is a popular pick because it is light, waterproof and easy to install over a flat subfloor. Repair soft spots before installing any flooring.
Do I need a permit to remodel a manufactured home?
Electrical, plumbing and structural work typically require permits. Cosmetic work like paint and flooring often does not, but check with your local building office first.


