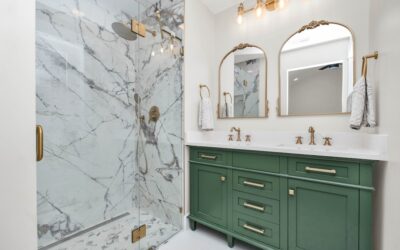
Most manufactured home showers fail from the bottom up: a cracked ABS pan, a soft subfloor, or a leaking drain that has quietly rotted the particleboard for years. A mobile home shower remodel is the chance to fix those hidden problems while upgrading to a surround that actually lasts. The good news is that mobile home showers use a handful of standard sizes, so replacement parts are easy to find. The catch is that walls are thinner, framing is lighter, and plumbing access is often from underneath, which changes how you plan the job compared with a site-built house.
Part of our Bathroom Remodeling & Flooring guide — explore the full guide →
What Makes a Mobile Home Shower Remodel Different
Manufactured homes are built to the HUD code rather than local residential building codes, and that shows in the bathroom. Walls are often 2×3 or 2×4 studs at 16 or 24 inches on center, and interior wall panels may be only 5/16-inch vinyl-covered gypsum. Older homes, especially those built before 1995, frequently have 5/8-inch particleboard subfloors that swell and crumble when they get wet.
Plumbing is another difference. Many mobile homes use PEX or polybutylene supply lines and a drain that runs through the belly under the home, protected by a vapor barrier called the bottom board. The shower valve may be accessed through a panel in an adjoining closet or not at all. Standard residential shower units are also a problem because most mobile home bathroom doorways are narrow, often 24 to 28 inches, and a one-piece fiberglass unit usually will not fit through the door.
Finally, weight matters. Heavy tile over a mortar bed adds several hundred pounds to a floor system designed for lighter loads. That does not mean tile is off the table, but it needs a stiff subfloor and good support underneath.
Standard Mobile Home Shower Sizes
Measure the existing pan or tub before buying anything. Measure the rough opening wall to wall at the floor and again at 48 inches high, since walls in manufactured homes are rarely perfectly plumb. Note the drain location from the back wall and the side wall.
- Standard shower pans: 32 x 32, 34 x 54, 36 x 36, 36 x 48, and 30 x 60 inches are common.
- Tub-to-shower conversions: 27 x 54 and 30 x 54 inch tubs are typical in single-wides; 30 x 60 is more common in newer double-wides.
- Drain placement: Mobile home pans often have left, right, or center drains, and the drain may be closer to the wall than in a standard house. Match the new pan to the existing drain location to avoid cutting the floor.
Manufactured-housing suppliers stock pans and surrounds designed for these exact sizes, often with lighter-weight ABS or fiberglass construction and multi-piece walls that fit through small doorways.
Choosing a Shower Surround and Pan
Your material choice drives both cost and longevity. Each option has trade-offs worth weighing against how long you plan to stay in the home.
Multi-Piece Fiberglass or ABS Kits
Three- or four-piece kits run $300 to $900 and are the most common choice. They fit through narrow doorways, go up in a day, and are light. Choose acrylic-capped ABS over thin gelcoat fiberglass if you can; it resists fading and scratches better.
Acrylic or Solid-Surface Wall Panels
Large acrylic or cultured stone panels, often 1/4 inch thick, cost $800 to $2,500 for the walls. They have no grout, look far more upscale than a kit, and are glued directly to backer board or cement board with silicone and construction adhesive.
Tile Over Backer Board
Porcelain tile over 1/2-inch cement board or a foam board system is the most durable and customizable, but it adds weight and labor. Expect $12 to $30 per sq ft installed. Use a waterproof membrane over the board and a pre-formed pan rather than a traditional mortar bed to keep the weight manageable.
Pans and Bases
A composite or solid-surface base resists flexing much better than a thin ABS pan. Whatever you choose, set it in a bed of mortar or the manufacturer’s leveling compound so there is no hollow spot under the floor of the pan. Flexing is what cracks pans in manufactured homes.
Step-by-Step Mobile Home Shower Remodel
- Shut off water and power. Turn off the main supply and any bathroom GFCI circuit if you will be near outlets or an exhaust fan.
- Remove the old surround and pan. Cut caulk joints, remove screws or trim, and pull the panels. Most old pans are screwed through a flange into the studs.
- Inspect the subfloor and framing. Probe with a screwdriver. Any soft, swollen, or black particleboard must go. Cut back to solid framing and replace with 3/4-inch exterior-grade plywood, screwed every 6 inches.
- Check the plumbing. Replace old polybutylene lines and the valve if they are original. Consider a pressure-balance valve, required for new installations in most areas, to prevent scalding.
- Install blocking and backer. Add 2×4 blocking for grab bars at 33 to 36 inches high and for any shower door hinges. Install cement board or waterproof foam board if you are using panels or tile.
- Set the pan. Dry-fit, then set it in mortar, level it in both directions, and connect the drain. Test for leaks before walls go up.
- Install walls and trim. Follow the manufacturer’s sequence, usually back wall first, then sides. Seal all seams with 100 percent silicone.
- Add fixtures, door, and caulk. Install the trim kit, shower head, glass door or curtain rod, and let silicone cure 24 hours before use.
A handy homeowner can complete a kit replacement in a weekend. Tile or subfloor repairs usually stretch the job to a week.
Subfloor, Plumbing, and Ventilation Fixes
A remodel that ignores what is under the pan is money wasted. In older homes, the floor around the shower often has water damage extending 12 to 24 inches beyond the pan edge. Replace it now, and install a sheet of 6-mil poly or a liquid waterproofing membrane at the base before the new pan goes in.
Check the drain trap under the home through the bottom board. If you see a sagging belly wrap, wet insulation, or a trap held up with string, repair it and re-seal the bottom board with belly-wrap tape. Leaks here invite rodents and mold.
Ventilation is frequently inadequate. Many mobile home bathrooms have small 50 CFM fans or none at all. Upgrade to an 80 to 110 CFM fan ducted to the exterior, never into the attic cavity or under the home, and put it on a timer switch so it runs 20 minutes after showering.
When to call a licensed professional: if you find structural rot in floor joists, need to move drain lines, replace a water heater connection, or add new electrical circuits for fans or heated towel racks, hire a licensed plumber or electrician. Some states also require permits for plumbing changes in manufactured homes, and park rules may require licensed contractors for any work that affects the home’s belly or supply lines.
Mobile Home Shower Remodel Costs
Costs vary with scope, but these ranges reflect typical 2026 pricing for a single bathroom:
| Project Scope | DIY Cost | Professional Cost |
|---|---|---|
| Kit surround + new pan | $500-$1,300 | $1,200-$3,000 |
| Tub-to-shower conversion | $800-$2,000 | $2,500-$6,000 |
| Acrylic panel system | $1,200-$3,000 | $3,000-$6,500 |
| Tile shower with new pan | $1,500-$3,500 | $4,500-$9,000 |
| Subfloor repair (added) | $150-$500 | $500-$1,800 |
Glass doors add $250 to $1,200 depending on framed or frameless styles. A new pressure-balance valve and trim runs $150 to $400 in parts. Labor in rural areas can be 20 to 30 percent lower than metro areas, though finding contractors who work on manufactured homes can take longer.
Design Ideas and Accessibility Upgrades
Small bathrooms benefit from light colors, a clear glass door instead of a curtain, and a single large-format panel design that reduces visual clutter. A recessed niche between studs holds bottles without a caddy; since walls are shallow, a 2×3 wall may only allow a 2.5-inch-deep niche, so check before cutting.
For aging in place, convert a tub to a low-threshold shower with a curb of 3 inches or less, add a fold-down seat anchored to blocking, install grab bars rated for 250 pounds, and use a handheld shower on a slide bar. A slip-resistant textured pan floor is worth the small premium.
Lighting is often overlooked. A wet-rated recessed LED fixture over the shower, around $40 to $90, makes the space feel bigger and safer.
Common Mistakes to Avoid
- Buying a one-piece unit that will not fit through the bathroom door.
- Setting a pan directly on the subfloor with no mortar bed, leading to flex and cracks.
- Covering soft particleboard instead of replacing it.
- Using standard drywall behind panels in the wet zone.
- Ignoring the vent fan, which invites mold behind new walls.
- Caulking with acrylic latex instead of 100 percent silicone.
A careful mobile home shower remodel pays off in a bathroom that feels solid underfoot, drains properly, and stays dry for decades. Measure precisely, fix the floor first, and choose materials sized for manufactured homes, and the finished shower will look and perform like one in a site-built house.