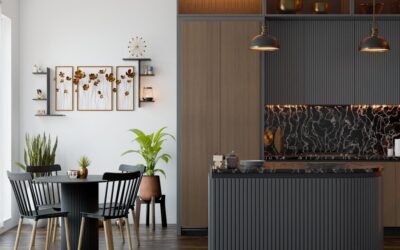
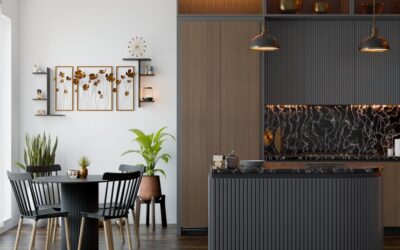
An island that doubles as a gathering spot is the single most requested feature in kitchen remodels today, and getting it right comes down to inches, not just style. A well-designed modern kitchen island with seating balances prep space, storage, and comfortable perching room without crowding the work zones around it. Miss the clearances by a few inches and you end up with stools that bump the wall or a counter overhang that digs into your knees.
Part of our Kitchen Remodeling guide — explore the full guide →
This guide covers the exact measurements, seating layouts, materials, and costs that separate a showpiece island from an awkward afterthought.
Getting the Dimensions Right
Every comfortable island starts with clearance. Leave at least 36 inches of walkway between the island and surrounding cabinets, and bump that to 42 to 48 inches on the side where people sit, so someone can pull a stool out and still let others pass behind them. Skimp here and the whole kitchen feels cramped no matter how sleek the countertop looks.
Islands themselves typically run 3 to 4 feet deep and anywhere from 4 to 8 feet long. For seating, a minimum island length of about 4 feet fits two stools, while an 8-foot run comfortably seats four. Standard island counter height is 36 inches, the same as your perimeter counters, which pairs with 24-inch counter-height stools. If you want a raised bar, that ledge sits at 42 inches and takes 30-inch bar stools.
Overhang and Legroom, the Details That Matter
Comfortable seating lives or dies on the overhang, the amount of countertop that extends past the cabinet base for knee room. For a standard 36-inch counter-height island, plan a 12-inch overhang; anything less than 10 inches leaves knees jammed against the cabinet. Bar-height ledges at 42 inches can use a 12- to 15-inch overhang.
Any overhang beyond 12 inches usually needs support. Steel L-brackets, corbels, or hidden countertop supports keep a heavy quartz or granite top from cracking under weight. Budget for these when your seating side pushes past a foot of unsupported stone.
Width per seat is the other critical number. Allow 24 inches of linear counter per stool so elbows do not collide, and 28 to 30 inches feels genuinely roomy. A 6-foot seating edge, for example, comfortably holds three stools at 24 inches each with a little breathing room.
Seating Layouts to Consider
How you arrange the stools shapes how the island feels. A few proven approaches:
- Single-side row: stools along one long edge, the most common and cleanest look, keeps the opposite side free for prep and appliances
- L-shaped wrap: seating turns a corner, ideal for larger islands and encouraging conversation
- Two-tier design: a lower 36-inch prep surface with a raised 42-inch bar behind it, which hides cooking mess from guests seated at the bar
- End seating: a stool or two at the short end, useful when a long walkway makes side seating tight
Modern designs increasingly favor a single flush countertop at 36 inches rather than the two-tier split, since a waterfall quartz edge cascading to the floor reads cleaner and more current.
Material and Countertop Choices
The countertop is the star of a modern island. Quartz leads the pack for its seamless look, durability, and zero maintenance, typically running $60 to $120 per square foot installed. Waterfall edges, where the stone runs vertically down the sides to the floor, define the contemporary style but add material and fabrication cost, often 25 to 40 percent more than a standard edge.
Butcher block brings warmth for around $40 to $70 per square foot, though it needs periodic oiling. Natural stone like granite or a marble-look porcelain slab suits homeowners chasing a specific vein pattern. For the base cabinets, flat-panel or slab-door fronts in matte finishes, often in deep navy, charcoal, or warm wood tones, anchor the modern aesthetic better than raised-panel shaker doors.
Storage and Function Built In
A seating island should still earn its footprint through storage. On the non-seating side, deep drawers hold pots and small appliances far better than door cabinets. Consider building in a microwave drawer, a wine fridge, or open shelving on the seating end for cookbooks and decorative baskets. Many homeowners add a prep sink or even the primary sink to the island, which requires plumbing runs under the floor and typically adds $500 to $1,500 to the project.
If the island houses a cooktop or sink, remember that appliances eat into both counter and knee space, so size up the island length accordingly. Pop-up outlets or integrated USB charging on the seating side keep phones and laptops powered without cluttering the surface, and most codes now require receptacles on islands anyway.
Lighting the Island
Pendant lights over an island are both practical and a major style statement. Hang two or three pendants for a standard island, spacing them 24 to 30 inches apart and centering the group over the counter. The bottom of each fixture should sit 30 to 36 inches above the countertop, high enough to clear sightlines across the island but low enough to light the surface well.
For a modern look, oversized linear pendants or a row of matte black globes work beautifully. Put them on a dimmer so the same fixtures handle bright meal prep and soft evening ambiance.
Budgeting the Whole Project
A modern kitchen island with seating spans a wide price range. A modest stock-cabinet island with a laminate or basic quartz top might run $2,000 to $4,000. A custom island with premium quartz, a waterfall edge, integrated appliances, and plumbing commonly lands between $5,000 and $10,000 or more. Stools add $80 to $400 each depending on quality.
Choosing the Right Stools
Stools make or break the comfort of a seating island, and the most common mistake is buying the wrong height. Measure from the floor to the underside of the countertop overhang and subtract 9 to 12 inches to find the ideal seat height, which leaves room for legs. For a standard 36-inch counter, that puts you at 24-inch counter-height stools; for a 42-inch bar, you want 30-inch bar stools. Guessing wrong leaves guests perched awkwardly high or crouched low.
Beyond height, weigh backless versus backed stools. Backless stools tuck fully under the overhang for a clean, uncluttered look and are easy to slide out of the way, while stools with backs offer more comfort for long sits and lingering meals. Swivel seats add convenience in tight spaces, and upholstered seats bring warmth but demand more cleaning in a kitchen. For a modern island, low-profile stools in matte black, brushed brass, or natural wood with clean lines complement the contemporary aesthetic without competing with the counter.
Ventilation and Appliance Considerations
If your island includes a cooktop, ventilation becomes a real design challenge because there is no wall for a standard range hood. Your options are a ceiling-mounted island hood suspended over the cooktop, which becomes a visual focal point, or a downdraft vent that rises from behind the cooktop and retracts when not in use. Island hoods must be sized to the cooktop width plus a few inches on each side and vented to the exterior, which requires ductwork run through the ceiling or floor.
Placing a cooktop or sink in the island also affects the seating layout, since diners should not sit directly beside a hot burner or a splashing faucet. A two-tier island once solved this by hiding the cooktop behind a raised bar, but modern flush designs often move the cooktop to the perimeter and keep the island for prep and seating instead. Think through the work triangle, the path between sink, stove, and refrigerator, so the island supports your cooking flow rather than interrupting it.
Before committing, tape out the island footprint on your floor with painter’s tape, set kitchen chairs where the stools will go, and walk the clearances. Sit down and check your knee room against a 12-inch mock overhang. That fifteen-minute test reveals crowding problems while they are still free to fix. Nail the dimensions, choose materials that match how you actually cook, and your island becomes the true center of the home rather than just a pretty obstacle in the middle of the room.