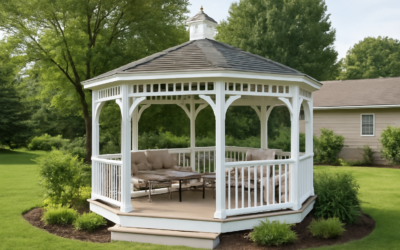
Most assembly headaches with an outdoor gazebo kit start before the first bolt goes in: a missing part discovered halfway through, a frame built on ground that is not level, or a crew of one trying to lift a roof section alone. A hardtop or wood kit is very doable for a homeowner with two or three helpers, a weekend and the right tools. The trick is preparing the site, inventorying every box, and building in the order the manual intends.
Part of our Decks & Outdoor guide — explore the full guide →
Expect a 10 by 12 foot hardtop to take roughly one to two full days for a crew of three, and longer for wood kits with many small pieces or larger models with double roofs.
Choosing and Preparing for an Outdoor Gazebo Kit
Kits fall into a few groups. Aluminum or steel hardtops have metal posts, beams and roof panels and are the most common. Wood kits use pre-cut cedar or treated lumber and resemble traditional gazebos. Soft-top kits use fabric canopies and are seasonal. Outdoor gazebo kits in the first two groups are meant to stay up year-round and must be anchored.
Before the delivery arrives, decide where the outdoor gazebo kit will sit and what it will anchor to. A concrete patio, a deck with framing that can take the load, or concrete footings are all workable; loose pavers and bare lawn are not. Check with your building department and HOA about permits and setbacks, since many hardtops exceed exemption sizes. If you will dig footings, call 811 first so buried lines are marked.
Level matters more than people expect. A slope of even an inch across the footprint can twist the frame so roof panels will not line up. Shim post bases on a slab, or pour footings with their tops set level to each other.
Tools and Crew
- Cordless drill/driver and a cordless impact driver, with spare charged batteries
- Socket set and combination wrenches in the sizes listed in the manual
- Rubber mallet, tape measure, 4-foot level and a post level
- Two stable stepladders of a height that lets you reach the roof beams without standing on the top steps
- Masonry bit and hammer drill if anchoring into concrete
- Work gloves, safety glasses and closed-toe shoes
- Painter’s tape and a marker for labeling parts
- Large tarp or moving blankets to lay out parts without scratching them
A cordless impact driver speeds up the dozens or hundreds of screws in a typical kit, but switch to a hand wrench or low clutch setting for final tightening into aluminum so you do not strip threads.
Plan on a crew of at least three for any hardtop: two to hold beams or roof sections in the air and one to fasten. Large kits and double-roof designs benefit from four people. Wood kits can start with two, but raising the roof assembly still needs extra hands.
Inventory Before You Build
Open every box and check parts against the parts list. Group hardware by bag and label each frame piece with tape that matches the manual’s part number. Look for dents, bent flanges or cracked panels and photograph any damage. Contacting the seller for a replacement part before you start is far easier than waiting for it with a half-built frame sitting in the yard.
Read the entire manual once before touching a tool. Many kits have a step where certain bolts should stay loose until the roof is on, or where a panel must go in before a beam closes off access. Missing that can mean disassembly.
Step-by-Step Assembly Order
- Lay out posts. Mark post positions on the slab or footings and check that diagonal measurements match, which confirms the footprint is square.
- Assemble posts and bases. Attach base plates or brackets to each post as the manual directs, usually on the ground.
- Build the perimeter beams. Join beam sections on the ground, then lift them onto the posts with helpers. Snug bolts by hand only.
- Square and plumb the frame. Measure corner to corner and adjust until diagonals are equal, then plumb each post with a post level.
- Install roof framing. Assemble rafters and the center hub or ridge, often on the ground, and lift into place as a unit with several people.
- Attach roof panels. Start where the manual says, often opposite sides first to keep the frame balanced, and overlap panels in the stated direction so water sheds correctly.
- Add the top cap and trim. Install ridge caps, vents and gutter trim if included.
- Tighten everything. Work around the structure tightening every bolt to the manual’s guidance.
- Anchor to the base. Fasten post bases with the anchors specified for your surface.
- Add accessories. Hang curtains, netting or privacy panels last.
Squaring and Roof Panels
Squaring is the step that decides whether the roof goes on smoothly. With beams loosely bolted, measure the two diagonals of the post rectangle. If they differ, push the long diagonal corners toward each other until the numbers match within about 1/4 inch. Then plumb each post in two directions and brace with temporary 2 by 4s if wind might shift it.
Roof panels are light but catch wind like a sail. Install them on a calm day, keep stacks weighted down, and never carry a panel on a ladder in a gusty breeze. Hand panels up to someone on a second ladder rather than climbing with one. Fasten each panel fully before moving to the next, and use every gasketed screw or washer supplied, since they keep water out at the fasteners.
Anchoring the Finished Gazebo
An unanchored hardtop can lift or slide in a storm. Anchor type depends on what is beneath it:
- Concrete slab: wedge anchors or concrete screws sized to the base plate holes, installed with a hammer drill to the embedment depth listed.
- Concrete footings: anchor bolts set in the wet concrete, or the same wedge anchors once cured.
- Wood deck: through-bolts or structural lag screws into joists or added blocking, after confirming the deck framing can carry the loads.
Anchoring is part of the structure, not an accessory. Many manufacturer warranties require it.
Ladder and Lifting Safety
Set ladders on firm, level ground and never on loose pavers or soft lawn without a base board. Do not stand on the top two steps of a stepladder. Keep your belly button inside the ladder rails and move the ladder rather than leaning. Lift roof assemblies with enough people that no one is straining, and agree on who calls the moves. Stop work in wind, rain or lightning.
Troubleshooting Common Problems
Holes will not line up: the frame is out of square or a bolt was overtightened early. Loosen nearby connections, re-square and try again.
Roof panels gap at one corner: the base is not level or a post is out of plumb. Shim the low base and re-check.
Stripped screws in aluminum: use the next size up only if the manual allows, or a thread repair insert; set the driver clutch lower for the rest.
Leaks at seams: check panel overlap direction and missing washers, then seal with exterior sealant.
Costs and Time
Hardtop kits commonly range from under one thousand dollars for small soft-top-style frames to several thousand for large aluminum or wood models. Professional assembly services often charge a few hundred to over a thousand dollars depending on size and anchoring. Budget for anchors, concrete and tool rentals. Plan one to three days of DIY time depending on kit size and crew.
When to Call a Pro
Hire an installer for large or double-roof kits, for installs on a deck or slope, or if the frame needs footings in an area with high wind or heavy snow. A structural engineer or contractor should review deck mounting. Any lighting, fans or outlets added later belong to a licensed electrician, with GFCI protection and wet-location fixtures, and power shut off at the breaker and confirmed with a non-contact voltage tester before anyone works on wiring.
Frequently Asked Questions
How long does it take to assemble an outdoor gazebo kit?
A typical 10 by 12 foot hardtop takes a crew of three about one to two days. Larger or wood kits can take longer.
How many people do I need to build a hardtop gazebo?
At least three for most hardtops, and four for large or double-roof designs, so two people can hold beams and roof sections while another fastens them.
Do I have to anchor a gazebo kit?
Yes. Hardtop gazebos can lift or slide in wind if not anchored, and many warranties require anchoring to concrete or deck framing.
Can I put an outdoor gazebo kit on pavers?
Pavers alone do not anchor well. Pour concrete footings at each post and lay pavers around them, or build on a slab.
Do outdoor gazebo kits need a permit?
Some do, depending on size and local rules. Check your building department and HOA before buying.