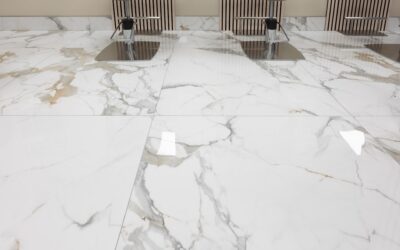
Outdoor porcelain tile 24×24 has become the go-to surface for patios, pool decks, and walkways because it combines the clean look of large-format tile with the toughness needed to survive rain, frost, and full sun. This 24-by-24-inch square format hits a sweet spot: big enough to read as modern and seamless, small enough that one person can still handle and set each piece.
Part of our Tile & Grout guide — explore the full guide →
Choosing the right tile and install method is where most homeowners go wrong, so I’ll walk you through thickness options, the ratings that actually matter outdoors, three proven installation systems, and realistic costs. Get these decisions right and your patio will look sharp for 25 years with almost no upkeep.
- 2cm Pavers vs. Standard Thickness
- Why the 24×24 Format Is So Popular
- The Ratings That Matter Outdoors
- Installation Method 1: Pedestal System
- Installation Method 2: Gravel or Sand Set
- Installation Method 3: Mortar Over Concrete
- Drainage, Slope, and Sealing
- Cost, Pros, and Cons
- Best Uses: Patios, Pool Decks, and Walkways
- Handling, Cutting, and Common Mistakes
2cm Pavers vs. Standard Thickness
The first fork in the road is thickness, and it changes everything about how you install the tile.
Standard 3/8-inch (10mm) Tile
Indoor-style porcelain runs about 10mm thick and must be bonded to a solid base, usually a concrete slab, with thin-set mortar. It cannot span a gap or float, so it lives and dies by the substrate beneath it. Standard tile is cheaper per square foot but limits you to the bonded installation method.
2cm (20mm) Porcelain Pavers
Outdoor pavers are 20mm thick, roughly double the standard, and that mass unlocks options standard tile cannot touch. A 24×24 2cm paver can be dry-laid over gravel or sand, set on adjustable pedestals for a raised deck, or mortared to concrete like any tile. The thickness gives it the load-bearing strength to sit unsupported at the edges, which is why nearly every pedestal rooftop deck and dry-set patio uses 2cm pavers rather than thin tile.
Once your patio flooring is in place, think about how you’ll use the space. A gazebo adds shade and structure, while a good outdoor furniture set turns it into a spot you’ll actually want to hang out in. A deck box is also worth considering if you need somewhere to stash cushions and outdoor gear.
We may earn a commission when you purchase through our links.
Why the 24×24 Format Is So Popular
Two feet square has become the default outdoor size for good reasons. The proportions read as contemporary, fewer grout lines mean a cleaner visual field, and the format aligns neatly with common patio dimensions, cutting down on awkward cuts at the perimeter. A single 24×24 tile covers exactly 4 square feet, so estimating quantities is simple math.
The size is also practical to handle. Larger formats like 24×48 planks weigh a lot and crack more easily during handling, while smaller 12×12 tiles multiply grout joints and labor. The 24×24 square balances installation speed, appearance, and durability better than any other single format for outdoor floors.
The Ratings That Matter Outdoors
Not every porcelain tile is rated for exterior use. Three specifications separate a tile that survives from one that shatters after the first hard winter.
- Freeze-thaw rated: Look for tile explicitly certified frost-resistant per ASTM C1026. Porcelain with under 0.5 percent water absorption resists the freeze-thaw cycles that spall lesser tile. In any climate that dips below 32°F, this is mandatory.
- PEI rating: The PEI wear scale runs 1 to 5. For a patio or pool deck choose PEI 4 or 5, built to handle furniture, foot traffic, and grit without surface wear.
- DCOF slip rating: Outdoors you want a dynamic coefficient of friction of at least 0.42, and ideally 0.60 or higher around pools. Textured, matte, and structured-surface tiles deliver the traction that polished tile cannot.
Installation Method 1: Pedestal System
Adjustable pedestals are the cleanest way to build a raised deck over a rooftop, balcony, or uneven grade. Screw-jack pedestals sit under each corner where four tiles meet, and you dial each one up or down to create a dead-level surface that floats above the structure below.
The gap beneath the tiles lets water drain straight through to the waterproof membrane below, hides wiring and plumbing, and makes any single tile removable for access. Pedestals only work with 2cm pavers, since standard tile is too thin to span the corner supports. Expect pedestal hardware to add $2 to $4 per square foot, but the drainage and access benefits are worth it on any elevated deck.
Installation Method 2: Gravel or Sand Set
For a ground-level patio, dry-laying 2cm pavers over a compacted base is the fastest DIY-friendly route. Excavate 6 to 8 inches, lay and compact crushed stone, add a leveling layer of sand or fine gravel, then set each paver and tap it level. Polymeric sand or fine gravel fills the joints.
This method drains beautifully and flexes with ground movement instead of cracking, but it demands a well-compacted base or the pavers will settle unevenly. Edge restraints are essential to keep the field from spreading. Budget for a proper base; skimping on compaction is the number one reason dry-laid patios go wavy within a couple of seasons.
Installation Method 3: Mortar Over Concrete
If you already have a sound concrete slab, bonding tile with exterior thin-set is the most permanent option and works with both standard and 2cm tile. Use a polymer-modified, exterior-grade thin-set rated for large-format tile, back-butter each piece for full coverage, and maintain grout joints of at least 1/8 to 3/16 inch to allow for thermal movement.
Critically, the slab must slope for drainage and include movement joints that carry up through the tile, or thermal expansion will crack the field or pop tiles loose. An uncoupling or crack-isolation membrane between slab and tile is cheap insurance against reflective cracking. This method gives the most solid underfoot feel and the tightest joints.
Drainage, Slope, and Sealing
Water management makes or breaks any outdoor floor. Every method needs a slope of about 1/4 inch per foot away from the house so water sheds rather than pools. Pedestal and dry-set systems drain through open joints; mortared installs rely entirely on surface slope, so get it right before the mortar cures.
The good news on maintenance: porcelain is essentially non-porous, so unlike natural stone it almost never needs sealing. An occasional wash with water and mild detergent keeps it clean. You may seal cement-based grout joints to resist staining, but the tile body itself repels water, oil, and frost without any coating.
Cost, Pros, and Cons
An outdoor porcelain tile 24×24 project typically runs $4 to $9 per square foot for the tile, with premium wood-look and stone-look pavers reaching $10 to $15. Installed costs land around $12 to $25 per square foot depending on method, with mortared installs on the higher end and DIY dry-set on the lower.
Pros
- Frost-proof, fade-proof, and virtually maintenance-free with no sealing.
- Multiple install methods suit patios, rooftops, and pool decks.
- Non-porous surface resists stains, moss, and mildew.
- Realistic wood, stone, and concrete looks in a durable body.
Cons
- 2cm pavers are heavy and cut only with a wet saw and diamond blade.
- Higher upfront cost than poured concrete or basic pavers.
- Improper base or slope leads to settling or drainage problems.
For patios, pool surrounds, and rooftop decks alike, a properly specified and installed 24×24 porcelain floor delivers the look of premium stone with a fraction of the upkeep, easily lasting decades in any climate.
Best Uses: Patios, Pool Decks, and Walkways
Around a pool, 2cm porcelain pavers are hard to beat. They stay cooler underfoot than natural stone in full sun, resist chlorine and salt that pit and stain concrete, and the textured, high-DCOF surfaces give barefoot swimmers reliable traction on a wet deck. A dry-set or pedestal install lets pool water drain away instead of pooling, which cuts down on slick spots.
On a walkway or garden path, dry-laid 2cm pavers spaced with gravel or ground-cover joints create a clean, modern route that drains freely and flexes with frost heave. For a covered porch or a solid patio slab, mortared standard tile gives the tightest, most finished appearance. Match the method to how the space gets used and how much water it will see.
Handling, Cutting, and Common Mistakes
A 24×24 2cm paver weighs roughly 25 to 30 pounds, so plan for two people on larger jobs to avoid dropped corners. Cut porcelain only with a wet saw and a continuous-rim diamond blade rated for porcelain; a dry cut or the wrong blade chips the glazed edge and dulls fast. Score-and-snap tools do not work on 2cm material.
The most common failures I see outdoors trace back to two shortcuts: an under-compacted base that lets dry-set pavers settle into ruts, and mortared installs with grout joints too tight to absorb thermal movement, which pop tiles in the first hot summer. Respect the base prep and the expansion joints and the floor will outlast everything around it.
Prefer to explore on your own?
See how new flooring looks in your actual room in seconds — free, no signup.
Try the free Floor Studio →