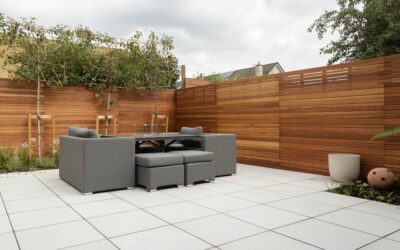
Most homeowners assume any tile they like indoors will survive on a patio. That assumption cracks tiles every winter. Choosing the right outside tile is less about color and more about water absorption, slip resistance, and how the material handles a hard freeze. Get those three factors right and you end up with a deck or walkway that looks sharp for 20 years. Get them wrong and you are pulling up spalled, lifting tiles by spring.
Part of our Tile & Grout guide — explore the full guide →
Why Outdoor Tile Is a Different Animal
Indoor floors only deal with foot traffic and the occasional spill. Outside, tile faces UV exposure, driving rain, standing water, and temperature swings that can run 60 degrees in a single day. A glazed wall tile rated for a powder room will absorb moisture, freeze, and pop apart within a season or two in any climate that dips below 32°F.
The single most important spec is water absorption. Porcelain rated as “impervious” absorbs less than 0.5 percent of its weight in water, which is exactly what you want for freeze-prone regions. Ceramic and many natural stones sit higher, sometimes 3 to 7 percent, and that trapped water is what shatters tile when it freezes and expands.
Best Materials for Outdoor Use
Not every material belongs outside. Here are the proven performers and where each one shines.
- Porcelain — The workhorse. Dense, low absorption, and available in wood-look, stone-look, and concrete-look finishes. Look for 2cm (20mm) pavers for patios you can set on gravel or pedestals.
- Granite — Extremely dense and frost-proof. Flamed or honed surfaces add grip. Heavier and pricier, but nearly indestructible.
- Travertine — Popular around pools because it stays cooler underfoot. It is porous, so it needs sealing and is best in milder climates unless you choose a dense grade.
- Slate — Naturally textured and slip-resistant. Quality varies wildly by quarry, so confirm it is rated for exterior freeze-thaw.
- Quartzite — Harder than granite in many cases, with low absorption and good grip.
Skip polished marble and soft limestone for ground-level outdoor floors. They etch, stain, and turn slick when wet.
Slip Resistance Is Not Optional
An outdoor floor that looks beautiful and sends people to the ER is a failure. Slip resistance is measured by the Dynamic Coefficient of Friction (DCOF). For wet exterior areas, aim for a DCOF of 0.42 or higher; for pool decks and steps, push toward 0.60. Textured, matte, and structured finishes deliver grip. Glossy and polished surfaces do not, no matter how good they look in the showroom.
A simple field test: splash water on a sample and drag your bare foot across it. If it feels glassy, keep shopping. Manufacturers often label outdoor-rated lines with a “grip” or “R-rating” (R11 to R13 covers most exterior needs).
Installation Methods That Hold Up
How you set the tile matters as much as the tile itself. There are three common approaches outdoors.
Mortar-Set Over Concrete
The traditional method. You need a sound, sloped concrete slab (about 1/4 inch of fall per foot so water sheds away from the house). Use a polymer-modified, exterior-rated thinset and an unmodified or epoxy grout depending on the joint width. Crucially, install over a crack-isolation or waterproofing membrane so slab movement does not telegraph into the tile.
Pedestal Systems
For rooftop decks and patios over membranes, 2cm porcelain pavers sit on adjustable pedestals. Water drains underneath, the surface stays level, and individual pavers lift out for repairs. No mortar, no grout, no slope headaches.
Sand-Set Pavers
Thick porcelain or stone pavers can be dry-laid on a compacted gravel-and-sand base, the same way you would install concrete pavers. Joints get filled with polymeric sand. This handles ground movement well and is fully DIY-friendly.
What Outside Tile Costs
Budget for the full system, not just the tile. Material prices vary, but these ranges are realistic across most of the country.
- Outdoor-rated ceramic: $2 to $6 per sq ft
- Porcelain pavers and tile: $4 to $12 per sq ft
- Natural stone (travertine, slate, granite): $6 to $20+ per sq ft
- Professional installation: $8 to $20 per sq ft depending on prep and method
Add membrane, thinset, grout, edge trim, and slab repair to your estimate. For a typical 300 sq ft patio installed by a pro, a realistic all-in figure lands somewhere between $4,500 and $9,000.
Grout and Sealing for the Long Haul
Outdoor grout takes a beating. Epoxy grout resists staining and freeze damage better than standard cementitious grout, though it costs more and sets fast. If you use cement grout, seal it. For porous stone, apply a penetrating sealer before grouting and again after, then reseal every one to three years depending on exposure. A quick water-bead test tells you when it is time: if water soaks in instead of beading, reseal.
Maintenance That Keeps It Looking New
Outdoor floors collect pollen, leaves, and algae. Sweep regularly and rinse with a garden hose. For deeper cleaning, a pH-neutral cleaner and a stiff brush handle most grime; pressure washers work too, but keep them under 1,500 PSI on grout joints and stone to avoid erosion. In shaded, damp areas, an oxygen-bleach solution clears algae and moss without harming plants the way chlorine bleach can.
Tackle stains fast. Oil from a grill, rust from metal furniture, and leaf tannins all set in if ignored. A poultice draws out deep stains in porous stone, while sealed porcelain usually wipes clean.
Common Mistakes to Avoid
Three errors account for most failed outdoor tile jobs. First, using indoor-rated tile outside because it was on sale. Second, skipping slope and membrane prep, which lets water sit and freeze under the tile. Third, choosing a slick finish that becomes a hazard the first time it rains. Spend an extra hour confirming the absorption rating, DCOF, and freeze-thaw approval before you buy, and the rest of the project goes smoothly.
The Bottom Line
Quality outside tile turns a plain slab into an outdoor room that handles weather year after year. Match the material to your climate, insist on slip resistance, install over a properly sloped and protected base, and keep up with sealing. Do that, and your patio, walkway, or pool deck will outlast the furniture you put on it. When you are ready to compare specific lines, bring your climate zone and square footage to the conversation so you can size up the right product the first time.
Prefer to explore on your own?
See how new flooring looks in your actual room in seconds — free, no signup.
Try the free Floor Studio →