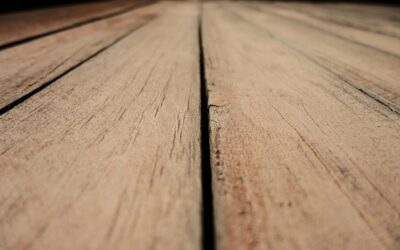
The gaps are where a deck finish job looks either crisp or sloppy. If you want to paint between deck boards, the trick is to coat the board edges and the first half inch down the sides without filling the gap itself. Clean the joints first, use a narrow brush or a dedicated gap tool to work coating into the edges, and immediately clear any drips or bridges so water can still drain through.
Part of our Decks & Outdoor guide — explore the full guide →
Those gaps are there on purpose. They let rain fall through, let air dry the boards from both sides, and give wood room to swell. Paint or stain that bridges a gap traps debris and water, which leads to rot along the board edges and peeling finish within a season or two.
This guide covers how to clean out the gaps, which tools actually reach into them, why some builders darken the tops of the joists, and how to finish the job without sealing your deck shut.
Why You Should Paint Between Deck Boards Carefully
When you only roll the top faces, the unfinished side edges show as bare stripes every few inches, especially with a solid color or dark stain. Those edges also absorb more water than the faces because end and side grain soak it up readily. Coating them evens out the look and slows moisture cycling, which reduces cupping and checking.
The flip side is overdoing it. Thick paint that pools in a 1/8- to 1/4-inch gap forms a skin that catches pine needles and dirt. Once packed, the gap stops draining, and the edges of the boards stay wet. So the goal when you paint between deck boards is coverage on the edges and a clean, open slot below.
Composite and PVC decking generally should not be painted at all unless the maker approves a specific coating, so this advice applies to wood decks: pressure-treated pine, cedar, redwood and tropical hardwoods.
Tools and Materials
- Putty knife, old saw blade or a purpose-made gap cleaning tool
- Shop vacuum or leaf blower
- Stiff deck brush and a garden hose or pressure washer on a low, wide fan
- Deck cleaner or brightener made for your wood type
- A narrow deck gap brush or a 1-1/2-inch angled sash brush
- Stain pad or roller on an extension pole for the faces
- Deck paint, solid stain or semi-transparent stain rated for horizontal surfaces
- Exterior flat black paint for joist tops (optional, new builds or re-decks)
- Nitrile gloves, safety glasses, a respirator if spraying, drop cloths
- A metal can with a tight lid for used rags
Step-by-Step: Cleaning and Coating the Gaps
- Clear the gaps. Drag a putty knife or gap tool down every joint to break up packed leaves and dirt. Vacuum or blow out the loose material. On a deck that has not been cleaned in years, this step alone may take an hour for 300 square feet, and it makes the biggest difference.
- Wash and brighten. Apply deck cleaner per the label, scrub with a stiff brush, and rinse, pushing water down through the gaps to flush out residue. If using a pressure washer, keep pressure low and the tip moving so you do not fur the wood or widen the joints.
- Let the wood dry. Most coatings want the wood dry to the touch and below about 15 percent moisture. Give it at least 48 hours of dry weather; the edges inside the gaps dry last.
- Cut in the edges first. Work two or three boards at a time. Dip only the tip of the narrow brush or gap tool, then drag it along the board edge so coating rolls over the corner and about 1/2 inch down the side. Do both sides of each gap.
- Coat the faces. Right behind the edge work, roll or pad the top faces while the edges are still wet so you avoid lap marks. Keep a wet edge along the full length of each board.
- Check for bridges. Look down each gap after every few boards. If a film spans the slot, run a putty knife or a clean dry brush through it immediately. Wet paint clears easily; dry paint needs to be cut out.
- Second coat if the product calls for it. Solid stains and deck paints often need two thin coats. Repeat the edge-then-face routine and clear the gaps again.
- Allow full cure. Keep foot traffic off for the time on the label, usually 24 to 48 hours, and furniture off for longer.
Black Paint on Joist Tops: The Builder’s Trick
Look down into the gaps of a well-built deck and you may notice you cannot see the joists. That is often because the tops of the joists were painted flat black or covered with dark joist tape before the decking went on. The dark surface disappears in shadow, so the gaps read as clean lines rather than showing strips of raw lumber.
Joist tape adds a second benefit: it sheds water from the joist top, where decking screws create entry points for rot. If you are re-decking or building new, taping or painting joist tops costs little and extends frame life. On an existing deck you can reach joist tops only through the gaps, so a thin brush dipped in black exterior paint can darken the visible strips, but do not expect it to protect the wood the way tape installed before decking would.
Keeping the Drainage Gaps Open
Gaps between boards should generally be about 1/8 to 1/4 inch once the wood has dried and settled; pressure-treated lumber installed wet often shrinks to that on its own. Never caulk, fill or deliberately paint over deck gaps to close them. If the gaps have closed because boards swelled, they may open again in dry weather. If they stay closed, running a circular saw set to the board thickness down the joint is a pro-level fix best left to someone experienced, because the blade can hit fasteners.
After each coating session and once or twice a year afterward, run a gap tool through the joints. Keeping them clear is the single easiest thing you can do to protect board edges.
Chemical and Fire Safety
Deck cleaners, brighteners and coatings can irritate skin, eyes and lungs. Work outdoors with good airflow, wear nitrile gloves and safety glasses, and use a respirator when spraying or working in enclosed spaces under a deck. Never mix cleaners or brighteners together, especially bleach-based products with acids or ammonia, because dangerous gases can form. Rinse plants nearby before and after cleaning.
Rags soaked in oil-based stain or paint can heat up and self-ignite as they dry. Lay used rags flat outdoors on a nonflammable surface until fully dry, or place them in a metal can filled with water and a tight lid, then dispose of them according to local rules. Never leave a pile of oily rags in a garage, shed or trash bag.
Troubleshooting
Paint dried inside the gaps
Score both sides of the film with a utility knife, then pull it out with a gap tool or putty knife. Touch up any scraped edges with a small brush.
Board edges are blotchy or light
Edges absorb more coating than faces. A second thin pass with the narrow brush usually evens them out; do not flood them to compensate.
Finish peeling along the edges after one winter
Often caused by coating wet wood or by gaps that stayed packed with debris. Strip or sand the loose finish, clean the gaps, let the wood dry thoroughly and recoat thinly.
Gaps look uneven after painting
Paint does not change board spacing, but drips on one side can make a gap look narrower. Clean drips while wet, and view the deck from a few feet away before worrying about small variations.
Cost Ranges and When to Call a Pro
For a DIY refinish of a typical 200 to 400 square foot deck, expect to spend on cleaner, a couple of gallons of coating, a gap tool, brushes and pads; totals commonly fall in the low hundreds of dollars depending on product quality. Hiring a deck refinishing contractor usually costs more per square foot, with gap cleaning, sanding and railing work raising the price. Heavy stripping of failed paint is the most labor-intensive and costly scenario.
Bring in a pro when boards are soft or rotted at the edges, when the frame needs repair, if you are dealing with a large multi-level deck, or when the old finish needs chemical stripping over a big area. A contractor can also assess whether boards should be replaced rather than recoated. For a sound deck, though, taking your time to paint between deck boards with the right brush and a clean gap tool is well within reach of most homeowners.
Frequently Asked Questions
Do you need to paint the sides of deck boards?
Coating the top edges and the first 1/2 inch of the sides gives a finished look and slows water absorption. You do not need to reach the full depth of the board.
What is the best tool for staining between deck boards?
A narrow gap brush or a small angled sash brush works best, used with only the tip loaded so you coat edges without filling the slot.
Should I fill the gaps between deck boards?
No. Gaps let water drain and air circulate. Filling them traps moisture and debris, which leads to rot and peeling.
Why are the joists painted black on some decks?
Dark joist tops disappear in the shadows of the gaps, creating clean lines. Joist tape applied before decking also sheds water from the joist tops.
How wide should gaps between deck boards be?
Roughly 1/8 to 1/4 inch after the wood dries, though exact spacing depends on the decking type and moisture content at install.