Most backyard cooks park a grill against the house, run out of counter space by the second batch of burgers, and spend every cookout walking trays back and forth through the patio door. A well-planned patio grill station fixes all of that — it gives you landing space for hot food, storage for tools and fuel, and safe clearances that keep siding from melting and guests out of the smoke. You can build one for as little as $300 with a prefab cart and some planning, or invest $6,000 to $15,000 in a masonry island that anchors the whole patio. Here is how to get the layout, surface, and budget right the first time.
- Start With the Location, Not the Grill
- The Work Triangle: Dimensions That Matter
- Surface and Base: What Goes Under the Station
- Three Ways to Build It: Cart, Prefab Island, or Custom
- Grill cart plus work table ($300 to $1,200)
- Modular or prefab island ($1,500 to $6,000)
- Custom masonry ($6,000 to $15,000+)
- Utilities: Gas, Power, and Water
- Gear and Storage That Earn Their Space
- Shade, Lighting, and Cooking Past Sunset
- Budget Reality Check
Start With the Location, Not the Grill
Placement decides whether you use the station three times a summer or three times a week. Keep the cooking zone within 20 to 30 feet of the kitchen door — every extra step matters when you are carrying a platter of raw chicken. At the same time, respect clearances: manufacturers and most fire codes call for at least 10 feet between an open-flame grill and combustible structures, and never position a grill under a roof overhang, pergola with a solid cover, or low tree canopy.
Study the prevailing wind before you pour anything permanent. Smoke should blow away from the seating area and away from open windows. In most of the US, summer winds come from the south or southwest, so putting the grill on the north or east edge of the patio keeps smoke off your guests. Finally, think about sight lines — cooks stay at the grill for 30 to 45 minutes at a stretch, and a station that faces a fence instead of the conversation is a station nobody enjoys manning.
The Work Triangle: Dimensions That Matter
Indoor kitchen design principles translate directly outdoors. Plan three zones: hot (the grill itself), cold (cooler, fridge, or beverage tub), and dry (prep and landing counter). The numbers that make a station comfortable:
- Landing space: Minimum 18 inches of counter on one side of the grill and 12 inches on the other. Serious cooks want 24 to 36 inches on the dominant side.
- Counter height: 36 inches standard, matching indoor counters. Go 38 inches if the primary cook is over 6 feet tall.
- Counter depth: 24 to 30 inches. Built-in grill heads need 27 to 30 inches of depth for most 36-inch models.
- Circulation: Keep 42 to 48 inches of clear walkway behind the cook so traffic can pass while the grill lid is open.
- Total footprint: A functional straight-run station fits in 8 to 10 linear feet. An L-shaped island with seating wants roughly 10 by 12 feet of patio.
Surface and Base: What Goes Under the Station
Grease, heat, and 400-pound islands are hard on patio surfaces. Poured concrete is the gold standard base — a 4-inch slab handles any prefab island, and grease stains can be ground or resealed. Concrete pavers rated for vehicular loads work well too, but set them on a compacted base of at least 4 inches of gravel plus bedding sand so a heavy island cannot settle unevenly. Avoid placing grill stations directly on wood or composite decking without a fire-resistant mat; grease fires drop embers, and many composite boards deform at temperatures a grill’s grease tray can reach. If a deck is your only option, use a grill mat rated to 500°F and keep a Class K or ABC extinguisher within reach.
Slope matters more than people expect. A patio that drains at the standard 1/4 inch per foot is fine, but check that the grill sits level side-to-side — burner performance and grease drainage both depend on it. Shim prefab carts; set masonry islands on a leveled slab from the start.
Three Ways to Build It: Cart, Prefab Island, or Custom
Grill cart plus work table ($300 to $1,200)
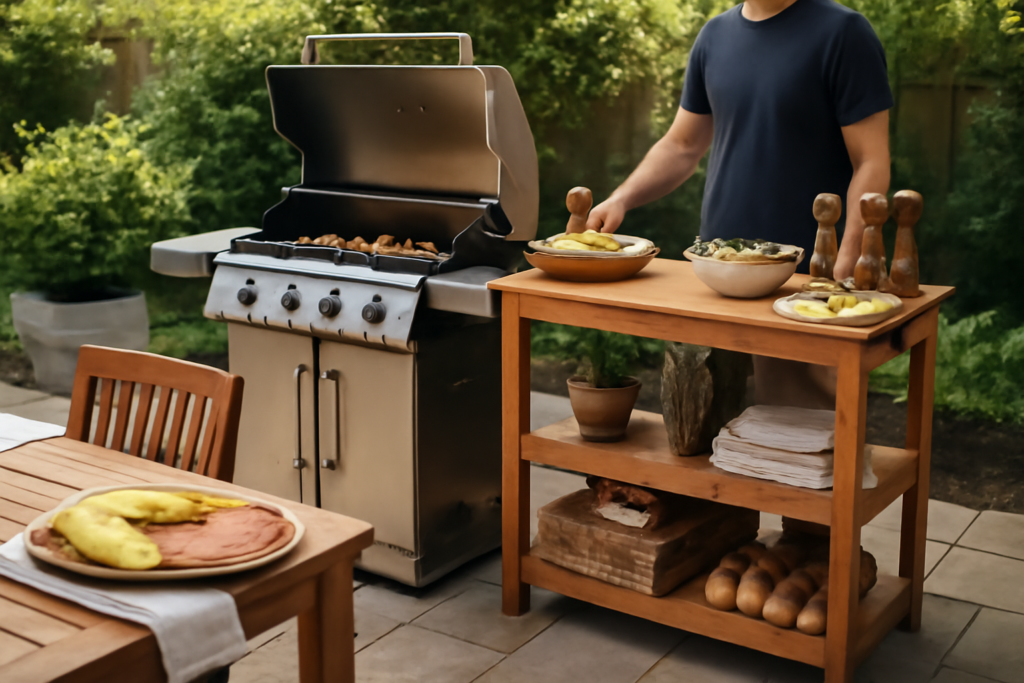
The budget route: a quality freestanding grill (Weber Spirit E-325 at around $649, or a Nexgrill for less) flanked by a stainless prep table. Restaurant-supply stainless tables run $120 to $250 for a 48-inch unit and outlast every consumer-grade option. Add a Keter or Suncast outdoor cabinet ($150 to $300) for tools and propane, and you have 90 percent of a built-in’s function at 15 percent of the cost — and you can rearrange it anytime.
Modular or prefab island ($1,500 to $6,000)
Companies like Char-Broil, KitchenAid, and NewAge sell modular island sections that bolt together — grill cabinet, side burner, storage, and counter modules. RTA (ready-to-assemble) panel systems ship on a pallet and assemble in a weekend with a drill. You get the built-in look without masonry trades, and most systems accept standard 30- to 36-inch drop-in grill heads.
Custom masonry ($6,000 to $15,000+)
Concrete block or steel-stud frame, cement board sheathing, and a stone or stucco finish with a granite or concrete counter. This is the route for built-in grill heads (Blaze, Bull, and Napoleon drop-ins run $1,200 to $4,000), outdoor-rated refrigerators, and gas piped from the house. Budget $80 to $130 per square foot of counter for granite and expect the project to need permits once gas and electrical are involved.
Utilities: Gas, Power, and Water
Running a natural gas line to the station costs $15 to $30 per linear foot installed and pays for itself if you grill more than once a week — no more propane runs, and fuel cost drops by roughly two-thirds. Any fixed gas line needs a licensed plumber and a permit in most jurisdictions. Add at least one GFCI-protected outdoor outlet at the station for rotisserie motors, pellet grill controllers, and blenders; an electrician will add a circuit for $200 to $500. Water is a luxury worth skipping in freeze-prone climates unless you are prepared to winterize a sink line every fall.
Gear and Storage That Earn Their Space
Outfit the station like a workstation, not a display. The pieces that get used every cookout: a stainless tool set with a real 16-inch spatula, an instant-read thermometer (Thermapen or the $35 ThermoPro alternative), a heavy cutting board reserved for outdoor use, and a grill light for anything cooked after 7 p.m. in September. Store propane upright, outdoors, and never in an enclosed cabinet without ventilation cutouts — prefab islands include vents for exactly this reason. A 20-pound propane tank runs a typical 3-burner grill for 18 to 20 hours of cooking, so keeping one spare on hand covers a whole season of weekend grilling.
Cover everything. A fitted grill cover ($40 to $90) doubles the life of stainless components, and covering the counters keeps pollen and grit off prep surfaces. In snow country, plan to shut off and drain gas and water lines by early November.
Shade, Lighting, and Cooking Past Sunset
Shade is the upgrade most people skip and regret by July. A cook standing over a 500°F grate in full afternoon sun quits early, and dark counters get hot enough to soften butter in minutes. A cantilever umbrella ($250 to $600) positioned upwind of the grill — never directly over it — solves the problem for most stations. For permanent setups, an open-slat pergola set at least 7 feet above the grill lid keeps the space usable while letting heat and smoke escape; solid roofs demand a vent hood rated for outdoor grills, which starts around $1,200 installed and is only worth it on true outdoor kitchens.
Lighting extends the season more than any other single purchase. A dedicated task light aimed at the grates — either a clamp-on grill light or a wall-mounted LED flood on the house — means October brisket does not get pulled early because you cannot read the bark color. String lights over the seating zone handle ambience, but keep at least one bright, color-accurate source at the cooking surface itself. Hardwire it to a switch by the door and it actually gets used.
Budget Reality Check
A sensible spending ladder: put the first dollars into the grill itself and the prep surface, because those touch every meal. Shade, lighting, and refrigeration come next. Decorative finishes come last. A $650 grill on a $200 stainless table under a $300 cantilever umbrella will out-cook a $12,000 island with a bargain grill head every single weekend. Build the patio grill station around how you actually cook — high-heat weeknight grilling wants maximum counter and minimum fuss, while low-and-slow weekend smoking justifies more storage, more shade, and a comfortable place for the cook to sit for six hours.