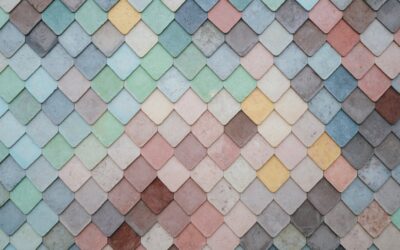
A plain grid of square tiles is safe, but it rarely makes anyone stop and look. Pattern floor tile is what turns a floor into a design feature, whether that pattern comes from the shape and layout of plain tiles arranged in herringbone or chevron, or from the printed designs of encaustic and Moroccan-style tiles. The right pattern can make a small entry feel like a jewel box, define a “rug” of color in an open kitchen, or give a bathroom the kind of character that gets remembered.
Part of our Tile & Grout guide — explore the full guide →
After laying patterned floors in everything from powder rooms to sunrooms, I have learned that pattern success is equal parts choosing the design and nailing the layout. Here is how to get both right.
Two Kinds of Pattern
It helps to separate the two ways a floor gets its pattern, because they involve different materials and skills.
The first is layout pattern, where plain single-color tiles or planks are arranged in a geometric configuration. Herringbone, chevron, basketweave, pinwheel, and running-bond all fall here. The tile itself is simple; the artistry is in the arrangement. The second is printed or inlaid pattern, where the design lives on the face of each tile. Encaustic cement tiles, patterned porcelain, and mosaic blends create their effect from the tiles’ own graphics, so even a plain grid layout looks intricate.
Popular Layout Patterns
These patterns use rectangular or square tiles and reward precise installation.
- Herringbone: Rectangles set at 45 or 90 degrees in an interlocking zigzag. Timeless, works in entries and kitchens, and hides minor size variation well.
- Chevron: Similar to herringbone but the planks are cut at an angle so the ends meet in a continuous V. Sharper and more formal, but demands precise miter cuts.
- Basketweave: Pairs of tiles alternating horizontal and vertical, classic in bathrooms and vintage-style spaces.
- Pinwheel (hopscotch): A small square framed by four larger squares; adds subtle movement without shouting.
- Diagonal: Standard squares rotated 45 degrees; the simplest way to make a small room feel wider.
Printed and Statement Patterns
When you want the floor to be unmistakably the star, printed tile delivers.
- Encaustic cement tile: Bold, matte, Old-World patterns in blues, blacks, terracotta, and greens. Stunning, but true cement tile is porous and must be sealed.
- Patterned porcelain: Printed to mimic encaustic and Moroccan designs with none of the sealing headache. My default recommendation for busy floors.
- Moroccan / Zellige-inspired: Intricate interlocking geometric motifs that read as artisanal and rich.
- Mosaic blends: Small tiles in mixed colors that form a pattern across the sheet, great for shower floors and accent zones.
Where Patterns Work Best
Scale is everything. A big, bold pattern can overwhelm a large open floor, while it feels perfectly balanced in a compact space. Entryways, powder rooms, mudrooms, and laundry rooms are ideal, because the small footprint keeps a strong pattern from becoming exhausting and the space becomes a delightful surprise.
In larger rooms, use pattern strategically rather than everywhere. Lay a patterned “area rug” of encaustic tile framed by plain field tile under a kitchen island, or run herringbone in a hallway that opens into rooms with plainer floors. Mixing a patterned zone with solid surrounding tile gives you drama without visual overload, and it costs less than tiling the whole space in premium patterned tile.
What Pattern Floor Tile Costs
Budget for both the tile and the extra labor, because patterns take longer to install.
- Plain porcelain for layout patterns: $3 to $9 per square foot for the tile.
- Patterned porcelain: $5 to $12 per square foot.
- Encaustic cement tile: $8 to $25 per square foot, plus sealer.
- Installation: Standard grid runs $7 to $14 per square foot installed; herringbone, chevron, and complex patterns add 20 to 50 percent to labor because of the extra cutting and layout time.
Buy 15 to 20 percent extra tile for pattern work, not the usual 10 percent, because angled cuts create more waste and you want enough from the same dye lot to match.
Layout: The Make-or-Break Step
A patterned floor lives or dies on the layout, so never start tiling from a wall. Find the room’s center by snapping two chalk lines corner to corner or measuring to the midpoints, then dry-lay the pattern from that center outward. This centers the design and pushes the cut tiles to the edges where they are least noticeable.
Plan the cuts at the perimeter and in doorways so you never end up with an awkward sliver against a prominent wall or a broken motif in the main sightline. With directional patterns like chevron and herringbone, decide which way the pattern points relative to the entry; running it toward the far wall or the window elongates the room. Dry-lay a full section before spreading any thinset; ten minutes of planning saves hours of regret.
Mixing Pattern With the Rest of the Room
A strong patterned floor needs breathing room above it, and this is where projects go wrong. When the floor carries a bold encaustic or Moroccan pattern, keep the walls, cabinets, and countertops simple and solid so the eye has somewhere to rest. Pile a busy patterned floor under a busy wallpaper and a veined marble counter, and the room feels chaotic no matter how beautiful each element is on its own. Let one surface be the star.
Layout patterns like herringbone and chevron are more forgiving because the tile color is usually solid, so they read as texture rather than graphic and pair comfortably with more decoration elsewhere. Pull one color from a patterned tile and repeat it in a towel, a rug, or a paint accent to tie the room together. And think about sightlines from adjoining rooms: a patterned floor that is visible from a hallway or open kitchen should relate to the flooring beside it, either by sharing a color or by being cleanly framed with a threshold or border tile.
Common Mistakes to Avoid
A few predictable errors trip up patterned-tile projects. Ordering too little tile is the biggest, because angled patterns generate 15 to 20 percent waste and a mid-job reorder rarely matches the original dye lot. Starting the layout from a wall instead of the room center leaves ugly slivers in the main sightline. And choosing a glossy patterned tile for a wet floor invites slips, so always confirm the DCOF rating for floor use.
Two more worth flagging: skipping the dry layout means you discover a broken motif or awkward cut only after the thinset is down, when it is too late to shift. And underestimating installation time and cost for patterns leads to sticker shock, since a herringbone or chevron floor can take nearly twice as long to set as a straight grid. Plan for the extra labor up front so the pattern you love does not blow the budget halfway through.
Grout, Finish, and Sealing
Grout color changes the whole read of a pattern. A contrasting grout, like dark grout with white tile, emphasizes the geometry and makes herringbone or basketweave pop. A matched grout softens the lines for a subtler, more seamless effect. For patterned porcelain, a mid-tone grout that picks up a color in the print usually looks most intentional.
Use a high-performance epoxy or urethane grout on any floor that sees water or heavy traffic, since it resists staining and never needs resealing. If you choose real encaustic cement tile, apply a penetrating sealer before grouting and again after, and reseal periodically; skipping this lets grout haze and stains soak permanently into the porous surface. Choose a matte or honed finish with a DCOF of 0.42 or higher for slip resistance on any floor, especially in wet rooms.
Get the scale right for the room, plan the layout from the center out, budget for the added labor of angled patterns, and finish with the right grout and sealer, and pattern floor tile will give you a floor with genuine character that looks custom and lasts for decades.
Prefer to explore on your own?
See how new flooring looks in your actual room in seconds — free, no signup.
Try the free Floor Studio →