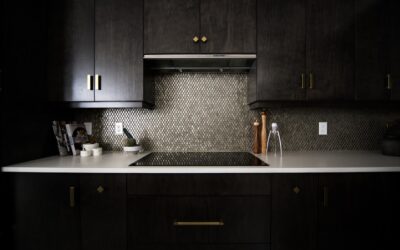
A blank stretch of wall between your countertop and upper cabinets is one of the biggest missed opportunities in a kitchen. Installing patterned backsplash tile turns that dead zone into the visual anchor of the entire room. After years of setting tile in kitchens across the country, I can tell you that a bold pattern does more heavy lifting than a fresh coat of paint or new cabinet hardware ever will. The right design ties your counters, cabinets, and flooring together and gives an ordinary kitchen a custom, high-end feel.
Part of our Kitchen Remodeling guide — explore the full guide →
The catch is that patterned tile rewards planning and punishes guesswork. Get the scale, color, and layout right and the wall looks intentional. Get them wrong and it reads as busy or dated within a few years. This guide walks through the most popular patterns, the materials that hold up, where to use them, and roughly what you should expect to pay.
Popular Patterns Worth Considering
Pattern is the first decision, and it drives everything else. Some designs come baked into a single printed tile, while others are created by how plain tiles are laid. Here are the styles I get asked for most often.
- Moroccan and encaustic: Bold, symmetrical motifs printed or inlaid into cement or porcelain. These are the show-stoppers, often in blue, terracotta, or black-and-white, and they read almost like a rug on the wall.
- Herringbone: Rectangular tiles set at a 45-degree zigzag. A 3-by-12-inch tile in herringbone feels modern; a small 1-by-3-inch mosaic feels classic. This is layout-driven, so you can use any solid tile.
- Chevron: Similar energy to herringbone but the tiles are cut to points so the pattern forms continuous V-shaped rows. Cleaner and more formal than herringbone.
- Spanish and geometric: Interlocking shapes such as hexagons, arabesque lanterns, or diamonds, often in a saturated glaze. Great for a Mediterranean or Southwestern look.
- Fish scale (scallop): Fan-shaped tiles that overlap like mermaid scales. Popular in soft greens and blues for a coastal or spa vibe.
- Penny round: Tiny 3/4-inch to 1-inch circles on mesh sheets. Mix two colors for a speckled effect or use one color with a contrasting grout for a vintage diner look.
Choosing the Right Material
The pattern gets the attention, but the material determines how the wall performs over a decade of splattered marinara and steam. Three materials cover the vast majority of jobs.
Cement (Encaustic)
True cement tile has the pattern pressed all the way through, so the design never wears off. It has a matte, slightly chalky beauty that porcelain can only imitate. The downside is that cement is porous and must be sealed before grouting and periodically afterward. Expect to pay $15 to $30 per square foot for genuine encaustic cement, and plan for a more involved installation.
Porcelain and Ceramic
Modern inkjet printing lets porcelain and ceramic mimic Moroccan, marble, and encaustic looks convincingly at a fraction of the price and maintenance. Porcelain is denser and more water-resistant, running roughly $5 to $15 per square foot. Ceramic is the budget-friendly choice at $2 to $8 per square foot, and for a backsplash that never sees foot traffic, ceramic durability is more than enough.
Where to Use Patterned Backsplash Tile
Deciding how much wall to cover is as important as the pattern itself. A full-height installation from counter to ceiling, or all the way up behind open shelving, makes a dramatic statement but can overwhelm a small kitchen if the pattern is loud. For a busy encaustic or Moroccan design, I usually recommend keeping it to the standard 18-inch band between the counter and upper cabinets.
An accent approach works beautifully too. Run a plain subway tile across most of the kitchen and reserve the patterned tile for the wall behind the range or the hood. That focal panel gives you the wow factor without the cost or visual noise of tiling every wall. Behind a range, make sure whatever pattern you choose is easy to wipe, since that zone takes the most grease.
Pairing Patterns With Cabinets and Counters
The single most common mistake I see is a patterned backsplash fighting a patterned countertop. If your counter is a heavily veined granite or quartz, choose a quieter tile, maybe a subtle geometric in one or two colors. If your counters are solid white quartz or plain butcher block, that is your green light for a bold Moroccan or Spanish pattern.
Cabinet color sets the palette. White or light gray shaker cabinets are a neutral canvas that handles almost any pattern. Deep navy or forest green cabinets pair best with a backsplash that pulls one accent color from the pattern and leaves the rest muted. A safe rule: let either the cabinets, the counter, or the backsplash be the star, never all three at once.
What Patterned Backsplash Tile Costs
Budgeting has two parts: the tile and the labor. Material prices swing widely by type. Here is a realistic range per square foot for the tile alone:
- Ceramic printed patterns: $2 to $8
- Porcelain patterns: $5 to $15
- Genuine cement encaustic: $15 to $30
- Handmade or imported Spanish tile: $20 to $40
Professional installation typically adds $10 to $20 per square foot, and intricate patterns like herringbone, chevron, or mosaics land at the top of that range because of the extra cutting and layout time. A typical 30-square-foot kitchen backsplash therefore runs anywhere from $360 for a simple ceramic DIY job to $1,800 or more for installed cement tile. Always order 10 to 15 percent extra for cuts, waste, and future repairs.
Cleaning and Sealing Your Patterned Tile
Glazed porcelain and ceramic are basically maintenance-free. Wipe them down with a soft cloth and a mild dish-soap solution, and skip abrasive pads that can dull the finish. The grout lines are where dirt collects, so a grout sealer applied once a year keeps them from graying.
Cement tile needs more attention. Seal it with a penetrating stone sealer before installation, again before grouting, and then reapply every 12 to 18 months. Never use acidic cleaners like vinegar on cement, as they etch the surface. For any patterned tile, a soft microfiber cloth and pH-neutral cleaner will preserve the color and sheen for decades.
Grout Color and Layout Tips
Grout is the unsung hero of a patterned wall. A matching grout, close to the tile color, lets the pattern flow uninterrupted and reads as seamless. A contrasting grout, such as charcoal against white penny rounds, turns the grid itself into a graphic feature. For most printed encaustic and Moroccan looks I steer clients toward a soft gray grout, since it hides everyday grime better than bright white and does not compete with the design.
Layout matters just as much. Always dry-lay a section on the counter first to see how the repeat falls, and center the pattern on your focal wall so partial tiles land at the edges rather than the middle. Snap a level chalk line for your first row instead of trusting the countertop, which is often slightly out of level. Ten minutes of planning here saves a crooked pattern you will notice every day.
DIY Versus Hiring a Pro
A straightforward mosaic or penny-round backsplash on mesh sheets is one of the most beginner-friendly tile projects there is. If you can measure, use a notched trowel, and cut a few tiles with a rented wet saw, you can likely handle a simple pattern over a weekend for the cost of materials plus around $100 in tools and thinset.
Bring in a pro when the pattern demands precision. Herringbone, chevron, and large-format encaustic layouts require dead-level starter lines, careful spacing, and clean miter cuts, and a small alignment error compounds across the wall. A professional also handles outlets, inside corners, and the transition to your countertop cleanly. For a durable, eye-catching result with patterned backsplash tile, weigh your comfort with a wet saw against the roughly $300 to $600 a pro charges in labor for an average kitchen. When in doubt, the pattern you fell in love with deserves a clean installation, and that peace of mind is often worth the extra cost.
Prefer to explore on your own?
See how new flooring looks in your actual room in seconds — free, no signup.
Try the free Floor Studio →