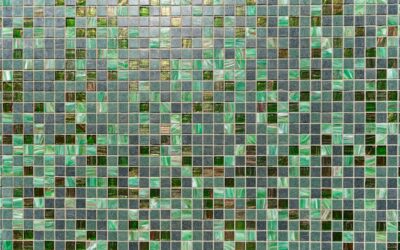
The promise is irresistible: the rugged look of natural stone with none of the mortar, grout, or professional install. Peel and stick stone tile lets you transform a backsplash or accent wall in an afternoon using nothing more than the adhesive already on the back. But the category hides a huge quality gap, from genuine thin-cut stone veneer to printed vinyl that only photographs like stone, and knowing the difference determines whether you love or regret the result.
Part of our Tile & Grout guide — explore the full guide →
- Two Very Different Products, One Name
- Real Stone Veneer: The Premium Option
- Printed Vinyl Tile: The Budget Look
- Where Peel and Stick Stone Tile Actually Works
- Honest Durability and Weight Limits
- Installation Tips for a Lasting Result
- Cost Compared to the Alternatives
- Maintenance and Cleaning
- The Bottom Line
Two Very Different Products, One Name
The biggest source of confusion is that “peel and stick stone tile” describes two completely different things at wildly different price points.
- Real stone veneer: thin slices of actual slate, quartzite, or marble mounted on a flexible backing with adhesive. This is genuine stone, with real texture, weight, and durability
- Printed vinyl or gel tile: a flexible plastic sheet with a photographic stone image and a raised texture. It mimics stone visually but is not stone at all
Both stick to the wall, but they perform nothing alike. Real stone veneer looks and feels authentic up close; printed vinyl reads convincingly from a few feet away but gives itself away under a hand or bright light.
Real Stone Veneer: The Premium Option
Peel-and-stick real stone panels use paper-thin sheets of natural stone, often quartzite or slate, split so thin they flex slightly. Because it is authentic stone, the color, sparkle, and texture are the real deal, and it holds up to heat and moisture far better than plastic.
The tradeoffs are cost and weight. Real stone veneer runs meaningfully more per square foot than vinyl, and even thin stone is heavier, which stresses the adhesive over large areas. It also cannot bend around tight inside corners, and cutting it requires a wet saw or grinder rather than scissors.
Printed Vinyl Tile: The Budget Look
Gel and vinyl peel-and-stick “stone” tiles are the inexpensive, DIY-friendly option flooding online marketplaces. They cut with scissors or a utility knife, weigh almost nothing, and cost a few dollars per sheet. For a rental refresh or a quick weekend upgrade, they are hard to beat on convenience.
Just be honest with yourself about the look. The texture is molded plastic, the “grout” lines are printed, and up close it will not fool anyone. In the right low-stakes spot, though, that is a perfectly acceptable trade for the price.
Where Peel and Stick Stone Tile Actually Works
Placement makes or breaks these products. They perform best on vertical, low-contact, dry-to-moderate surfaces:
- Kitchen backsplashes above the counter, away from constant water
- Accent and feature walls in living rooms, bedrooms, and offices
- Fireplace surrounds (keeping vinyl well away from direct heat)
- Rental updates where you need a look that is easy to remove later
They struggle in wet, hot, or high-traffic areas. Shower walls, floors, and behind a cooktop are risky, especially for vinyl, where heat and steam attack the adhesive.
Honest Durability and Weight Limits
This is where sellers stay quiet and buyers get surprised. The whole system depends on one thing: the adhesive bond to your wall. That bond is only as good as the surface prep and the weight it must hold.
- Surface matters: adhesive grips clean, smooth, sealed drywall or existing tile well, but fails on textured, dusty, or freshly painted walls
- Weight is a limit: real stone veneer is heavy enough that large installs can peel over time without extra construction adhesive as backup
- Heat and moisture degrade the bond: steam, temperature swings, and direct sun all shorten lifespan, particularly for vinyl
- Removal: vinyl usually peels off leaving residue; real stone often damages drywall on removal
Realistically, expect quality peel-and-stick to last several years in a good location, not decades. Treat it as a semi-permanent upgrade, not a lifetime finish.
Installation Tips for a Lasting Result
Preparation is everything. Wipe the wall with a degreasing cleaner and let it dry fully; kitchen walls carry invisible grease that kills adhesion. Prime glossy or porous surfaces if the manufacturer recommends it. For real stone veneer, back up the adhesive with a bead of construction adhesive on each panel. Start from a level line rather than the countertop, which is rarely straight, and press each tile firmly for the full recommended time. A hand roller improves the bond.
Cost Compared to the Alternatives
Price is a big part of the appeal, but the range is wide depending on which product you choose. Knowing the numbers helps you decide whether peel-and-stick is genuinely the value play or whether traditional tile makes more sense for your project.
- Printed vinyl/gel tiles: roughly $3 to $8 per square foot, the cheapest and most DIY-friendly option
- Real stone veneer peel-and-stick: often $10 to $25 per square foot, closer to mid-range tile pricing
- Traditional stone tile installed: $15 to $40 per square foot or more once you add mortar, grout, and labor
Factor in that peel-and-stick saves the labor of a professional tile install, which is where traditional tile gets expensive. For a small backsplash you can do yourself in an afternoon, the total cost difference is significant. For a large or permanent installation, though, the longer lifespan of real tile often makes it the better long-term value.
Maintenance and Cleaning
Once installed, peel-and-stick stone tile is generally low-maintenance, which adds to its appeal in kitchens and baths. Wipe printed vinyl tiles with a damp cloth and mild soap; their sealed surface resists grease and splashes well. Avoid harsh abrasive scrubbers that can wear through the printed layer over time.
Real stone veneer benefits from an occasional sealer, just like full-thickness natural stone, to protect against staining in a kitchen environment. Whichever product you have, keep an eye on the edges and seams over the months, since that is where peeling starts. Catching a lifting corner early and pressing it back down, or adding a dab of adhesive, prevents a small issue from spreading across the whole installation.
The Bottom Line
The right peel and stick stone tile can genuinely transform a wall in an afternoon, but only if you match the product to the job and set your expectations honestly. Real stone veneer looks authentic and lasts longer at a higher price and weight; printed vinyl is cheap and easy but reads as a look, not stone. Keep it on dry vertical surfaces, prep the wall properly, and you will get years of good service from a project you finished before dinner. Choose real stone veneer when authenticity matters and your budget allows, or printed vinyl when speed and cost win. Either way, the surface you bond it to and how carefully you prep it will determine whether the tile stays put or slowly peels, so never skip the cleaning and priming step.
Prefer to explore on your own?
See how new flooring looks in your actual room in seconds — free, no signup.
Try the free Floor Studio →