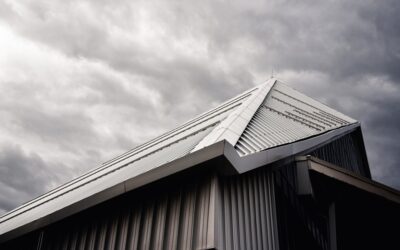
Most people who build an enclosed pole barn end up parking a truck, tractor or trailer outside of it within a year. That is why so many owners plan a pole barn with carport bays from the start: an open lean-to along one side gives covered parking for a fraction of the cost of more enclosed space, and it shares posts, trusses and a roofline with the main building.
The basic layouts are simple. You can add an open lean-to on one or both eave sides, include an open bay inside the main roofline, or build a gable-end overhang. Each choice affects post spacing, footing design and how the trusses or rafters carry wind and snow. Plan the carport section with the barn, get engineered trusses and drawings, call 811 before augering post holes, and confirm permits and setbacks first.
- Pole Barn With Carport Layout Options
- Post Spacing and Bay Layout
- Post Embedment and Footings
- Engineered Trusses and Rafters
- Permits, Setbacks and HOA Rules
- Tools and Materials
- Step-by-Step Build Sequence
- Wiring the Barn and Carport
- Troubleshooting
- Typical Cost Ranges
- When to Call a Licensed Professional
- Frequently Asked Questions
Adding a carport later is possible, but tying a lean-to into an existing barn requires checking that the original posts and footings can take the new load.
Pole Barn With Carport Layout Options
Eave-side lean-to
The most common layout. A shed-style roof extends from the eave of the main barn at a lower slope, supported by an outer row of posts. Lean-tos are typically 10 to 16 feet deep, enough for one vehicle length crossways or for a trailer parked along the wall. Two lean-tos, one on each side, give covered storage on both sides.
Open bay within the main roof
Leave one or two bays of the barn unenclosed. The roof and trusses stay continuous, so engineering is straightforward, and you can enclose the bay later with siding and a door if needs change. This works well when you want the carport height to match the barn.
Gable-end overhang or porch
Extending the roof past the gable end with a few extra posts creates a drive-through or porch-style cover. It suits narrow lots where side lean-tos would break setbacks.
Metal barn carports
Steel kits marketed as metal barn carports combine a tall center section with lower side lean-tos, all in tube or red-iron framing. They install on slabs or piers and are a cousin of the wood pole barn. Pole barn carport kits made of wood posts and steel roofing are also available, while a simple metal pole carport uses steel posts set in concrete.
Post Spacing and Bay Layout
Wood pole barns commonly use posts 8 to 12 feet on center along the eave walls. Lean-to posts often line up with the main barn posts so each lean-to rafter or truss lands on a main post. Typical considerations include:
- Vehicle access: a 12 foot post spacing gives a clear opening for most cars and trucks; 14 to 16 feet is easier for tractors and trailers, but needs a heavier header or beam.
- Clear height: plan at least 9 to 10 feet under the lean-to beam for pickups and 12 feet or more for equipment and campers. Remember the lean-to roof slopes down, so the outer edge is the lowest point.
- Roof slope: metal roofing typically needs a minimum slope set by the panel maker, often 1 in 12 to 3 in 12 for lean-tos. Too flat and water backs up at laps.
- Snow sliding: snow can slide off the main roof onto the lean-to. The lean-to must be designed for that drift and impact load in snow regions.
Post Embedment and Footings
Pole barns get their strength from posts embedded in the ground. Typical practice, which your engineer will refine, looks like this:
- Embedment depth: often 4 to 6 feet, and always below the local frost line. Taller buildings and high-wind areas may require deeper embedment.
- Post material: pressure-treated posts rated for ground contact, or glulam columns with treated lower sections. Some builders use concrete piers with wet-set brackets so the wood stays above grade.
- Footing pad: a concrete pad or precast footing at the bottom of each hole spreads the load and prevents settling. Typical diameters are 16 to 24 inches, depending on soil bearing capacity.
- Uplift resistance: concrete collars, uplift cleats or rebar through the post bottom keep the building from lifting in high wind.
- Backfill: compacted gravel or concrete, per the drawings.
Before augering a single hole, call 811. Pole barns often sit near buried electric service, water lines or septic components, and a power auger can hit a line in seconds. Septic tanks and drain fields also need clear setbacks; never dig over a drain field.
Engineered Trusses and Rafters
Order engineered trusses designed for your building width, spacing, roof pitch and local loads. The truss supplier provides drawings showing bracing and connections. For the lean-to, the designer will specify rafters or lean-to trusses, the ledger or connection to the main posts, and the outer beam size. Key points:
- Never cut, notch or modify engineered trusses without the designer’s approval.
- Install permanent lateral and diagonal bracing exactly as shown on the drawings.
- Use hurricane ties or truss clips at every bearing point.
- Purlins at the spacing called for, often 24 inches on center, support the metal roof panels.
Lifting trusses onto tall posts is dangerous. Many crews use a lift or crane, and nobody should stand under a truss being raised. Ladder and scaffold work at eave heights of 12 feet or more calls for fall protection.
Permits, Setbacks and HOA Rules
Agricultural exemptions exist in some rural areas, but most residential pole barns need a building permit. Ask your building department about:
- Required wind speed and ground snow load
- Setbacks from property lines, the house and septic systems
- Maximum height and size for accessory buildings
- Whether the open carport section counts toward lot coverage
- Inspections of post holes before backfill
If you are in a subdivision, HOA covenants may limit barn size, colors and siding. Get approvals in writing before you buy materials.
Tools and Materials
- Post hole digger or tractor auger (rent a powered auger for many holes)
- Ground-contact treated posts or glulam columns
- Concrete or precast footing pads, uplift cleats, gravel
- Engineered trusses, lean-to rafters, beams and girts
- Metal roofing and siding panels, closures, trim and screws
- Laser level or transit, string lines and batter boards
- Lift or scaffold, harness, safety glasses and gloves
A manual post hole digger works for a few lean-to posts in soft soil, but a powered auger saves days on a full barn.
Step-by-Step Build Sequence
- Finalize the layout with drawings that show the barn and carport section together.
- Pull permits and confirm setbacks.
- Call 811 and wait for utility marks.
- Set batter boards and string lines; square the layout by matching diagonals.
- Auger holes, set footing pads, then set and plumb posts with temporary bracing.
- Pass any required hole inspection, then backfill.
- Install headers and girts, then raise trusses and lean-to rafters with bracing.
- Install purlins, roofing and flashing where the lean-to meets the main wall.
- Add gutters or a gravel drip edge to protect post bases.
- Pour a slab or gravel floor in the carport section.
Wiring the Barn and Carport
Lights over the carport bay and outlets for tools or chargers make the space far more useful. Running power to an outbuilding means a feeder, a subpanel and grounding, which is work for a licensed electrician with a permit. Outdoor and damp-location receptacles need GFCI protection. For any fixture replacement on an existing circuit, turn off the breaker and confirm power is off with a non-contact voltage tester first.
Troubleshooting
- Leaks at the lean-to joint: add or redo the transition flashing between the main wall and lean-to roof; use foam closures under panel ribs.
- Posts rotting at grade: keep gravel or concrete sloping away and use posts rated for ground contact.
- Sagging lean-to beam: add a mid-span post or upsize the beam per engineering.
- Condensation dripping: use roof panels with condensation control or add ventilation in the enclosed section.
Typical Cost Ranges
Lean-to carport bays are usually the cheapest square feet in a pole barn with carport space because they have no walls or doors. Typical costs depend on region, materials and labor; adding a 12 foot lean-to along a 40 foot barn often costs a fraction of enclosing the same area. Engineering, permits, site prep and concrete add to the budget. Treat any number as a typical range and get written quotes.
When to Call a Licensed Professional
For any pole barn with carport bays, hire a licensed builder or engineer for truss design, footing sizing and any lean-to added to an existing barn. Truss raising and high roof work are best handled by an experienced crew with lifts. A licensed electrician should handle feeders, subpanels and new circuits, and the building department will tell you which inspections are required.
Frequently Asked Questions
How deep should pole barn posts be set?
Typically 4 to 6 feet and below the frost line, with a footing pad at the bottom. Your engineered drawings set the exact depth.
Can I add a carport lean-to to an existing pole barn?
Yes, but have a builder or engineer confirm the existing posts, footings and trusses can carry the new load, including snow sliding off the main roof.
How wide should a pole barn carport bay be?
A 12 foot post spacing fits most cars and trucks. Use 14 to 16 feet for tractors, trailers and campers, with a properly sized header.
Do I need engineered trusses for a lean-to?
Engineered trusses or designed rafters are strongly recommended and often required for permits, since they are sized for your local wind and snow loads.
Is a steel barn carport better than wood?
Steel resists rot and insects and installs quickly on slabs, while wood pole barns are easy to modify and finish. Choose based on budget, climate and future plans.