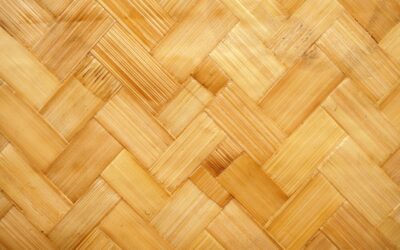
Porcelain tile that looks like wood has quietly become one of the most requested materials I install, and for good reason. It delivers the visual warmth of oak, walnut, or hickory while shrugging off water, scratches, and pet claws that would destroy real hardwood. Homeowners get the look they want in kitchens, bathrooms, and basements where solid wood simply cannot survive. If you have been torn between the beauty of hardwood and the practicality of tile, this is the compromise that usually ends the debate.
Part of our Tile & Grout guide — explore the full guide →
Why Wood-Look Porcelain Outperforms Real Hardwood
Real hardwood is gorgeous, but it hates moisture. A dishwasher leak or a humid bathroom will cup and crown planks within months. Porcelain has a water absorption rate under 0.5 percent, which is why it can go in a shower surround, a mudroom, or a walk-out basement without a second thought. You get the grain, the knots, and the color variation of timber with none of the seasonal expansion headaches.
Durability is the other selling point. Fired at roughly 2,200°F, porcelain is denser and harder than ceramic, earning a PEI rating of 4 or 5 on most wood-look lines. That means it stands up to a busy household with dogs, kids, and dropped cast-iron pans. I have pulled up hardwood floors after ten years that looked exhausted; wood-look porcelain from the same era often still looks new.
Plank Sizes and Formats
The single biggest factor in how convincing the tile looks is its shape. Early wood-look tile came in stubby 6×24-inch planks that read as tile. Today the realistic options are longer and narrower, mimicking actual board proportions.
- 6×36 and 8×48 inches — the most popular residential formats, closely matching real plank ratios
- 9×60 inches — dramatic, high-end look for open-concept spaces
- 6×24 inches — budget-friendly but reads more like tile than wood
Longer planks mean fewer grout lines and a more seamless illusion, but they also demand a flatter subfloor. Any hump over 1/8 inch across a 10-foot span will cause lippage where plank corners lift proud of their neighbors.
Getting the Grout Right
Grout can make or break the wood illusion. Choose a color that matches the darkest tone in the tile so the joints disappear into the plank shadows. A gray plank with white grout looks like tile every time. I steer clients toward unsanded or fine-sanded grout in joints of 1/8 to 3/16 inch, kept as tight as the tile’s rectified edges allow.
Rectified tile, which is mechanically ground to a precise size, lets you run grout lines as narrow as 1/16 inch. That tight joint is the single best trick for convincing anyone the floor is real wood. Pressed-edge tile needs slightly wider joints because the sizes vary more from piece to piece.
The Offset Question
Here is a mistake I see constantly. People assume they should stagger wood-look planks in a 50 percent brick pattern, just like real hardwood. With long porcelain planks, that is risky. Because tiles bow slightly in the center during firing, a 50 percent offset places the high center of one plank against the low end of the next, creating lippage.
The Tile Council of North America recommends a maximum offset of 33 percent, or roughly one-third, for planks longer than 18 inches. Following that guideline keeps your floor flat and your corners aligned. A one-third or random offset also looks more natural than a rigid running bond.
What It Costs
Material pricing for porcelain tile that looks like wood spans a wide range depending on brand and quality:
- Budget lines: $2 to $4 per sq ft
- Mid-range: $4 to $7 per sq ft
- Premium designer collections: $8 to $15 per sq ft
Professional installation typically adds $6 to $12 per sq ft, and often more for long planks that require extra layout care and leveling. Budget an additional $1 to $2 per sq ft for thinset, grout, and a self-leveling underlayment if your subfloor needs it. All-in, a 300 sq ft room usually lands between $3,000 and $6,000 installed.
Installation Details That Matter
Beyond flat subfloors and correct offset, a few technical points separate a professional job from a callback. Use a large-format tile mortar rated for the plank size, and back-butter each piece to guarantee full coverage. Voids under long planks are the number one cause of cracked tile down the road.
A leveling clip system, running about $30 to $50 for a room’s worth of clips and wedges, is money well spent. These clips hold adjacent planks flush while the mortar cures, eliminating lippage. On a wood-look floor where the eye expects a perfectly smooth surface, even a 1/32-inch height difference between planks catches light and gives the tile away.
Where It Shines and Where to Pause
I recommend wood-look porcelain almost anywhere a homeowner wants hardwood but faces moisture, heavy traffic, or radiant heat. It pairs beautifully with in-floor heating because tile conducts warmth efficiently and will not dry out. Bathrooms, kitchens, laundry rooms, entryways, and basements are ideal.
The one honest drawback is underfoot feel. Tile is harder and colder than wood, so a bedroom or a home office where you stand for hours may benefit from a rug or, better yet, radiant heat beneath the tile. If that hardness concerns you, walk on a sample in a showroom before committing. For most of my clients, the trade-off is easy given how good these floors look and how long they last.
Final Recommendation
If you want the hardwood aesthetic without the maintenance anxiety, porcelain tile that looks like wood is the smartest flooring on the market today. Prioritize longer rectified planks, match your grout to the tile, keep your offset under one-third, and invest in a leveling system. Do those four things and even a seasoned installer will have to touch the floor to be sure it is not real timber.
Grout and Layout for a Realistic Look
Getting wood-look porcelain to actually read as wood comes down to grout and layout. Choose a grout color that closely matches the plank tone so the joints disappear into the flooring rather than drawing a visible grid. Keep the grout lines as narrow as the tile allows, and follow the manufacturer’s recommended offset, often a one-third stagger rather than a 50 percent brick pattern, since large plank tiles set at half-offset can rock on the high center of the tile below. Mixing planks from several boxes as you go avoids a repeating pattern of identical faces, which is the giveaway of a fake wood floor.
Prefer to explore on your own?
See how new flooring looks in your actual room in seconds — free, no signup.
Try the free Floor Studio →