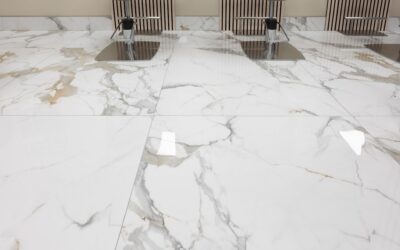
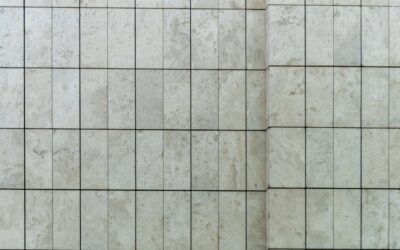
When a client wants a floor that reads clean and modern, I show them big porcelain tiles. Large-format tile has changed how homes look over the past decade, trading the busy grid of small squares for expansive, seamless surfaces with just a few thin grout lines. The result feels more like a poured slab of stone than a tiled floor, and it makes rooms look bigger. But the payoff comes with real demands on the subfloor and the installer, and that is where many DIY jobs go sideways.
Part of our Tile & Grout guide — explore the full guide →
I have set thousands of square feet of large-format tile, and the projects that turn out beautiful all share the same discipline in prep and technique. Here is everything a homeowner should understand before ordering pallets of oversized tile.
- What Counts as a Big Porcelain Tile
- Why Homeowners Love the Large-Format Look
- The Subfloor Is Everything
- Installation Techniques That Prevent Failure
- Cutting Oversized Porcelain
- What Big Porcelain Tiles Cost
- Grout Choices for a Seamless Look
- Common Questions Homeowners Ask
- Where They Work and Where I Pause
- The Bottom Line
What Counts as a Big Porcelain Tile
The tile industry generally defines large-format as any tile with at least one side 15 inches or longer. In practice, the big porcelain tiles I install most often are 12×24, 24×24, 24×48, and increasingly the giant 48×48 and gauged porcelain panels that run 5×10 feet. Those panels are technically porcelain slabs, only 6 to 12 millimeters thick, used for floors, walls, and even countertops.
Porcelain is the material of choice at these sizes because its dense, vitrified body resists moisture and stays dimensionally stable. That stability is critical: a large tile has more surface area to telegraph any flex or unevenness underneath, so the material itself needs to hold flat.
Why Homeowners Love the Large-Format Look
The appeal is mostly visual, and it is significant. Fewer grout lines mean fewer interruptions for your eye, which makes a space feel more open and less cluttered. Grout is also the part of any tile floor that stains and needs upkeep, so minimizing it cuts long-term maintenance.
Big porcelain tiles also shine with today’s marble-look and concrete-look designs. High-definition inkjet printing lets a single large tile carry a sweeping vein pattern that would be chopped up on small tiles. Lay several together and the veining flows across the room like a genuine stone slab at a fraction of the cost of natural marble.
The Subfloor Is Everything
Here is the hard truth I give every homeowner: big tiles are far less forgiving than small ones. A small tile can bridge a minor dip in the floor. A 24×48 tile cannot, and it will either rock, crack, or show ugly lippage where one edge sits higher than its neighbor.
The industry standard for large-format is a subfloor flat to within 1/8 inch over 10 feet, and no more than 1/16 inch over 2 feet. That is tighter than standard tile. Most floors need a self-leveling underlayment or a mortar float to hit it. I always run a straightedge across the whole area and mark the low spots before I mix a drop of thinset. Skipping this step is the single biggest cause of failed large-format installs.
Installation Techniques That Prevent Failure
Setting big porcelain tiles correctly comes down to coverage, leveling, and the right layout approach:
- Use a large-format notched trowel. A 1/2 inch by 1/2 inch square-notch trowel, or a special LFT trowel, lays down enough mortar to fully support the tile.
- Back-butter every tile. Combined with troweled mortar on the floor, this achieves the 80 to 95 percent coverage the standards require for large tile in wet or exterior areas.
- Comb the mortar in straight lines and flatten the ridges. This lets air escape and prevents hollow voids that crack under point loads.
- Use leveling clips and wedges. These anti-lippage systems hold adjacent edges flush while the thinset cures, which is nearly impossible to do by eye on big tile.
- Limit offset to a third. Never lay large planks in a 50 percent brick pattern. Tiles have a slight center crown, and a half offset stacks the high center of one tile against the low end of the next, guaranteeing lippage. Stagger 33 percent or less.
Cutting Oversized Porcelain
You cannot snap a big porcelain tile on a standard score-and-snap cutter. The dense body and long cut lines demand a proper wet saw with a continuous-rim porcelain blade, and ideally a rail saw or bridge saw for the larger panels. For the 5×10 slabs, installers use special scoring tools, suction cups, and a two-person carry frame because a single panel can weigh over 100 pounds and cracks if flexed. This is where DIY ambitions usually meet their limit, and it is fair to bring in a pro for the panel-size work.
What Big Porcelain Tiles Cost
Material and labor both run higher than standard tile:
- Standard large-format (12×24, 24×24): $4 to $9 per square foot for the tile.
- Extra-large (24×48, 48×48): $7 to $15 per square foot.
- Gauged porcelain panels (5×10): $10 to $25+ per square foot.
- Installation labor: $9 to $20 per square foot, more for panels, because of the leveling prep and specialized handling.
Factor in self-leveler if your subfloor needs it, usually $1.50 to $3 per square foot in material plus labor. All told, a professionally installed large-format floor commonly runs $18 to $35 per square foot, with panel installs going higher.
Grout Choices for a Seamless Look
Part of the appeal of big porcelain tiles is minimizing grout, and the color choice finishes the effect. For a monolithic, poured-slab look I match the grout as closely as possible to the tile’s dominant tone. A gray concrete-look tile gets a matching medium-gray grout, and a white marble-look tile gets a bright white or off-white. That makes the few grout lines you do have nearly disappear.
If you want a subtle plank or grid definition, a grout one shade off from the tile gives just enough separation without drawing a hard grid. I steer clients away from strong contrast grout on large-format floors because it fights the seamless quality that made them choose big tiles in the first place. Use a quality stain-resistant or single-component grout so those minimal lines stay clean for years.
Common Questions Homeowners Ask
Two questions come up on nearly every large-format job. First, can big tiles go over an existing floor? Sometimes, but only if the existing surface is dead flat, sound, and properly prepped or covered with an uncoupling membrane. Given how flatness-sensitive these tiles are, I usually prefer to start from a clean, leveled subfloor.
Second, do big tiles crack more easily than small ones? Not when they are installed right. A large tile fully supported by mortar on a flat, rigid subfloor is extremely strong. Cracks come from voids under the tile, subfloor movement, or deflection in the joists, not from the tile size itself. Get the base right and the tiles last as long as any floor in the house.
Where They Work and Where I Pause
Big porcelain tiles excel in open-concept living areas, large kitchens, spacious bathrooms, and modern entryways where the seamless look pays off. On walls, gauged panels create dramatic full-height shower surrounds with almost no grout lines.
I pause before recommending them for small, choppy rooms cut up with lots of cabinets, closets, or angled walls. In tight spaces you end up cutting the big tiles down so much that you lose the whole benefit while paying the premium. A small powder room usually looks better with a mid-size tile. Match the tile scale to the room scale.
The Bottom Line
Big porcelain tiles deliver a high-end, seamless floor that makes rooms feel larger and cuts down on grout maintenance. The look is worth it, but only if the subfloor is dead flat and the install uses full coverage, leveling clips, and a proper offset. Budget for professional prep and setting, choose the tile scale to fit your room, and you will end up with a floor that looks like poured stone and lasts for decades.
Prefer to explore on your own?
See how new flooring looks in your actual room in seconds — free, no signup.
Try the free Floor Studio →