Walk into a modern showroom kitchen and the floor almost always reads the same way: fewer seams, cleaner lines, a surface that feels expansive instead of busy. That look comes from big floor tiles, the large-format porcelain and stone slabs that have quietly pushed the standard 12×12 out of most new builds. If you are tired of scrubbing a grid of grout lines every weekend or you want a small room to feel bigger, going large is one of the highest-impact flooring decisions you can make. It also changes how the job gets installed, so it pays to understand what you are signing up for.
What Counts as a Big Floor Tile?
In the trade, anything with at least one edge of 15 inches or longer is technically “large format.” In practice, homeowners shopping today are looking at 12×24, 18×18, 24×24, and the increasingly common 24×48 plank tiles that mimic wide-plank hardwood. Push further and you enter true gauged porcelain panel territory, where a single sheet can measure 48×110 inches and only 6 millimeters thick. Most residential projects land somewhere between 12×24 and 24×48, which balances the dramatic look against the practical realities of getting the tile up a staircase and onto a subfloor without cracking it.
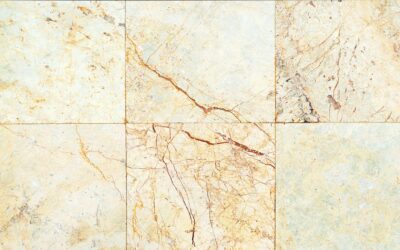
The material underneath the size matters just as much. Porcelain dominates the large-format world because it is dense, low-absorption, and fires flat enough to stay true across a long edge. Natural stone like marble, travertine, and limestone also comes in big formats, but stone is heavier, more porous, and more prone to warping, so it demands a flatter subfloor and sealing.
Why Homeowners Choose Big Tiles
The visual payoff is the headline reason. A 24×24 tile has roughly a quarter of the grout lines of a 12×12 across the same floor, so the eye reads a continuous plane instead of a checkerboard. In a compact bathroom or galley kitchen, that continuity tricks the brain into perceiving more square footage. Designers lean on the same principle when they run the same large tile up a shower wall and across the floor for a seamless wet-room effect.
Maintenance is the practical reason. Grout is the weak point of any tile floor: it stains, it harbors mildew, and it is the first thing to look dated. Cut the number of joints by 60 to 75 percent and you cut your cleaning time and your long-term grout-refresh headaches by a similar margin. Fewer joints also means fewer places for water to sneak through, which is why big porcelain is a favorite for open-concept main floors.
Costs: What to Budget
Large-format tile spans a wide price range, but here are realistic 2026 numbers to plan around. Entry-level big porcelain runs about $2 to $4 per square foot at the big-box stores. Mid-grade wood-look and concrete-look planks land around $4 to $8. Designer and stone-look porcelain, plus real marble, climbs to $10 to $25 or more. Add these to your budget:
- Installation labor: $8 to $15 per square foot, higher than small tile because big pieces are harder to set flat.
- Leveling clips and wedges: $30 to $80 for a room-sized kit; nearly mandatory for large format.
- Self-leveling underlayment: $1 to $2 per square foot if your subfloor is out of plane.
- Large-notch trowel and thinset: plan on more mortar per square foot than small tile uses.
All in, a professionally installed big-tile floor typically costs $12 to $30 per square foot. The labor premium is real, but you are buying a floor that looks high-end and stays that way.
The Installation Reality: Flatness Is Everything
Here is the part contractors wish more homeowners understood before falling in love with a 24×48 plank. Big tiles are unforgiving of an uneven subfloor. The industry standard tightens as tiles grow: for tiles 15 inches or longer, the subfloor must be flat within 1/8 inch over 10 feet. A dip that a 12×12 tile would bridge without complaint will cause a big tile to rock or leave a “lippage” edge you can catch with a bare toe.
That is why a tile leveling system is close to mandatory. Clips and wedges pull adjacent tiles into the same plane while the thinset cures, holding lippage under the 1/32-inch that walks the fine line between acceptable and annoying. Pros also back-butter every large tile, meaning they spread thinset on the back of the tile in addition to the floor, to guarantee full coverage. A void under a big tile is a future crack waiting for the wrong footstep or dropped pan.
Grout Lines and Layout Choices
Big tile does not mean no grout. A minimum joint of 1/8 inch is still recommended because large-format tiles have slightly more edge variation than their size suggests. Fashionable ultra-thin joints of 1/16 inch look sleek but leave no room for the tile’s natural size tolerance, so most installers steer you to 1/8 or 3/16 inch. Choose a grout color close to the tile for the most seamless result, or contrast it if you want the grid to read as a design feature.
Layout matters too. The old rule of offsetting rectangular tiles by 50 percent in a running bond pattern actually backfires with large format. Because long tiles bow slightly in the middle, a 50 percent offset drops each tile’s high center against its neighbor’s low corner and amplifies lippage. Set the offset at 33 percent or less, or run them in a straight stack, and the floor lays much flatter.
Where Big Tiles Work Best
Open-plan kitchens and living areas are the sweet spot, where an uninterrupted expanse of large tile reads as intentional and luxurious. Bathrooms and showers benefit from the reduced grout and easier cleaning. Entryways and mudrooms take advantage of porcelain’s near-zero water absorption and scratch resistance. Big wood-look planks are a durable alternative to real hardwood in basements and over radiant heat, where they will not swell or fade.
Smaller, chopped-up rooms with lots of jogs and closets are the tougher call, because every cut around an obstacle wastes an expensive tile and adds a fussy seam. In those spaces the math sometimes favors a medium format like 12×24.
Care and Maintenance
Once installed, big porcelain floors are famously low effort. Sweep or dry-mop to keep grit from dulling the surface, and damp-mop with a neutral pH cleaner as needed. Skip oil soaps and waxes, which leave a film that clouds the finish. If you chose natural stone, seal it on install and re-seal every one to two years to keep spills from staining. The handful of grout lines you do have will still benefit from a periodic scrub and a grout sealer, but with so few of them the job is finished before the mop water cools.
Is Large Format Right for You?
Big floor tiles reward homeowners who want a modern, low-maintenance surface and are willing to invest a little more in subfloor prep and skilled labor. If your subfloor is reasonably flat, your rooms are open, and you value fewer grout lines, large format is one of the best-looking, most durable floors you can buy. If your budget is tight or your space is chopped into small rooms, a mid-size tile may serve you better. Either way, insist on a leveling system and a flat substrate, and your big tiles will lie perfectly for decades.
Prefer to explore on your own?
See how new flooring looks in your actual room in seconds — free, no signup.
Try the free Floor Studio →