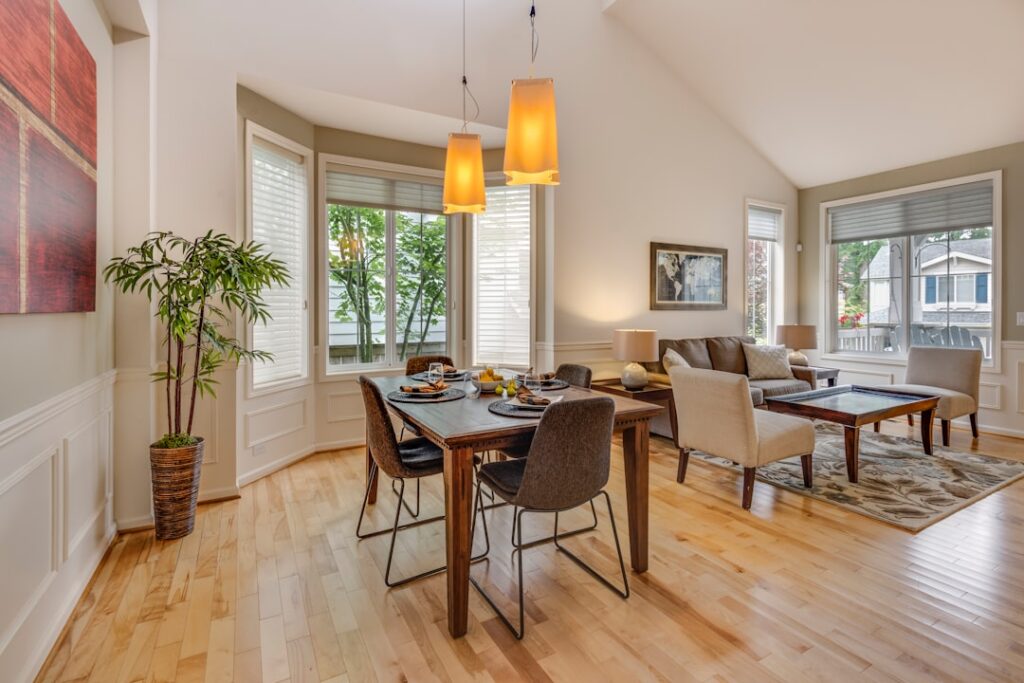
Most homeowners who plan a wainscoting project underestimate one thing: layout time. Measuring, cutting and spacing dozens of rails, stiles and panel moldings so every box lines up can eat an entire weekend before any paint goes on. Pre made wainscoting panels solve that problem by arriving with the rails, stiles and recessed or raised fields already machined into a single sheet or a set of interlocking sections.
The short answer: kits are the better choice for a standard dining room, hallway or bathroom with straight walls and few interruptions. You get consistent reveals, faster installation and a predictable budget. Building from scratch still wins in rooms with odd ceiling heights, many windows, stair runs or a design you cannot find in a catalog. A site-built look also lets you match existing millwork exactly in an older house.
- What Pre Made Wainscoting Panels Are and How They Differ From Site-Built Trim
- Panel Types: MDF, PVC, Wood and Beadboard
- Cost and Time: Kits vs Building From Scratch
- Tools and Materials You Will Need
- How to Install Wainscoting Panels Into Studs With Adhesive
- Controlling Cutting Dust and Working Safely
- Troubleshooting Common Problems
- When to Call a Pro
- Frequently Asked Questions
Either route can look like custom carpentry if the panels are anchored firmly, the seams are caulked and the paint is applied well. We compare the panel types, costs and labor, then walks through installation step by step.
What Pre Made Wainscoting Panels Are and How They Differ From Site-Built Trim
Prefabricated wainscoting panels are factory-made sections that recreate the look of traditional frame-and-panel woodwork. Instead of nailing up a flat backer and then layering rails, stiles and molding on top, you install one piece that already carries the profile. Most kits include a matching cap rail and baseboard, or at least a recommended profile, so the top and bottom edges finish cleanly.
These are different from peel-and-stick faux products. Faux wainscoting panels made of thin vinyl or foam rely on adhesive alone and sit nearly flush with the drywall. A real panel kit is usually 3/8 to 3/4 inch thick, carries a shadow line you can actually see, and is fastened mechanically into framing. That depth is what makes the wall read as woodwork from across the room.
Site-built wainscoting, by contrast, is assembled piece by piece. You cut each stile to length, space them by hand, and add panel moldings inside each box. It takes longer, but every dimension is yours to decide.
Panel Types: MDF, PVC, Wood and Beadboard
Material choice affects price, durability and which rooms the panels can go in. Here is how the common options compare:
- MDF (medium-density fiberboard): The most popular choice for living spaces. It machines cleanly, takes paint beautifully and costs less than solid wood. It swells if it gets wet, so avoid it in full bathrooms, laundry rooms and mudrooms unless it is a moisture-resistant grade and well sealed.
- PVC or cellular vinyl: Fully waterproof, so it handles bathrooms, basements and entryways. It is slightly softer and can show dents, and it expands and contracts with temperature, so leave the gaps the instructions call for.
- Solid wood or wood veneer: The premium option, usually prefinished or stain-grade. Beautiful for libraries and dens, but it moves with humidity and costs the most.
- Beadboard sheets: Vertical grooved panels that suit cottages, farmhouses and bathrooms. They are simple to install and very forgiving of slightly out-of-plumb walls.
Style matters too. Shaker wainscoting panels have a flat recessed field with square edges and fit modern and transitional rooms. Raised panel kits have a beveled center field and feel more formal. Tall wainscoting panels, often 48 to 60 inches high, create a board-and-batten or “half wall” look that pairs well with an open stair or a dining room with high ceilings. Standard heights run 32 to 42 inches, roughly one third of the wall.
Cost and Time: Kits vs Building From Scratch
Prices vary by region and material, so treat these as general ranges. MDF panel kits typically run about $8 to $25 per linear foot of wall for materials, including cap and base in many kits. PVC kits land in a similar to slightly higher band. Solid wood panel systems can reach $30 to $60 or more per linear foot.
Building from scratch with MDF strips and molding often costs less in raw material, sometimes $5 to $15 per linear foot, but labor time roughly doubles. A pro carpenter might charge $20 to $50 per linear foot installed for site-built work and somewhat less for a kit, since there is less cutting and layout. For a typical 12 by 14 foot dining room with about 40 linear feet of wainscoting, a DIYer can usually install a kit in one to two days and finish paint on the third. A site-built version often stretches to four or five days.
- Choose a kit if: walls are fairly straight, the design is standard, and you want predictable results.
- Build from scratch if: you must match existing trim, the room has many openings, or you want a custom box spacing.
Tools and Materials You Will Need
Gather everything before you begin so the job moves steadily:
- Wainscoting panel kit plus matching cap rail and baseboard
- Stud finder, 4-foot level and laser level (helpful for long runs)
- Tape measure, pencil and a chalk line
- Miter saw and a fine-tooth blade; jigsaw or oscillating tool for outlet cutouts
- Brad or finish nailer with 1-1/2 to 2-1/4 inch nails
- Construction adhesive rated for the panel material
- Paintable caulk, wood filler and fine sanding sponges
- Primer and a durable satin or semi-gloss paint
- Safety glasses, hearing protection and an N95 or better dust mask
- Shop vacuum with a HEPA filter for cleanup
How to Install Wainscoting Panels Into Studs With Adhesive
Good installation comes down to a level reference line, solid fastening and careful seam work. Follow these steps:
- Remove old baseboard and trim carefully. In a home built before 1978, test the existing paint for lead before you pry, sand or cut it. Inexpensive test kits give a quick answer, and a certified inspector can confirm. If lead is present, use lead-safe work practices: mist surfaces to keep dust down, lay plastic sheeting, avoid dry sanding and power planing, and clean with a HEPA vacuum and damp wipes.
- Check the wall. Run a straightedge along the wall. High spots and bulges should be knocked down and low spots shimmed so panels sit flat.
- Snap a level line. Floors are rarely level, so measure up from the lowest point in the room and snap your top line with a laser or long level. Every panel will reference this line, not the floor.
- Mark the studs. Find and mark every stud above and below your line. Studs usually sit 16 inches on center, but verify each one.
- Dry-fit the layout. Lay panels against the wall to see where seams and cut pieces fall. Aim for equal-width end panels at corners so the room looks balanced.
- Cut outlet openings. Before cutting around any receptacle or switch, turn off the breaker and confirm power is off with a non-contact voltage tester. Remove the cover plate, transfer the box location to the panel, and cut the opening. You will likely need box extenders so the device sits flush with the new surface.
- Apply adhesive and fasten. Run a serpentine bead of construction adhesive on the back of each panel, press it to the line, and nail into studs every 8 to 12 inches. Adhesive holds the field flat while nails into framing give a permanent mechanical bond. Never rely on adhesive alone for heavy MDF.
- Join seams tightly. Most kits use tongue-and-groove or shiplap edges. Add a thin bead of glue in the joint and keep it tight. For PVC, leave the expansion gap the maker specifies.
- Install the cap rail and baseboard. Cope or miter inside corners and miter outside corners. Fasten into studs.
- Fill, caulk and paint. Fill nail holes, caulk every seam and the top edge where it meets the wall, prime raw edges, and apply two coats of paint.
Controlling Cutting Dust and Working Safely
MDF produces very fine dust that lingers in the air and settles everywhere. Make your cuts outdoors or in a garage when possible, and use a saw with a dust port connected to a shop vacuum. Wear an N95 respirator at minimum, plus eye and hearing protection. Close HVAC returns in the work room so dust does not circulate through the house, and clean with a HEPA vacuum rather than sweeping, which simply lifts dust back into the air.
PVC cuts with less dust but can melt on a dull blade, so use a sharp fine-tooth blade and steady feed. Keep the work area clear of cords and offcuts to avoid trips while you carry long panels.
Troubleshooting Common Problems
- Visible seams after painting: The joint was not glued or the panels shifted. Fill with a flexible filler, sand smooth and repaint.
- Panels bowing off the wall: Not enough fasteners into studs, or the wall had a hump. Add nails into framing and fill.
- Gaps at the top edge: The wall is wavy. A cap rail with a deep lip hides most of it; caulk the rest.
- MDF edges swelling: Moisture got in. Seal every cut edge with primer, and switch to PVC in wet zones.
- Uneven box reveals: The panels followed the floor instead of the level line. On the next wall, start from the snapped line.
When to Call a Pro
Hire a finish carpenter if the room includes a staircase, curved wall, sloped ceiling or many windows where the layout gets complicated. Bring in a licensed electrician if outlets need to be moved, added or extended beyond simple box extenders. If lead paint testing comes back positive and you have a large area of old trim to remove, an EPA-certified renovator can handle containment and cleanup safely. For most straight-walled rooms, though, a kit puts professional-looking wainscoting within reach of a careful weekend DIYer.
Frequently Asked Questions
Are pre made wainscoting panels cheaper than building it yourself?
Material costs are often a bit higher for a kit, but you save significant labor time. If you are paying a carpenter, the total cost of a kit installation is frequently lower because layout and cutting take far less time.
Can I install wainscoting panels with adhesive only?
Lightweight PVC or faux products may hold with adhesive, but MDF and wood panels should be nailed into studs in addition to adhesive. The mechanical fastening prevents sagging and keeps panels flat over time.
What height should wainscoting be?
A common rule is about one third of the wall height, which works out to 32 to 42 inches in rooms with 8 to 9 foot ceilings. Tall styles run 48 to 60 inches for a bolder look.
Which wainscoting material is best for a bathroom?
PVC or cellular vinyl panels are the safest choice because they do not absorb water. Moisture-resistant MDF can work in a powder room with good ventilation, but avoid standard MDF near a tub or shower.
Do I need to test for lead before removing old trim?
If your home was built before 1978, yes. Test the paint before prying, sanding or cutting old baseboard and chair rail, and follow lead-safe practices if the result is positive.