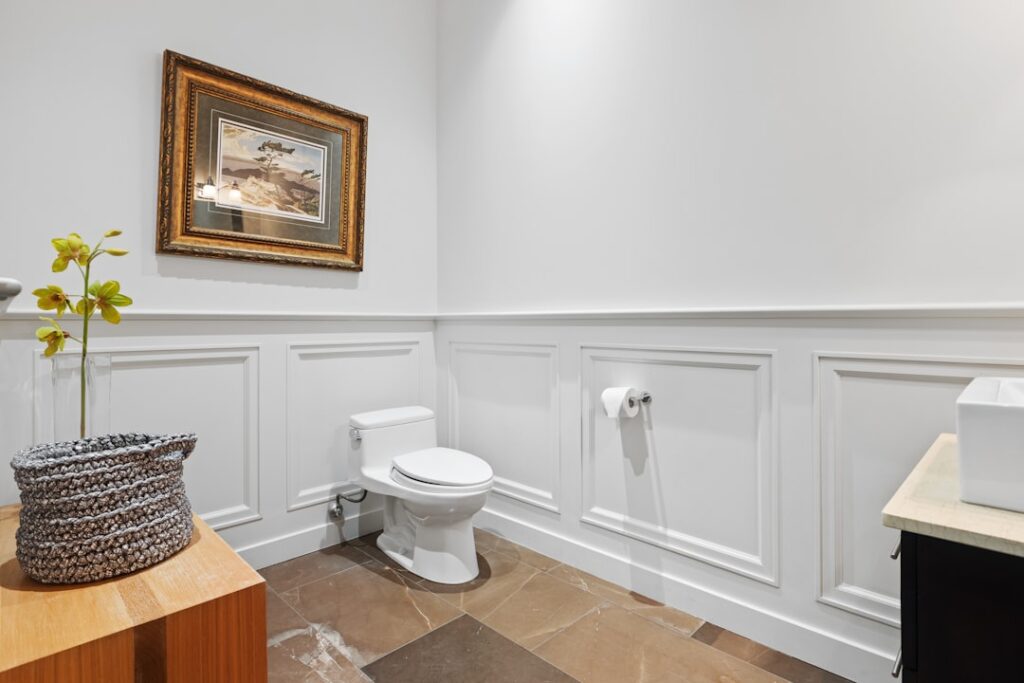
Of all the wainscoting styles, only one traces straight back to the paneled parlors of colonial Williamsburg and the state rooms of Georgian England. Raised panel wainscoting — beveled panels whose centers sit proud of the surrounding frame — is the formal apex of the category, the difference between a dining room that looks trimmed and one that looks built. It is also the most demanding style to execute, with real joinery, real material decisions, and a price spread from $8 per linear foot in MDF kits to $200-plus in custom stain-grade millwork. Here is the full picture: anatomy, correct heights, the three ways to buy or build it, and where it belongs.
- What Makes a Panel "Raised"
- Anatomy: Rails, Stiles, Field, and Moldings
- Heights: The 32-36" Classic and the Alternatives
- Three Ways to Get It: MDF Kits, Custom Millwork, Solid Wood DIY
- Costs Summarized, per Linear Foot
- Paint-Grade vs. Stain-Grade Decisions
- Which Rooms Deserve It
- Installation Notes That Separate Crisp from Almost
What Makes a Panel “Raised”
The defining feature is the bevel. A raised panel is a board — historically 5/8″ to 3/4″ solid wood — whose edges are cut on an angle (the “fielding” cut) so the perimeter thins enough to slip into grooves in the surrounding frame, while the center field stands forward. Light rakes across those bevels and creates the shadow lines that give the style its depth; flat-panel (Shaker/mission) wainscoting reads calm and planar by comparison, and board-and-batten reads vertical and farmhouse. Raised panel is unapologetically formal — the vocabulary of Georgian, Federal, and Colonial Revival architecture — and it commits a room to that register. Painted in historic colors it suits center-hall colonials and traditional dining rooms; stained in cherry or mahogany it furnishes libraries and studies with the gravity no wallpaper can fake.
Anatomy: Rails, Stiles, Field, and Moldings
Traditional raised panel wainscoting is frame-and-panel construction, the same joinery as a cabinet door scaled to a wall:
- Bottom rail: the horizontal member at the base, typically 3-5″ wide, sitting on or behind the baseboard.
- Top rail: the horizontal member under the cap, 2-4″ wide.
- Stiles: the vertical members dividing the run into panels, commonly 2-1/2″ to 4″ wide, spaced to create panels between roughly 12″ and 20″ wide.
- Raised field panels: the beveled boards captured in the frame — floating in grooves, never glued tight, so solid wood can move seasonally without cracking.
- Panel molding (bolection or scribe molding): a small profiled molding at the frame-to-panel joint, dressing the transition; heavier bolection profiles that overlap the frame are the high-formal option.
- Chair rail cap: the crowning horizontal profile, often built up from two or three stock profiles with a small ledge; this is what visually finishes the assembly.
Proportions carry the style. Panels should be taller than wide (a 3:4 to 2:3 width-to-height ratio reads classically), spacing must be planned so corners land on stiles rather than partial panels, and outlets should fall within panels, not across joints — the layout hour spent with painter’s tape on the wall is the most valuable hour of the project.
Heights: The 32-36″ Classic and the Alternatives
The historic default is wainscot to 32-36″ off the floor — roughly one-third of an 8-ft wall, aligned with the traditional chair rail. That height protects plaster from chair backs (the original job) and suits dining rooms, hallways, and stairs. Two variations are period-correct: tall wainscot at 54-60″ (two-thirds height), an emphatic look for entries, libraries, and formal baths, often with a deeper display ledge at the cap; and full-height paneling, which leaves wainscot territory and becomes a paneled room. One rule saves rooms from looking wrong: avoid stopping at exactly half the wall height — a 48″ wainscot on an 8-ft wall cuts the room in two visually. Go clearly one-third or clearly two-thirds. On stairs, the top and bottom rails rake parallel to the stringer with panels parallelogrammed between — the signature move of a serious trim carpenter, and the detail to check when hiring one.
Three Ways to Get It: MDF Kits, Custom Millwork, Solid Wood DIY
MDF kit systems are the volume market: companies like Wainscoting America, Elite Trimworks, and New England Classic sell pre-machined raised-panel systems — routed one-piece MDF panels or assembled frame-and-panel sections — sized to your wall dimensions. MDF machines crisply, has no grain to telegraph through paint, and does not move seasonally, making it genuinely ideal for paint-grade work. Expect $8-$20 per linear foot for one-piece routed sheets and $15-$40 per linear foot for engineered panel systems, plus a weekend of installation with construction adhesive and a brad nailer. The caveats: MDF hates standing water (prime all edges in baths; keep it off wet floors with a wood or PVC base), and one-piece routed sheets read slightly shallower than true frame-and-panel at close range.
Custom millwork is the heritage path: a shop builds true frame-and-panel sections — poplar or MDF panels for paint grade, cherry, walnut, mahogany, or quartersawn oak for stain grade — to your room’s exact layout, and finish carpenters install. Installed prices run $25-$60 per linear foot paint-grade and $75-$200+ per linear foot stain-grade depending on species and molding weight. This is the only route for stain-grade work (MDF cannot be stained) and the best route for stairs, radius walls, and historic matching.
DIY solid wood sits between: with a router table and a panel-raising bit set (a 3-1/2″ horizontal raiser plus rail-and-stile cutters, $80-$200 for a quality set like Freud or Whiteside; a 2-1/4-HP-minimum router required), a competent hobbyist can mill true raised panels from 3/4″ poplar or oak. Budget material at $4-$10 per linear foot and real shop time — a dining room is a multi-weekend project. The shortcut hybrid: build the frame from flat 1×4 stock on the wall, then insert pre-made raised panel inserts or even beveled MDF panels, gaining 80% of the look for half the machining.
Costs Summarized, per Linear Foot
| Route | Materials | Installed / Total |
|---|---|---|
| One-piece routed MDF sheet kit | $8-$20 | $18-$40 with pro install |
| Engineered MDF panel system | $15-$40 | $30-$60 |
| Custom paint-grade millwork | — | $25-$60 |
| Custom stain-grade millwork | — | $75-$200+ |
| DIY solid wood (router-built) | $4-$10 | your weekends |
A 14′ x 12′ dining room (about 44 linear feet after openings) therefore runs roughly $800-$1,700 in MDF kit materials DIY-installed, $1,500-$2,600 professionally installed in paint grade, and $3,500-$9,000+ in custom stain-grade millwork.
Paint-Grade vs. Stain-Grade Decisions
Paint grade is the forgiving path: MDF or poplar, caulked joints, and a scrubbable enamel — satin or semi-gloss alkyd-hybrid like Benjamin Moore Advance or SW Emerald Urethane — in classic form painted the same color as the trim package, with the wall above in a contrasting flat. Historic palettes (deep greens, navy, Chelsea Gray-class neutrals) painted over both wainscot and cap are the current designer default and flatter the shadow lines. Stain grade removes every shortcut: no caulk to hide joints, so joinery must be furniture-tight; species must match across rails, stiles, and panels; and panels must be pre-finished before assembly so seasonal shrinkage never exposes raw grooves. That discipline is what the custom-millwork premium buys. Whichever finish, back-prime MDF in baths, and in any room, run the cap ledge level around the entire perimeter — sight lines forgive nothing at chair-rail height.
Which Rooms Deserve It
Raised panel wainscoting earns its cost where formality is the point: dining rooms first, the style’s natural habitat; libraries and studies, especially stain-grade at two-thirds height; front halls and stairways, where raked stair paneling announces the whole house’s trim standard; and formal powder rooms, with moisture-smart materials. It fights against casual architecture — in a ranch or a modern open plan, flat-panel or board-and-batten will look intentional where raised panel can look imported. Match the style to the house’s bones, hold the classic heights, and this is the one trim upgrade that appraisers, guests, and eventual buyers all read instantly as quality.
Installation Notes That Separate Crisp from Almost
Whatever route you buy, the same field details decide the result. Find and mark every stud before layout, and plan nailing through rails and stiles into framing — panels themselves are never fastened. Walls are not flat, so scribe or shim the frame plumb and let caulk (paint grade only) handle hairline wall gaps behind the cap. At inside corners, run one wall’s assembly tight and butt the second to it; at outside corners, miter the cap and back-bevel the stile joint. Keep a 1/4″ expansion gap at floor level covered by the base shoe, prime all six sides of MDF components before installation, and pre-paint panels and frames separately where possible — cutting in a painted panel field against thirty molding profiles on the wall is the slowest paint job in the house. Done in that order, a kit room installs in a weekend and reads like millwork; done out of order, even expensive material reads like a project.