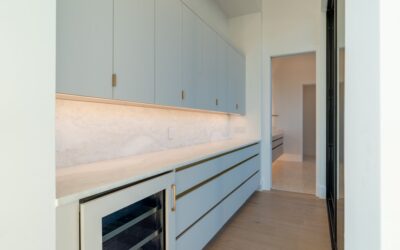
Building cabinet doors is one of the most satisfying woodworking projects a homeowner can take on, and it can cut the cost of a kitchen refresh dramatically. Custom doors from a cabinet shop routinely run $40 to $150 each, so a 20-door kitchen replacement can top $2,000. Build them yourself and your material cost drops to roughly $12 to $30 per door. The work is well within reach for anyone with a table saw and some patience.
Part of our Kitchen Remodeling guide — explore the full guide →
I’ve built shaker and slab doors for my own projects and clients’ for years. Here’s the process I follow, start to finish.
- Pick Your Door Style First
- Tools and Materials You’ll Need
- Step 1: Measure for Overlay or Inset
- Step 2: Cut Stiles, Rails, and Panel
- Step 3: Cut the Groove and Joinery
- Step 4: Glue Up and Clamp Square
- Step 5: Sand and Finish
- The Fast Track: Building a Slab Door
- Boring Hinge Cups and Hanging the Door
- Time and Cost for a Full Kitchen
- Pro Tips From the Shop
Pick Your Door Style First
Two styles cover the vast majority of DIY builds, and they differ hugely in difficulty:
- Slab doors: a single flat panel, usually 3/4-inch plywood or MDF with edge banding or solid-wood edging. The simplest possible door, no joinery required.
- Shaker doors: a five-piece door with two vertical stiles, two horizontal rails, and a flat center panel set into a groove. Timeless, and the most popular request I get.
Slab is the fastest way in, but shaker isn’t much harder once you understand rail-and-stile construction. This guide focuses on the shaker build since it teaches the joinery that everything else borrows from.
Tools and Materials You’ll Need
You don’t need a full pro shop, but a few tools make the job far easier and more accurate:
- Table saw: the core tool for ripping stiles, rails, and panels to width.
- Router with a rail-and-stile bit set, or a dado stack: for cutting the groove and matching profile.
- Pocket-hole jig (Kreg or similar): the beginner-friendly way to join rails to stiles without a shaper.
- Clamps, tape measure, combination square, and a sander (random orbital).
For materials, budget hardwood such as poplar (excellent for painted doors, about $3 to $5 per board foot) or maple and oak for stained doors. Use 1/4-inch plywood for the center panels. A typical shaker door uses about 8 to 10 linear feet of 2.5-inch-wide stock plus a small panel.
Step 1: Measure for Overlay or Inset
Before cutting anything, decide how the door sits on the cabinet. This determines every dimension:
- Full overlay: the door covers most of the cabinet opening. Add roughly 1 inch to both the height and width of the opening (1/2-inch overlay on each side).
- Half overlay: common on shared middle stiles; add about 3/4 inch total.
- Inset: the door sits flush inside the opening. Subtract 1/8 inch total for even 1/16-inch reveals all around. This is the least forgiving option.
Measure each opening individually, since older cabinets are rarely perfectly square. Write down the finished door size for every door before you touch the saw.
Step 2: Cut Stiles, Rails, and Panel
Rip your stock to a consistent width; 2.25 to 2.5 inches is standard for shaker frames. Cut the two stiles to the full finished height of the door. The rails are trickier: their length equals the door width minus the combined width of both stiles, plus the depth of the two grooves they seat into (typically add 3/8 inch on each end for a 3/8-inch-deep groove).
Cut the center panel to fit the grooves with a little breathing room. For a solid-wood panel, leave about 1/8 inch of expansion gap so it can move with humidity. Plywood and MDF panels are stable and can fit snug.
Step 3: Cut the Groove and Joinery
Run a 1/4-inch-wide, 3/8-inch-deep groove down the inside edge of all four frame pieces. A dado stack on the table saw or a slot-cutting router bit both work. This groove captures the panel.
For the frame joints, you have options:
- Pocket screws: easiest. Drill two pockets in each rail end and screw into the stiles. Strong and beginner-proof.
- Rail-and-stile router bits: the cope-and-stick method that cuts an interlocking profile for a true furniture-grade joint.
- Dowels or a domino: clean and strong if you have the tooling.
Whatever you choose, do a dry fit of the whole door before glue to confirm everything is square and the panel floats freely.
Step 4: Glue Up and Clamp Square
Apply glue to the joints only, never to the center panel; the panel must stay free to expand and contract. Slide the panel into the grooves, bring the frame together, and clamp across the width. Check for square by measuring both diagonals; when they’re equal, the door is square. Wipe away squeeze-out with a damp rag and let it cure at least an hour, ideally overnight, before handling.
Step 5: Sand and Finish
Once the glue cures, sand progressively: start at 120 grit to level the joints, then move to 150 and 180 for a paint-ready surface, or 220 for stain. Knock down all sharp edges slightly so finish adheres and the door feels good in the hand.
For painted doors, prime with a quality bonding primer, sand lightly with 220, then apply two thin coats of a durable cabinet-grade enamel. For stained doors, apply stain, let it penetrate, wipe off the excess, then protect with two or three coats of polyurethane or lacquer, sanding lightly between coats.
The Fast Track: Building a Slab Door
If shaker feels like too much for a first attempt, a slab door gets you a finished front in under an hour. Cut 3/4-inch plywood or MDF to your overlay dimensions, then deal with the raw edges. On plywood, iron-on edge banding hides the plies in about ten minutes per door; on MDF, the edges are smooth enough to prime and paint directly. For a more substantial look, glue a thin strip of solid-wood edging to each side and trim it flush. Sand, prime, and finish exactly as you would a shaker door.
Slab doors are also the easiest to keep dead flat. MDF will not warp the way a poorly dried solid panel can, which is why it is the go-to substrate for painted modern fronts.
Boring Hinge Cups and Hanging the Door
The step that intimidates most first-timers is drilling for European concealed hinges, but a $30 jig makes it foolproof. Standard cup hinges need a 35mm flat-bottom hole bored about 1/2 inch in from the door edge, roughly 3 to 4 inches from each end. Set your Forstner bit or the jig’s drill stop to a 1/2-inch depth so you do not blow through the face.
- Mark the cup centers, clamp the jig to the door edge, and bore the 35mm holes.
- Screw the hinge into the cup, keeping the arm square to the edge.
- Mount the baseplates inside the cabinet and clip the doors on.
- Use the three adjustment screws to dial in height, depth, and side-to-side until reveals are even.
Soft-close Blum or Grass hinges run about $4 to $8 each and turn a homemade door into one that opens and shuts like factory work.
Time and Cost for a Full Kitchen
Plan realistically. A confident weekend woodworker can build and finish four to six shaker doors a day once the setup is dialed in, so a 20-door kitchen is a couple of focused weekends plus drying time. Material cost lands around $12 to $30 per door in poplar and plywood, versus $40 to $150 to buy them, so a full kitchen’s worth of doors might cost $300 to $500 in lumber against $1,500 or more ordered. Finish supplies, primer, enamel, and hinges, add roughly $150 to $250. The payoff is real money saved and doors sized to fit your actual, slightly-out-of-square cabinets rather than a catalog’s idea of them.
Pro Tips From the Shop
A few lessons that will save you frustration:
- Build one door completely before batching the rest; you’ll catch dimension mistakes early.
- Label the back of every door with its cabinet location in pencil.
- Use a story stick or stop block on the saw so repeat cuts stay identical.
- Poplar dents easily; handle painted doors carefully until the finish cures.
- Buy a concealed-hinge jig to bore the 35mm cup holes cleanly for European hinges.
Take your time on the first door and the rest go quickly. Once you understand rail-and-stile joinery, building cabinet doors becomes a repeatable, money-saving skill you’ll use on every kitchen, bath, and built-in project you tackle from here on out.