Laminate is the floor that made DIY installation realistic for ordinary homeowners, but the projects that fail almost always skip the same two steps: acclimation and the expansion gap. Putting down laminate flooring is genuinely doable in a weekend with basic tools, because it floats — the click-lock planks lock to each other, not to the subfloor. The catch is that floating floors must be free to expand and contract, and they punish shortcuts. Follow the sequence below and you will get tight seams, a flat floor, and no buckling a month later.
- Acclimate the Planks First
- Prep the Subfloor
- Lay the Underlayment
- Plan the Layout and Expansion Gap
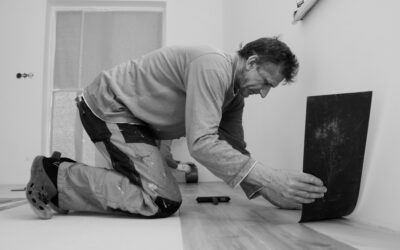
- Install the First Row
- Stagger the Seams
- Undercut Door Jambs
- Finish the Last Row and Trim
- Pros and Cons of DIY Laminate
- Tools You Will Need
- Cutting Around Obstacles
- Glued Down Laminate Flooring: When Glue Belongs in the Job
- The Bottom Line
Acclimate the Planks First
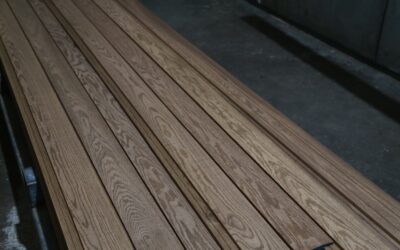
This is the step everyone wants to skip, and it causes more failures than any other. Laminate expands and contracts with temperature and humidity. Bring the unopened or open boxes into the room where they will be installed and let them sit flat for at least 48 hours so the planks reach the room’s conditions. Install at the home’s normal living temperature and humidity. Skip this and the planks will move after installation — gapping if they shrink, buckling if they swell.
Prep the Subfloor
A floating floor telegraphs every flaw beneath it. The subfloor must be clean, dry, and flat — generally within about 3/16 inch over a 10-foot span. Sweep and vacuum thoroughly, then check for high and low spots with a long straightedge. Sand down high spots and fill low spots with leveling compound. On concrete, test for moisture, because a damp slab will ruin laminate. Repair squeaks and loose boards on a wood subfloor before you cover them up.
Lay the Underlayment
Underlayment is the thin foam or felt layer that cushions the floor, dampens sound, and smooths minor imperfections. Some laminate comes with underlayment pre-attached; if yours does not, roll it out across the room, butting seams (do not overlap) and taping them per the manufacturer’s instructions. Over concrete or any slab, add a vapor barrier — a plastic moisture film — unless the underlayment already includes one. Getting this layer right keeps the floor quiet and protected from moisture below.
Plan the Layout and Expansion Gap
Measure the room and plan your plank direction — usually running the long planks parallel to the longest wall or toward the main light source looks best. Then commit to the expansion gap: leave roughly 1/4 to 3/8 inch of space between the flooring and every wall and fixed object, all the way around. This gap lets the floating floor expand without buckling, and it gets hidden under baseboards and quarter-round later. Use spacers against the walls so the gap stays consistent as you work.
Avoid a sliver-width final row. Measure the room’s width against the plank width, and if the last row would be too narrow, rip the first row down so the first and last rows are more balanced.
Install the First Row
The first row sets the line for the entire floor, so take your time. Place the planks with the tongue side facing the wall, click the short ends together, and set spacers against the wall to hold the expansion gap. Check that the row is perfectly straight with a chalk line or string — any drift here multiplies across the room. If the wall is bowed, scribe and trim the planks to follow it while keeping the leading edge straight.
Stagger the Seams
Staggering is what makes the floor look professional and stay strong. Start the second row with the offcut from the first row, as long as it leaves the end joints staggered by at least 8 to 12 inches from the row before. Never let end seams line up or fall too close together row to row — that creates weak “H-joints” and an obvious pattern. Vary the starting lengths across rows for a random, natural look. Click each plank’s long edge into the previous row at an angle, then lower and tap it home with a tapping block and mallet, never hitting the plank edge directly.
Undercut Door Jambs
Trying to cut planks to weave around a door casing looks rough and never seals well. Instead, undercut the jambs. Lay a scrap plank upside down next to the casing as a height guide, then use a jamb saw or oscillating multi-tool to cut the bottom of the casing so the flooring slides cleanly underneath. This gives a clean, professional transition and preserves the expansion gap behind the trim.
Finish the Last Row and Trim
The final row almost always needs ripping to width. Measure the remaining space at several points (walls are rarely parallel), subtract the expansion gap, and rip the planks lengthwise to fit. Use a pull bar to lock the last row tight since there is no room to angle and tap. Once the floor is down, remove the spacers, install baseboards and quarter-round to cover the gap, and add transition strips at doorways and where the laminate meets other flooring. Nail trim to the wall, never to the floor, so the floating floor can still move.
Pros and Cons of DIY Laminate
- Pros: Affordable, beginner-friendly, fast to install, no glue or nails into the subfloor, easy to replace damaged planks, huge style range.
- Cons: Demands a flat, dry subfloor and disciplined acclimation; standard laminate is vulnerable to standing water; mistakes like skipping the expansion gap cause buckling.
Tools You Will Need
Laminate installation does not require a big tool collection, which is part of its DIY appeal. Gather a tape measure, a pencil, a square, and a chalk line for layout; a fine-tooth saw — a miter saw or circular saw with a laminate blade, or a hand saw and jigsaw for curves — for cutting; and a tapping block, pull bar, and rubber mallet for seating the joints. Add spacers for the expansion gap, a utility knife and tape for the underlayment, and a jamb saw or oscillating multi-tool for undercutting door casings. Knee pads and safety glasses round out the kit. Having everything on hand before you start keeps the install moving and your seams tight.
Cutting Around Obstacles
Rooms are never empty rectangles, so plan for pipes, vents, and irregular walls. For a heating pipe, drill a hole slightly larger than the pipe to allow for expansion, then cut a wedge out to the hole, slide the plank into place, and glue the wedge back in behind the pipe. For floor vents and odd shapes, make a cardboard template first, trace it onto the plank, and cut with a jigsaw. Always keep the expansion gap around these fixed objects too — laminate needs room to move everywhere, not just at the walls.
Glued Down Laminate Flooring: When Glue Belongs in the Job
Most laminate sold today is designed to float, and that is the method to use unless your product’s instructions say otherwise. The click-lock joints hold the planks to each other, and the whole floor moves as one piece over the underlayment. Still, glue does show up in a few laminate situations, and knowing which one you are dealing with prevents a costly mistake.
| Method | What it means | When it applies |
|---|---|---|
| Floating (click-lock) | Planks lock together; nothing attaches to the subfloor | Almost all modern residential laminate |
| Glued seams | Adhesive applied into the tongue-and-groove joints; floor still floats | Older or non-click laminate, and some products where the maker calls for glued joints in certain rooms |
| Full-spread glue-down | Planks adhered to the subfloor with flooring adhesive | Only when the manufacturer specifically approves it, often for commercial or special installations |
Glued-seam laminate
Before click-lock profiles became standard, laminate was plain tongue-and-groove, and a bead of joint glue held the planks together. You may still meet it in older stock or in repairs on an existing glued floor. The floor still floats, so the expansion gap, underlayment, and trim rules all stay the same. Apply the glue the manufacturer specifies, wipe away squeeze-out right away before it dries on the surface, and use straps or clamps to hold rows tight while the glue sets.
Some manufacturers also recommend a joint sealant or glue in rooms with more moisture exposure. That is a product-specific instruction, not a general rule, so check the installation guide rather than adding glue on your own.
Full-spread glue-down. Gluing standard click laminate directly to the subfloor usually works against its design. The planks can no longer expand and contract as one unit, which can lead to cracked joints or peaking, and many manufacturers will void the warranty for it. If you need a floor that is bonded down, such as in a room with heavy rolling loads, choose a product rated for glue-down installation, or look at glue-down vinyl plank instead.
Removing an older glued floor. Glued-seam laminate cannot be unclicked and reused. Expect to cut or break the planks apart during removal, and budget for new material if you are replacing damaged boards in an older glued installation.
The Bottom Line
The whole job rewards patience over speed. Acclimate the planks, prep a flat dry subfloor, lay underlayment, leave a consistent expansion gap, stagger your seams, undercut the jambs, and pull the last row tight. Do those steps in order and putting down laminate flooring turns into one of the most satisfying weekend projects in home improvement — a professional-looking floor you installed yourself, with no buckling, gaps, or callbacks down the road.
Prefer to explore on your own?
See how new flooring looks in your actual room in seconds — free, no signup.
Try the free Floor Studio →