If you are insulating exterior walls in a typical home, chances are R13 batt insulation is exactly what you need. It is the standard, code-minimum fill for 2×4 stud walls in much of the country, striking a practical balance between thermal performance, cost, and easy installation. Whether you are finishing a basement, building an addition, or upgrading a wall during a remodel, understanding what R13 offers, where it belongs, and how to install it properly will help you get real comfort and energy savings from a modest investment.
- What R13 Means
- Where to Use R13 Batt Insulation
- Faced Versus Unfaced R13
- What R13 Batt Insulation Costs
- Fiberglass Versus Mineral Wool
- How to Install R13 Batts
- Air Sealing Comes First
- Common Mistakes to Avoid
- R13 for Soundproofing Interior Walls
- Common Questions About R13 Performance
- Does R13 Meet Code for Your Home?
What R13 Means
R-value measures resistance to heat flow, and higher numbers insulate better. R13 is a moderate value designed to fit within a standard 2×4 wall cavity, which is about 3.5 inches deep. A batt is a pre-cut blanket of insulation, typically fiberglass or mineral wool, sized to fit standard 16-inch or 24-inch on-center stud spacing. R13 batts are roughly 3.5 inches thick so they fill a 2×4 cavity completely without compressing, which is important because compressed insulation loses R-value.
Where to Use R13 Batt Insulation
R13 is purpose-built for a few common assemblies, and matching it to the right location matters.
- Exterior 2×4 walls: The primary use, and the code minimum for wall insulation in many climate zones.
- Interior walls for soundproofing: R13 dampens sound transmission between rooms, bathrooms, and home offices.
- Basement framing: Filling 2×4 stud walls built against foundation walls.
- Garage walls: Insulating between a garage and living space, or a heated garage’s exterior walls.
For 2×6 walls you would step up to R19 or R21, which are thicker and fill the deeper 5.5-inch cavity. R13 is specifically the 2×4 answer.
Faced Versus Unfaced R13
R13 batts come faced or unfaced, and choosing correctly prevents moisture problems.
Faced batts have a kraft-paper or foil vapor retarder attached to one side. The facing slows moisture from migrating into the wall and also provides stapling flanges for installation. Use faced batts on exterior walls where a vapor retarder is required, installing the facing toward the interior (warm-in-winter) side in most climates.
Unfaced batts have no barrier. Use them for interior soundproofing walls where no vapor retarder is needed, or where a separate poly vapor barrier or air-sealing membrane will be applied over the studs. Unfaced batts are held in place by friction fit in the cavity.
What R13 Batt Insulation Costs
R13 is among the most affordable insulation options.
- Fiberglass R13: $0.50 to $1.10 per square foot for materials.
- Mineral wool R13: $1.00 to $2.00 per square foot, offering better fire and sound resistance.
A single 8-foot section of standard wall (about 100 square feet) runs roughly $50 to $110 in fiberglass batts. Professional installation adds $0.40 to $1.00 per square foot in labor. Because wall batt installation is straightforward, many homeowners save meaningfully by doing it themselves.
Fiberglass Versus Mineral Wool
Fiberglass is the default: inexpensive, lightweight, and widely stocked. Mineral wool (rock wool) costs more but resists fire, repels water, holds its shape without sagging, and provides superior sound dampening, which makes it a favorite for interior soundproofing and for walls between a garage and living space. For standard exterior 2×4 walls on a budget, fiberglass R13 is the value choice; for quiet or fire-rated assemblies, mineral wool earns its premium.
How to Install R13 Batts
Wall batt installation is achievable for most DIYers with basic tools and safety gear. A snug, gap-free fit is the goal.
- Gear up. Wear a respirator, safety glasses, gloves, and long sleeves; fiberglass irritates skin, eyes, and lungs.
- Measure and cut. Cut batts to length with a utility knife against a straightedge, sizing them to fill the cavity fully without cramming.
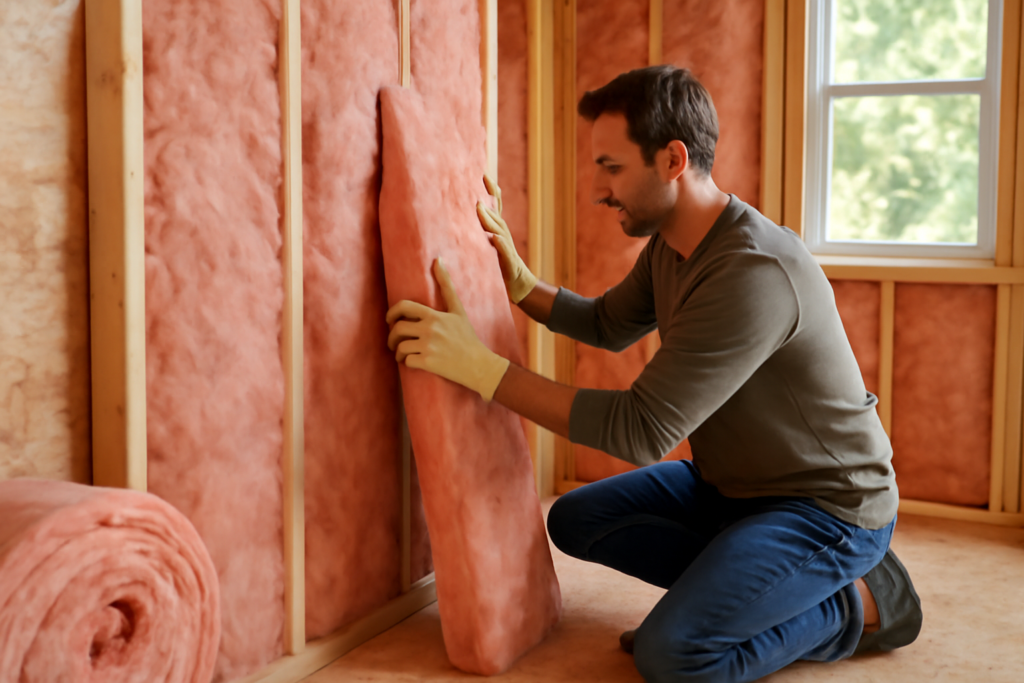
- Fit into the cavity. Tuck the batt in so it fills the full depth and touches all four sides, splitting it around wiring and outlet boxes rather than compressing over them.
- Handle obstructions. Peel the batt to fit behind pipes and wires, and cut neat notches around electrical boxes so the insulation sits flush.
- Secure faced batts. Staple the flanges to the stud faces or inside the cavity per your local practice; friction-fit unfaced batts.
- Fill gaps. Stuff small voids at framing and use canned foam around windows and doors, not compressed batt scraps.
Air Sealing Comes First
Insulation slows heat conduction but does not stop air leaks, and air leakage can waste a large share of a wall’s performance. Before insulating, seal the wall’s air paths: caulk around window and door frames, seal top and bottom plates, and foam around penetrations for wires and pipes. Insulation installed over unsealed gaps underperforms badly. Combining thorough air sealing with properly fitted R13 batts is what delivers the comfort and savings you are after.
Common Mistakes to Avoid
- Compressing the batts. Stuffing R13 behind wires or into a too-small space lowers its actual R-value.
- Leaving gaps and voids. Small uninsulated spots around framing and boxes let heat escape disproportionately.
- Installing the vapor facing backward. In most climates the facing goes toward the interior; reversing it can trap moisture.
- Skipping air sealing. Batts over leaky framing do not perform to their rating.
- Cramming batts over outlets. Cut around boxes cleanly instead of compressing insulation over them.
R13 for Soundproofing Interior Walls
One of the most popular non-thermal uses for R13 batts is dampening sound between rooms, and it is worth understanding how it works. Standard interior walls are hollow, so sound passes easily between a bathroom, laundry room, home office, or bedroom and the rest of the house. Filling those 2×4 stud cavities with R13 batts absorbs airborne sound and noticeably reduces the transfer of voices, plumbing noise, and appliance hum.
For sound control specifically, mineral wool R13 outperforms fiberglass because its denser fibers absorb more sound energy. Combining insulated cavities with other techniques, such as staggered studs, resilient channel, or a second layer of drywall, yields even quieter walls, but simply filling the cavity with batts is the single most cost-effective step. Because no vapor retarder is needed on interior walls, use unfaced batts here, friction-fit snugly into each bay. It is an inexpensive upgrade that makes a home feel calmer and more private, especially around bathrooms and media rooms.
Common Questions About R13 Performance
Homeowners often wonder whether R13 is enough, and the honest answer is that it depends on the wall and the climate. In a standard 2×4 wall, R13 fills the cavity and meets code in many regions, but the wood studs themselves conduct heat around the insulation, an effect called thermal bridging that lowers the wall’s real-world performance below the batt’s rating.
This is why energy codes in colder zones increasingly require continuous exterior rigid foam over the sheathing in addition to cavity insulation. That foam layer blankets the studs and stops the bridging, and it is often expressed as a requirement like R13 plus R5 continuous. If you are building or residing in a cold climate, ask about adding exterior foam; the cavity batts and the continuous foam work together for a wall that performs far better than either alone. In milder climates, well-installed R13 in an air-sealed 2×4 wall remains a perfectly adequate, code-compliant solution.
Does R13 Meet Code for Your Home?
R13 is the code minimum for 2×4 walls in many milder climate zones, but colder zones may require R13 plus continuous exterior foam, or a switch to 2×6 walls with R19 to R21. Some codes express this as R13 + R5 continuous insulation. Check your local building code or the Department of Energy climate zone recommendations to confirm what your wall assembly needs. If you have deeper 2×6 walls, do not use R13; step up to a thicker batt that fills the cavity.
For standard wall insulation, R13 batts are the reliable, budget-friendly workhorse. Fit them snugly with no gaps or compression, face the vapor retarder correctly, and air-seal the wall first, and you will get comfortable, quieter rooms and lower energy bills from one of the easiest and most cost-effective insulation upgrades available to homeowners.