The rectangle is the workhorse of deck building, and for good reason: rectangle layout deck designs are the cheapest to frame, the easiest to get past a permit office, and the most efficient use of both lumber and living space. Every board runs a predictable length, every joist sits on a simple square grid, and there is virtually no wasted material from odd angled cuts. The mistake homeowners make is assuming rectangular means boring — with smart zoning, board patterns, and level changes, a rectangle can be every bit as interesting as a fussy multi-angle deck at a fraction of the cost.
Part of our Decks & Outdoor guide — explore the full guide →
This guide covers how to size and frame a rectangular deck, how to break up its footprint so it does not feel like a flat slab, and where the money goes.
Why the Rectangle Wins on Cost and Buildability
A rectangular deck’s framing is a repeating grid of parallel joists spanning between beams, which means less cutting, less waste, and faster labor. Angled and curved decks require compound cuts, more blocking, and skilled labor that pushes costs up 20 to 40 percent. If your budget is finite, a rectangle buys you more square footage or better materials for the same money.
Permits are simpler too. Building inspectors see rectangular framing constantly, and a clean rectangular plan with standard joist spans and footing locations sails through review. The shape also nests naturally against the flat back wall of most houses, making the ledger board attachment and flashing straightforward — a critical detail, since improper ledger flashing is a leading cause of deck failure.
Get the Dimensions and Proportions Right
A rectangle looks best when its proportions have some intention rather than being a perfect square or an awkward skinny strip. A ratio somewhere between 3:2 and 5:3 — say 12 by 18 feet or 16 by 20 feet — reads as generous and balanced. Very long, narrow decks feel like hallways; near-perfect squares can feel static.
Size the deck to your furniture, not to a round number. A dining table for six needs roughly a 12 by 12-foot clear zone once you account for chair pull-out. Add a lounge grouping and you are looking at 300 to 400 square feet total. Standard joist spans make certain widths economical: with 2×8 joists at 16 inches on center, you can span about 12 feet between supports, and 2×10 joists reach roughly 15 feet, so designing to those spans avoids extra beams and posts.
Break Up the Footprint With Zones
The secret to keeping a rectangle from feeling like a plain platform is dividing it into distinct zones the eye can read. You do not need to change the shape — just define areas within it. Use board direction to signal a shift, running the dining area’s boards one way and the lounge area’s boards the other, separated by a divider board.
A picture-frame border around the entire perimeter instantly frames the rectangle and hides the field board ends. Inside, a contrasting inlay strip can draw a line between the grill zone and the seating zone. These moves cost only a bit of extra material and planning yet make a simple rectangle look thoughtfully designed rather than merely functional.
Add Interest With a Level Change
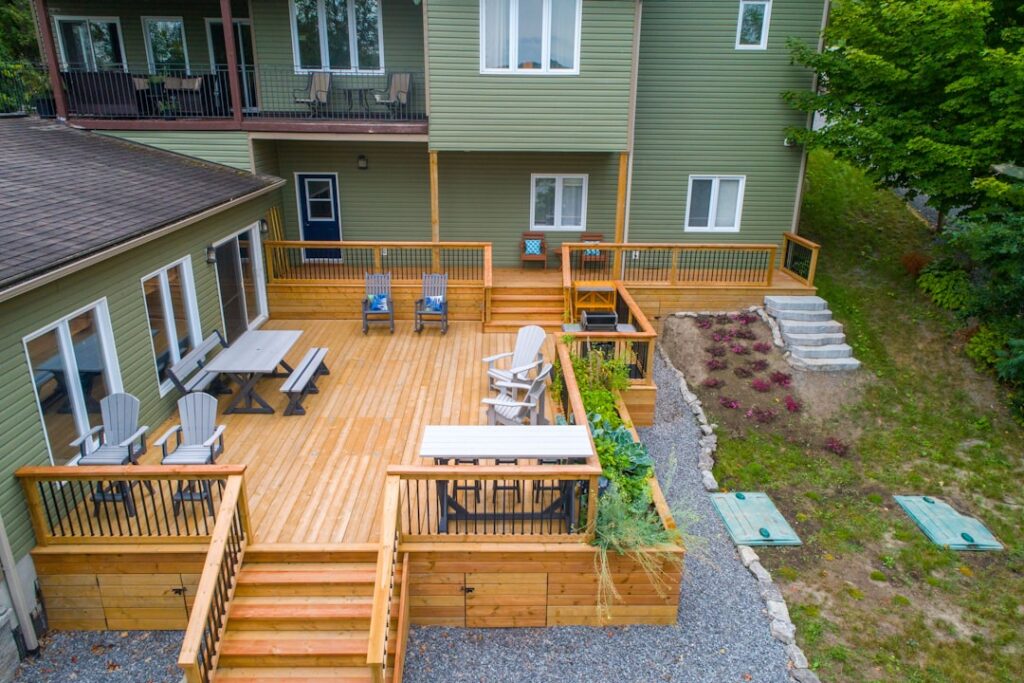
A single-level rectangle is fine, but stepping a portion of it up or down transforms the space. A two-tier design — an upper platform off the back door for dining and a lower level for lounging — creates natural room separation and adds real architectural presence without abandoning the efficient rectangular framing. Each tier is still a simple rectangle; you are just stacking two.
Even a single wide step down, 12 to 18 inches, defines a boundary and doubles as casual seating. Wrap-around stairs along one full side of a low rectangular deck give it a floating, resort-like feel and provide overflow seating for a crowd. Level changes must meet code for rise, run, and railing, so confirm the requirements for any drop over 30 inches, which typically triggers a guardrail.
Frame It to Last
The structure under the boards is what determines whether your deck lasts 10 years or 30. Set footings below the frost line — 36 to 48 inches deep in cold climates — on 8 to 12-inch diameter concrete piers sized for the load. Use pressure-treated lumber rated for ground contact on all framing, and space joists 16 inches on center for standard decking or 12 inches on center if you plan a diagonal board pattern or heavier composite.
Flash the ledger board properly where the deck meets the house: this connection carries enormous load and is the single most important detail. Use a metal Z-flashing over the ledger, structural lag screws or through-bolts into the rim joist, and never rely on nails alone. Galvanized or stainless hardware rated for treated lumber prevents the corrosion that quietly destroys fasteners over time.
Budget for a Rectangular Deck
A rectangular deck’s simplicity keeps costs predictable. Pressure-treated decks run roughly $15 to $30 per square foot installed, capped composite decks land around $30 to $60 per square foot installed, and premium hardwood tops that. So a 16 by 20-foot, 320-square-foot composite deck commonly runs $10,000 to $19,000 built by a contractor, less if you DIY the labor.
Spend on the parts you cannot easily upgrade later — the framing, footings, and ledger connection — and economize where you can change your mind, like railings and lighting. A well-proportioned rectangle with proper framing, a picture-frame border, and a level change gives you a deck that looks custom, builds fast, and stands solid for decades. Rectangle layout deck designs remain the smartest starting point for the vast majority of backyards.
Orient the Rectangle for Sun and Views
Where you place the long side of the rectangle changes how the deck feels all day. Run the long dimension parallel to the best view or toward the part of the yard you want to face, and position the dining zone where it catches morning sun and the lounge where it enjoys shade in the hot afternoon. In northern climates, orienting the deck to gather sun extends the usable season; in the South, planning for shade over the main seating keeps it comfortable through summer.
Think about how the deck relates to interior rooms too. Aligning the deck’s main access off the kitchen or living room makes it a natural extension of the home’s flow, and placing the grill zone near the kitchen door shortens the trips back and forth while cooking. A rectangle is easy to shift a few feet in any direction on the plan, so take advantage of that flexibility to line it up with sun, view, and the door you will use most.
Freestanding vs. Attached Rectangular Decks
Not every rectangular deck has to bolt to the house. A freestanding, or floating, deck stands on its own posts and footings with no ledger connection, which sidesteps the flashing and attachment details that cause so many deck failures. Freestanding decks are ideal where the house has problematic siding, a brick veneer that complicates ledger attachment, or where you want a detached destination deck out in the yard around a fire pit or under a tree.
The tradeoff is that a freestanding deck needs an extra beam and row of posts to replace the support the ledger would have provided, adding some cost and footings. An attached deck is more economical and feels connected to the home, but it lives or dies by that ledger detail. For a low, ground-level rectangle, freestanding construction is often simpler and safer; for a raised deck off a second-story door, an attached design with a properly flashed and bolted ledger is the standard. Decide which model fits your site before you finalize the framing plan, since it changes the post and beam layout underneath the same rectangular surface.