Once reserved for commercial warehouses and industrial facilities, residential epoxy flooring has become one of the hottest home improvement trends in 2026. Homeowners are discovering that epoxy coatings offer unmatched durability, stunning visual options, and long-term value that traditional flooring materials simply cannot match.
Whether you are considering epoxy for your garage, basement, kitchen, or bathroom, this guide covers everything you need to know about costs, types, installation, maintenance, and whether epoxy is the right choice for your home.
What Is Residential Epoxy Flooring?
Epoxy flooring is a surface coating made from a two-part chemical mixture of epoxide resin and polyamine hardener. When combined, these components undergo a chemical reaction that creates an extremely hard, durable, and seamless surface that bonds permanently to concrete substrates.
Unlike epoxy paint, which is simply paint with a small amount of epoxy added, true epoxy floor coating is applied in thick layers (typically 2 to 3 millimeters) that create a solid, monolithic surface. This thickness gives epoxy flooring its legendary impact resistance, chemical resistance, and longevity.
Modern residential epoxy systems have evolved far beyond basic gray coatings. Today’s options include metallic finishes that mimic marble, flake systems in hundreds of color combinations, and decorative quartz broadcasts that create slip-resistant, visually stunning floors suitable for any room in your home.
Types of Epoxy Floor Coatings
Understanding the different types of epoxy coatings helps you choose the right system for your specific needs and budget.
| Epoxy Type | Thickness | Durability | Best For | Cost per Sq Ft |
|---|---|---|---|---|
| Water-Based Epoxy | 1-2 mils | Good (5-8 years) | DIY garage floors | $0.50 – $2 |
| Solvent-Based Epoxy | 2-4 mils | Very Good (8-12 years) | High-traffic areas | $1 – $3 |
| 100% Solids Epoxy | 8-12 mils | Excellent (15-20+ years) | Professional installations | $3 – $7 |
| Metallic Epoxy | 10-15 mils | Excellent (15-20+ years) | Living spaces, showrooms | $5 – $12 |
| Flake Epoxy | 8-12 mils | Excellent (15-20+ years) | Garages, basements | $4 – $8 |
| Quartz Epoxy | 10-16 mils | Exceptional (20+ years) | Kitchens, bathrooms, pools | $6 – $12 |
Water-Based Epoxy
The most affordable and beginner-friendly option. Water-based epoxy is easy to apply, has low odor, and cleans up with water. However, it is the thinnest and least durable option, making it suitable primarily for light-duty residential garages and storage areas.
100% Solids Epoxy
Professional-grade 100% solids epoxy contains no solvents or water, meaning the entire applied volume cures into a solid coating. This produces the thickest, hardest, and most durable finish available. It requires professional application due to its fast cure time and technical application requirements.
Metallic Epoxy
Metallic epoxy uses metallic pigments suspended in a clear epoxy base to create swirling, three-dimensional effects that resemble marble, lava flow, or ocean waves. Each installation is unique since the pigments shift and blend during application. This is the premium choice for living spaces where aesthetics are the priority.
Flake (Chip) Epoxy
Flake systems involve broadcasting colored vinyl flakes or chips into wet epoxy, then sealing with a clear topcoat. The flakes provide excellent slip resistance, hide imperfections, and create an attractive terrazzo-like appearance. Flake epoxy is the most popular choice for residential garages.
Best Rooms for Epoxy Flooring
Epoxy flooring works in virtually any room with a concrete subfloor, though some applications are more common and practical than others.
Garage
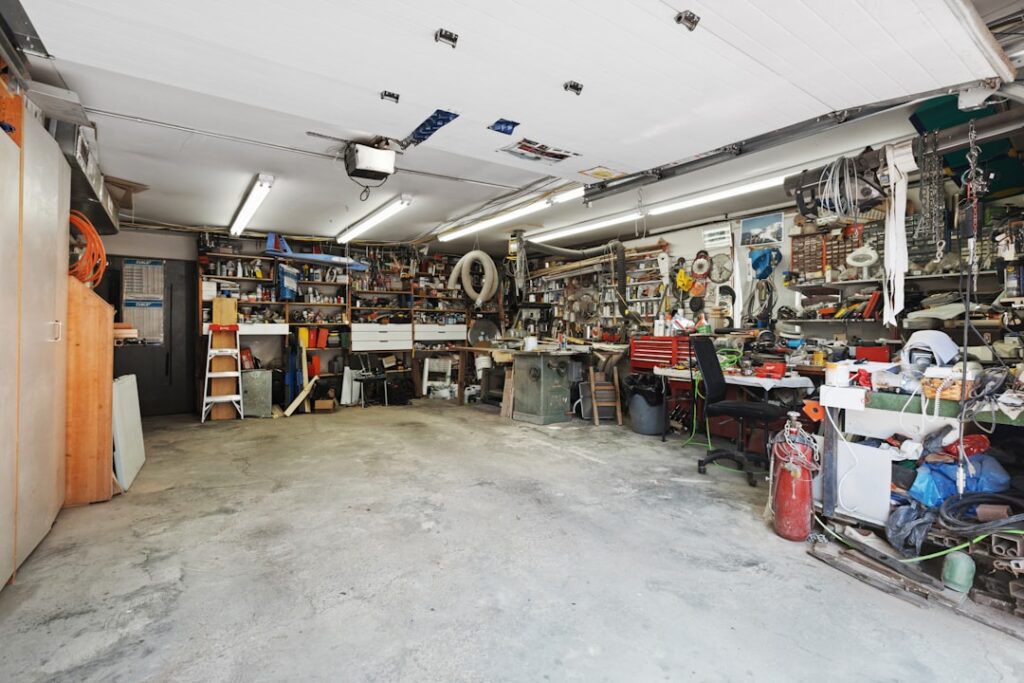
The garage remains the most popular room for residential epoxy, and for good reason. Epoxy resists oil stains, tire marks, chemical spills, and hot tire pickup that destroy painted concrete. A quality epoxy garage floor is easy to sweep clean and dramatically brightens the space with its reflective surface.
Basement
Epoxy is ideal for basements because it creates a moisture barrier that prevents water vapor from penetrating through the concrete slab. It transforms cold, gray basement floors into attractive living spaces suitable for home gyms, entertainment rooms, or workshops. Just ensure moisture levels are addressed before installation.
Kitchen
Seamless epoxy flooring in kitchens eliminates grout lines where bacteria and grime accumulate. It resists staining from food and beverages, handles heavy foot traffic, and can be designed to complement your kitchen decor with custom colors and patterns.
Bathroom
When applied with a non-slip additive or quartz broadcast, epoxy creates a waterproof, hygienic bathroom floor that is far easier to maintain than tile flooring. The seamless surface eliminates grout maintenance entirely.
Laundry Room
Epoxy’s waterproof nature and chemical resistance make it perfect for laundry rooms where detergent spills, water leaks, and heavy appliances are concerns. A simple solid-color epoxy coating protects the concrete and brightens the workspace.
Cost Breakdown for 2026
Epoxy flooring costs vary significantly based on the system type, floor condition, square footage, and whether you choose DIY or professional installation.
| Project | DIY Cost | Professional Cost | Includes |
|---|---|---|---|
| 1-Car Garage (200 sq ft) | $200 – $500 | $1,200 – $2,800 | Prep, base coat, flakes, topcoat |
| 2-Car Garage (400 sq ft) | $350 – $900 | $2,000 – $5,000 | Prep, base coat, flakes, topcoat |
| 3-Car Garage (600 sq ft) | $500 – $1,200 | $3,000 – $7,200 | Prep, base coat, flakes, topcoat |
| Basement (800 sq ft) | $600 – $1,400 | $3,500 – $9,000 | Moisture mitigation, full system |
| Metallic Floor (any size) | Not Recommended | $8 – $15 per sq ft | Full metallic system |
Professional installation typically costs $4 to $12 per square foot for standard systems and $8 to $15 per square foot for metallic or designer finishes. This includes floor preparation (grinding or shot blasting), crack repair, moisture testing, primer, base coat, decorative elements, and clear topcoat.
DIY epoxy kits range from $50 to $150 for basic water-based systems to $300 to $600 for professional-grade kits with flakes and high-performance topcoats. While DIY saves money upfront, the results depend heavily on proper surface preparation and application technique.
Pros and Cons
Advantages of Residential Epoxy Flooring
Exceptional durability. Properly installed epoxy floors withstand impacts, abrasion, and heavy loads that would damage most other flooring types. They resist scratches from furniture, pet claws, and dropped tools without showing damage.
Chemical and stain resistance. Epoxy creates an impermeable surface that resists oil, gasoline, bleach, acids, and virtually all common household chemicals. Spills bead up on the surface and wipe away without staining.
Seamless and hygienic. Unlike tile, hardwood, or laminate, epoxy flooring has no seams, grout lines, or joints where dirt, bacteria, and moisture can accumulate. This makes it one of the most sanitary flooring options available.
Low maintenance. Regular sweeping and occasional mopping with mild soap and water is all that epoxy requires. There is no waxing, sealing, polishing, or refinishing needed throughout its lifespan.
Unlimited design options. With metallic pigments, color flakes, quartz, and custom graphics, epoxy offers more design flexibility than any other flooring material. You can create any color, pattern, or effect imaginable.
Disadvantages of Residential Epoxy Flooring
Cold and hard underfoot. Epoxy over concrete is not warm or cushioned. In living spaces, area rugs are recommended for comfort, especially in bedrooms or areas where you stand for extended periods. Consider reviewing rug sizing guides if you plan to add rugs over epoxy.
Slippery when wet. Smooth epoxy can be slippery when wet unless anti-slip additives, flakes, or quartz are incorporated into the system. Always specify slip-resistant finishes for bathrooms, kitchens, pool areas, and garages.
Difficult to remove. Once cured, epoxy bonds permanently to concrete and requires aggressive grinding or shot blasting to remove. If you change your mind about the color or want to switch to a different flooring type, removal is expensive and labor-intensive.
Preparation-intensive. The success of an epoxy floor depends entirely on proper surface preparation. The concrete must be clean, dry, free of coatings, and profiled (roughened) to allow proper adhesion. Cutting corners on prep is the number one cause of epoxy failure.
Cure time. Most epoxy systems require 24 to 72 hours of cure time before light foot traffic and 5 to 7 days before vehicles or heavy items can be placed on the surface. This downtime can be inconvenient for garages and frequently used spaces.
Installation Process Step by Step
Whether you hire a professional or tackle a DIY installation, understanding the process helps you set realistic expectations and ensure quality results.
Step 1: Concrete Assessment
Test the concrete for moisture using a calcium chloride test or relative humidity probe. Moisture levels above 3 pounds per 1,000 square feet over 24 hours may require a moisture mitigation primer. Check for existing coatings, sealers, or paint that could prevent adhesion.
Step 2: Surface Preparation
This is the most critical step. Professionals use diamond grinders or shot blasters to remove the top layer of concrete and create a rough profile (CSP 2-3) for optimal adhesion. DIY installations typically use acid etching, which is less effective but adequate for water-based systems. Fill cracks and spalls with epoxy filler and allow to cure.
Step 3: Primer Application
Apply an epoxy primer to seal the concrete and improve adhesion of the base coat. This step is especially important on porous concrete or previously coated floors. Allow 12 to 24 hours for the primer to cure.
Step 4: Base Coat Application
Mix the epoxy resin and hardener according to manufacturer specifications. Apply the base coat using a roller or squeegee, working in manageable sections to maintain a wet edge. The pot life of mixed epoxy ranges from 20 to 45 minutes, so work efficiently.
Step 5: Decorative Elements
While the base coat is still wet, broadcast color flakes, quartz, or metallic pigments as desired. For full-broadcast flake systems, scatter flakes until the surface is completely covered. For metallic systems, use specialized techniques to create swirling patterns.
Step 6: Clear Topcoat
After the base coat and decorative elements cure (typically 12 to 24 hours), apply a clear polyurethane or polyaspartic topcoat. This final layer provides UV protection, chemical resistance, and a glossy or satin finish. Most systems require two topcoat applications.
Step 7: Cure Time
Allow the completed floor to cure for a minimum of 24 hours before light foot traffic, 72 hours before heavy foot traffic, and 7 days before parking vehicles or placing heavy equipment on the surface.
DIY vs. Professional Installation
The decision between DIY and professional installation depends on your budget, skill level, and expectations for the finished product.
| Factor | DIY Installation | Professional Installation |
|---|---|---|
| Cost (400 sq ft) | $350 – $900 | $2,000 – $5,000 |
| Time Required | 2-3 days | 1-2 days |
| Surface Prep Quality | Fair (acid etch) | Excellent (diamond grind) |
| Expected Lifespan | 3-7 years | 15-20+ years |
| Warranty | Product only (1-3 years) | Product + labor (5-15 years) |
| Design Options | Limited (solid, basic flake) | Unlimited |
| Risk of Failure | Moderate to High | Very Low |
DIY is a reasonable choice for basic garage floor coatings where aesthetics are secondary to protection. For living spaces, basements where moisture is a concern, or any metallic finish, professional installation is strongly recommended. The cost difference is justified by significantly longer lifespan and better results.
Maintenance and Care
One of the biggest advantages of epoxy flooring is its minimal maintenance requirements. Follow these simple practices to keep your floor looking new for decades.
Daily maintenance: Sweep or dust mop to remove loose dirt and debris that could scratch the surface over time. In garages, a leaf blower makes quick work of clearing dust and debris.
Weekly cleaning: Mop with warm water and a mild, pH-neutral cleaner. Avoid ammonia-based cleaners, vinegar, and citrus cleaners, as they can dull the epoxy finish over time. A microfiber mop works best for picking up fine particles.
Spill management: Clean up chemical spills, oil, and other liquids promptly, even though epoxy is resistant to staining. While the surface will not absorb the spill, prolonged exposure to certain chemicals can dull the topcoat finish.
Scratch prevention: Place felt pads under furniture legs and use rubber-wheeled casters on rolling chairs. In garages, park on clean tires and place cardboard or mats under vehicles during oil changes to protect the finish.
Design Options and Trends
The design possibilities with residential epoxy flooring in 2026 are virtually limitless. Here are the most popular trends and styles homeowners are choosing this year.
Metallic marble effect. Pearl, silver, and gold metallic pigments create a flowing, marble-like appearance that adds luxury to any room. Popular color combinations include charcoal with silver veining, white with gold accents, and navy with copper highlights.
Terrazzo-inspired flake. Large, multi-colored flake blends that mimic traditional terrazzo flooring are trending in 2026. These systems offer the classic terrazzo look at a fraction of the cost and without the maintenance requirements of real terrazzo.
Earth tones and naturals. Warm grays, tans, greiges, and sandstone colors dominate the residential epoxy market. These neutral tones complement most interior design styles and create a cohesive flow between rooms.
High-gloss finishes. Mirror-like, ultra-glossy topcoats reflect light and make spaces appear larger and brighter. This finish is particularly popular in basements and garages where natural light is limited.
Custom logos and designs. Homeowners are incorporating custom logos, sports team emblems, and geometric patterns into their garage and basement floors using stencils, vinyl decals, or hand-painted elements sealed under clear topcoat.
Frequently Asked Questions
How long does residential epoxy flooring last?
Professionally installed residential epoxy flooring lasts 15 to 20 years or longer with proper maintenance. DIY installations using water-based kits typically last 3 to 7 years. The longevity depends primarily on the quality of surface preparation and the type of epoxy system used.
Is epoxy flooring good for homes?
Yes, epoxy flooring is excellent for residential use in garages, basements, laundry rooms, kitchens, and bathrooms. It offers superior durability, easy maintenance, and endless design options. For bedrooms and living rooms, consider adding area rugs for warmth and comfort since epoxy over concrete can feel cold underfoot.
Can you put epoxy flooring over existing tile or wood?
Epoxy can be applied over existing tile if the tile is well-bonded and properly prepared. However, it cannot be applied directly over wood subfloors, as wood expands and contracts with humidity changes, which causes epoxy to crack and delaminate. Concrete is the ideal substrate for epoxy coatings.
Does epoxy flooring increase home value?
Epoxy flooring in garages and basements can increase home value by improving the space’s functionality and appearance. Real estate professionals estimate that a quality epoxy garage floor adds $3 to $5 per square foot to the perceived value of the space, though exact returns vary by market.
Is epoxy flooring slippery?
Smooth epoxy finishes can be slippery when wet. However, adding anti-slip aggregates, color flakes, or quartz broadcast to the topcoat creates excellent traction. Always specify a slip-resistant finish for any area that may get wet, including garages, kitchens, and bathrooms.
Can you apply epoxy over painted concrete?
Epoxy should not be applied directly over painted concrete. The paint creates a barrier that prevents the epoxy from bonding to the concrete substrate. All existing paint, sealers, and coatings must be removed by grinding or shot blasting before epoxy application.
How much does it cost to epoxy a 2-car garage?
A 2-car garage (approximately 400 to 500 square feet) costs $350 to $900 for a DIY installation using a quality kit, or $2,000 to $5,000 for professional installation with a flake system. Metallic finishes for the same area run $3,500 to $7,500 professionally installed.
Last updated: March 2026