
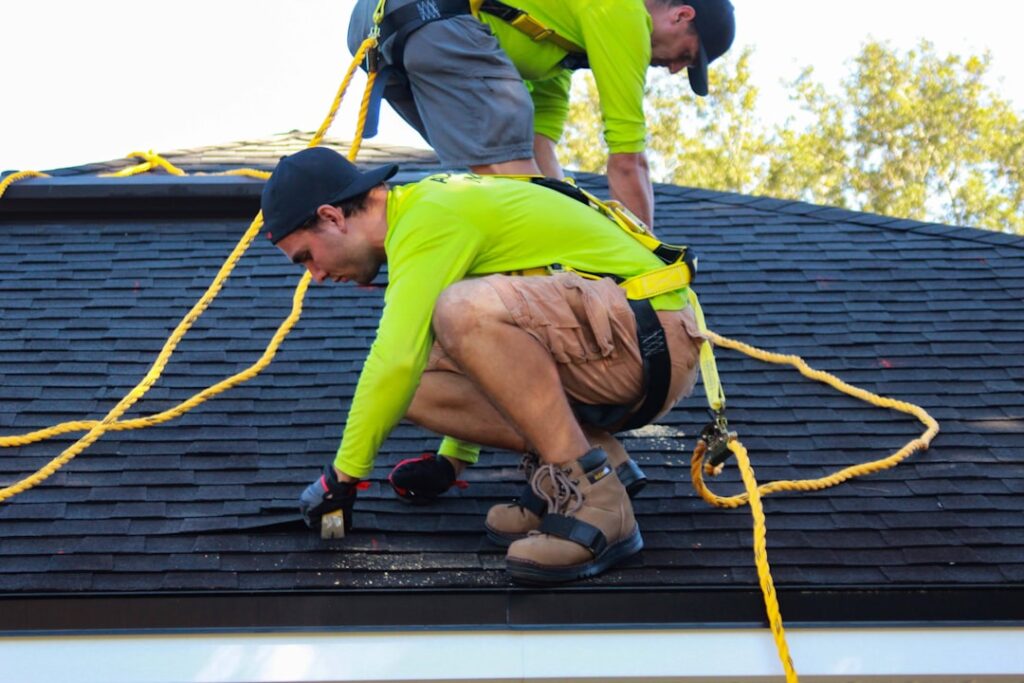
Falls from roofs kill more construction workers than any other single hazard, and homeowners on weekend projects fall at even higher rates because nobody trained them. A roof safety harness — properly called a personal fall arrest system — is the difference between a scary slip and a fatal one, and a complete kit costs less than a single ER copay. The catch is that a harness only works if the whole system is right: the anchor, the lifeline, the lanyard, and the fit all matter as much as the harness itself. Here is how the system works, what to buy, and the mistakes that make harnesses useless.
Part of our Roofing guide — explore the full guide →
The Four Parts of a Fall Arrest System
Safety trainers use the ABCD framework, and it is worth learning before you shop. A is the anchor: a rated connection point fastened to the roof structure, required to hold 5,000 pounds per attached person under OSHA 1926.502. B is body support: the full-body harness itself, with a dorsal D-ring between your shoulder blades. C is the connector: the rope lifeline, rope grab, and shock-absorbing lanyard that link harness to anchor. D is descent and rescue — the plan for getting down safely after a fall, which almost everyone forgets until they are hanging.
Every component must be rated and compatible. A $150 harness clipped to a plumbing vent is not a fall arrest system; it is a false sense of security attached to a piece of PVC.
Choosing a Harness
For residential roof work, buy a full-body harness meeting ANSI Z359.11 — never a body belt, which can cause fatal internal injuries during arrest. Entry-level compliant harnesses with a single dorsal D-ring run $50 to $90. Spending $100 to $200 gets meaningful comfort upgrades: padded shoulder and leg straps, quick-connect buckles instead of pass-through, and torso adjusters that hold their setting. Roofing-specific models sometimes add side D-rings for positioning on steep pitches.
Sizing is not one-size-fits-all despite the labels. Universal harnesses typically fit 130 to 310 pounds and 5’0″ to 6’4″, but check the spec sheet, and remember the weight rating must include your clothes and tool belt. Most consumer kits are rated for a combined 310-pound capacity.
- Budget kit ($90-$130): harness, 50-foot vertical lifeline with rope grab, shock lanyard, and reusable ridge anchor — brands like Guardian, Palmer Safety, and KwikSafety.
- Mid-range kit ($150-$250): padded harness, 50-foot lifeline, and a heavier-gauge anchor; Werner and Malta Dynamics kits sit here.
- Bucket kits ($200-$300): everything above packed in a carry bucket, common on jobsites and convenient for storage.
Anchors: The Part That Actually Saves You
The anchor is where DIY installs go wrong. A reusable ridge anchor is a hinged steel plate that straddles the ridge and screws through the sheathing into framing — ideally into rafters or trusses, not just decking — using all the manufacturer-specified fasteners, typically ten to sixteen #14 structural screws. Skipping half the screws or landing them in 7/16-inch OSB alone can cut holding strength below arrest loads. Permanent anchors ($30 to $60) get shingled over and stay for future maintenance, a smart move on any home that will need gutter cleaning or holiday lights.
Position the anchor at the ridge, centered above your work area. Working far to the side of your anchor creates swing-fall hazard: fall from an angle and you pendulum across the roof, possibly over the rake edge or into a wall at speed. Reposition the anchor, or use two, rather than working more than about 30 degrees off-line.
Fitting the Harness Correctly
A loose harness can injure you in a fall or let you slip out entirely. Fitting takes three minutes once you know the sequence.
- Hold the harness by the dorsal D-ring and shake it out so straps hang untangled.
- Step into the leg straps, pull the shoulder straps on like a vest, and buckle the chest strap at mid-chest — roughly armpit level, not at your throat or belly.
- Tighten leg straps until a flat hand slides under snugly; you should not fit a fist.
- Adjust the torso so the dorsal D-ring sits between your shoulder blades. After a fall, a low D-ring leaves you hanging face-down.
- Tuck strap tails into keepers so they cannot snag, then have someone tug-check every buckle.
Inspect before every use: look for cut or frayed webbing, chemical or UV damage, cracked stitching, corroded hardware, and a deployed shock absorber. Any harness that has arrested a fall is done — retire it permanently, no exceptions.
Using the System on the Roof
Set the ladder, install or clip to the anchor before committing your weight to the slope, and attach your rope grab to the lifeline with the shock-absorbing lanyard between grab and dorsal D-ring. The rope grab slides along the lifeline as you move but locks under sudden load, like a seatbelt. Keep slack minimal — total fall distance includes your lanyard length, shock absorber deployment (up to 3.5 feet), your body length below the D-ring, and a safety margin. On a single-story house with 10-foot eaves, a long, slack lanyard can let you hit the ground before the system arrests; this is why calculating fall clearance matters more on low roofs, not less.
Wear soft-soled shoes, keep the lifeline uphill of your feet, and never unclip to “just reach something quick.” The statistics are full of people who unclipped for thirty seconds.
The Rescue Problem Nobody Plans For
Surviving the fall is step one. Hanging motionless in a harness compresses the femoral veins, and suspension trauma can cause unconsciousness in as little as 10 to 20 minutes. Never work harnessed alone; someone on site must be able to call 911 and position a ladder to support your weight. If you are the one suspended, keep your legs moving, push against the structure if possible, and use trauma relief straps — $15 to $25 add-ons that deploy into stirrups you can stand in to restore circulation. Cheap insurance for a real, underappreciated risk.
Care, Storage, and When to Retire Gear
Fall protection ages even when it never arrests a fall. Ultraviolet light degrades nylon and polyester webbing, so store the harness indoors, hanging by its dorsal D-ring in a dry closet rather than baking in a truck bed or garage window. Keep it away from battery acid, solvents, and gasoline — chemical exposure that leaves no visible mark can cut webbing strength badly. Wash dirty gear with mild soap and water, air-dry it out of the sun, and never force-dry it near heat.
Manufacturers commonly suggest a service life of about five years from first use for harnesses and lanyards in regular service, with the honest caveat that condition governs: a two-year-old harness with frayed stitching retires today, while lightly used gear that passes inspection can serve longer under many makers’ policies. Write the date of first use on the label, log your inspections, and apply the automatic-retirement rules without negotiation — any fall arrest, any deployed shock absorber, any cut or burned webbing, any cracked or deformed hardware. Rope lifelines deserve the same scrutiny; grit works into the strands and abrades them from inside, so a lifeline dragged across shingles for a few seasons is a consumable, not an heirloom. At $30 to $60 for a replacement lifeline, erring toward early retirement is the cheapest decision in this entire system.
When a Harness Is Not Enough
Know your limits. Pitches above 8/12, wet or frost-covered shingles, wind gusts over 20 mph, and any work near power lines are professional territory regardless of your gear. Roof jacks and toe boards complement a harness on steep slopes but do not replace one. And a roof safety harness protects against falls from the roof surface — most homeowner accidents actually happen on the ladder transition, so extend the ladder 3 feet above the eave, tie it off, and keep three points of contact. Buy the $150 kit, screw the anchor into solid framing, and treat every trip up as the one where the system might have to work.


