Few landscape features add as much timeless character to a yard as natural stone, and a well-built sandstone retaining wall holds back a slope while looking like it grew out of the ground itself. The warm, layered tones of sandstone flatter almost any home, but the material has quirks: it’s softer than granite, it drinks water, and it demands proper drainage to avoid trouble. Understand those traits before you break ground, and you’ll build a wall that manages your grade and turns heads for decades.
- Why Homeowners Choose Sandstone
- Understanding Sandstone's Limitations
- Cost of a Sandstone Retaining Wall
- Dry-Stack Versus Mortared Construction
- Drainage: The Make-or-Break Detail
- Building a Solid Base
- Sealing and Long-Term Maintenance
- Design Ideas and Integration
- Sandstone Versus Other Wall Materials
- Weathering, Patina, and What to Expect Over Time
- Permits, Setbacks, and Property Lines
- DIY or Hire a Pro?
- The Bottom Line
Why Homeowners Choose Sandstone
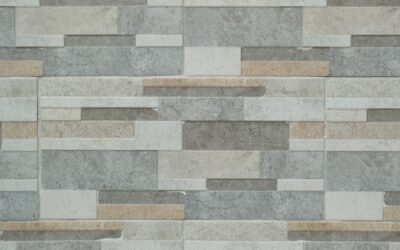
Sandstone earns its popularity on looks. The stone forms in natural layers, giving each piece warm bands of tan, buff, gold, and rust that no manufactured block can replicate. Split faces reveal a rugged texture, while sawn faces read cleaner and more contemporary.
Beyond beauty, sandstone is relatively easy to work. Because it’s softer than granite or basalt, masons can shape and split it with hand tools, which speeds dry-stack builds and lets you fit irregular pieces snugly. That workability makes it a favorite for garden walls and terraced beds where a natural, hand-laid look is the goal.
Understanding Sandstone’s Limitations
The same softness that makes sandstone easy to work also makes it porous. It absorbs water readily, which matters in freeze-thaw climates where trapped moisture expands and flakes the surface over years. This isn’t a reason to avoid it, but it is a reason to seal exposed caps and prioritize drainage.
Sandstone also varies widely in density by quarry. A hard, tightly grained Pennsylvania bluestone-family sandstone weathers far better than a soft, crumbly variety. Ask your supplier about the stone’s absorption rate and freeze-thaw rating before buying for a structural wall.
Cost of a Sandstone Retaining Wall
Natural stone sits at the premium end of retaining-wall materials. Expect the total installed cost to reflect both the stone and the skilled labor to lay it.
- Material only: $15 to $35 per square foot of wall face, depending on stone type and whether it’s tumbled, cut, or wild fieldstone
- Professional installation: $40 to $75 per square foot installed for a mortared or engineered wall
- Dry-stack DIY: Roughly $20 to $30 per square foot in materials if you supply the labor
- Drainage and base: Add $500 to $1,500 for gravel, drain pipe, and geotextile fabric on a typical wall
A 30-foot-long, 3-foot-tall wall (90 square feet of face) can run $3,500 to $6,500 installed. Walls over 4 feet tall usually require an engineer and permit, which adds cost but is non-negotiable for safety.
Dry-Stack Versus Mortared Construction
You have two fundamental build methods, each with a distinct look and function. The choice shapes cost, drainage, and appearance.
Dry-Stack Walls
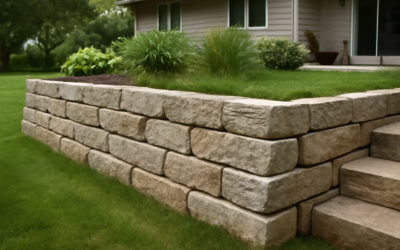
Stones are fitted without mortar, relying on weight, gravity, and careful placement for stability. Gaps between stones let water drain freely through the face, which is a real advantage. Dry-stack suits walls up to about 3 feet and delivers the most natural, rustic look. It also flexes slightly with ground movement instead of cracking.
Mortared Walls
Stones are bonded with mortar over a concrete footing, creating a rigid, monolithic wall. Mortared construction handles greater height and gives a more finished, formal appearance. The trade-off is that it must include weep holes and a drainage system, because mortar blocks the natural seepage a dry-stack wall allows.
Drainage: The Make-or-Break Detail
Water is the number-one killer of retaining walls, and porous sandstone raises the stakes. Hydrostatic pressure from waterlogged soil behind the wall can push it over, while trapped moisture accelerates freeze-thaw damage. Every durable sandstone wall gets the same drainage backbone.
- A perforated 4-inch drain pipe (French drain) runs along the base behind the wall, sloped to daylight or a drain
- Clean crushed gravel, 3/4-inch, backfills the space behind the wall to channel water down to the pipe
- Geotextile fabric separates the gravel from native soil so silt doesn’t clog the drainage
- Mortared walls include weep holes every 4 to 6 feet to relieve pressure
Skip drainage and even a beautifully laid wall will bulge, stain, and fail within a few seasons. This is the step DIYers most often shortcut, and it’s the one that matters most.
Building a Solid Base
A retaining wall is only as good as its foundation. Excavate a trench below the frost line in cold climates, then build a compacted base of 6 to 8 inches of crushed stone. Level and tamp it thoroughly, because any settling here telegraphs up through the entire wall.
Set the first course slightly below grade and level it stone by stone; this base row governs everything above it. Batter the wall by stepping each course back about an inch, so the wall leans slightly into the slope it retains. That backward lean uses gravity to resist the soil’s push.
Sealing and Long-Term Maintenance
Because sandstone is porous, sealing exposed surfaces extends its life significantly. Apply a breathable, penetrating siloxane sealer to cap stones and the wall face, especially in freeze-thaw regions. A breathable sealer repels water while still letting trapped vapor escape, which is critical, a film-forming sealer can trap moisture and worsen spalling.
Reapply sealer every 2 to 4 years. Beyond that, maintenance is light: pull weeds from joints, brush off organic staining, and reset any stone that shifts. Keep downspouts and grading directing surface water away from the top of the wall so runoff doesn’t saturate the backfill.
Design Ideas and Integration
A sandstone wall does more than hold soil. Cap it with wide, flat stones to double as casual seating around a patio. Terrace a steep slope with two or three shorter walls instead of one tall one, creating planting beds and easing the engineering load. Integrate built-in steps of matching stone for a cohesive, custom look.
Soften the structure with trailing plants like creeping thyme, sedum, or ornamental grasses tucked into dry-stack joints. The stone’s warm palette pairs beautifully with green foliage and gravel paths, tying the wall into the broader landscape.
Sandstone Versus Other Wall Materials
It helps to know where sandstone sits among the alternatives before you commit. Each material trades looks, cost, and durability differently, and the right choice depends on your priorities.
- Concrete segmental blocks: cheapest and easiest to DIY at $15 to $30 per square foot installed, with a uniform, manufactured look sandstone fans dislike
- Granite or basalt: harder and more freeze-resistant than sandstone but far heavier to work and more expensive
- Limestone: similar workability and warmth to sandstone, with comparable porosity concerns
- Poured concrete: strongest for tall structural walls but the least natural in appearance
Sandstone’s edge is purely aesthetic and tactile: no manufactured block matches its natural layering and warm color variation. If you want a wall that looks like it belongs in the landscape and you’re willing to seal and maintain it, sandstone wins. If you want the cheapest, most maintenance-free structural wall, concrete block is the pragmatic pick.
Weathering, Patina, and What to Expect Over Time
Natural sandstone doesn’t stay the exact color it was the day it was laid, and that’s part of its charm. Exposed to sun and rain, the stone develops a softened patina, often deepening in tone as iron content oxidizes and lichens or moss colonize shaded, damp faces. Many homeowners prize this aged look; others prefer to keep the wall clean and bright.
If you want to preserve the original color, a breathable sealer slows weathering and staining. If you welcome the patina, simply let nature work while still sealing the caps against freeze-thaw damage. Either way, watch for early warning signs of trouble, a bulging face, widening joints, white efflorescence, or persistent dampness at the base, since these signal a drainage problem you should address before it worsens. Caught early, a shifting stone can be reset; ignored, it can bring a section of wall down.
Permits, Setbacks, and Property Lines
Before you dig, check local rules. Many municipalities require a permit for retaining walls over 3 or 4 feet tall, and some regulate walls near property lines, easements, or drainage courses regardless of height. Building a tall wall without the required engineering and permit can mean fines and a costly rebuild.
Locate underground utilities by calling 811 before excavating, and confirm the wall sits fully on your property with proper setbacks. If the wall retains a neighbor’s grade or affects shared drainage, a conversation and sometimes a written agreement upfront prevents disputes later. These administrative steps are unglamorous, but they protect both your investment and your relationship with the folks next door.
DIY or Hire a Pro?
A short dry-stack garden wall under 2 feet is a realistic weekend project for a fit, patient DIYer willing to move heavy stone and rent a plate compactor. Once a wall exceeds 3 to 4 feet, retains a driveway or structure, or requires mortar and a footing, hire a mason or landscape contractor. The engineering, drainage, and sheer weight of a tall wall leave no room for guesswork.
The Bottom Line
A sandstone retaining wall rewards you with natural warmth and character that manufactured block can’t match, provided you respect the stone’s porous nature. Invest in a compacted base, an uncompromising drainage system, and a breathable sealer, then batter the wall into the slope for stability. Build it right and this softest of hard materials will hold your grade and grace your yard for a generation, aging into the landscape more gracefully every year.