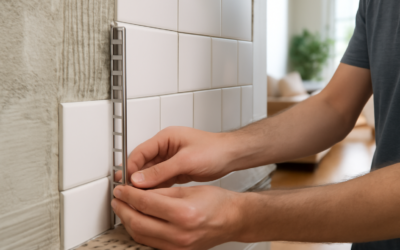
Look at a beautifully tiled shower or backsplash and the part that quietly sells the whole job is the edge. A raw tile edge looks unfinished and chips easily; a sloppy caulk line looks cheap. Schluter tile edging solves both, capping the exposed edge of tile with a clean metal or trim profile that protects the corner and gives the installation a crisp, intentional border. It’s become the standard finish for modern tile work because it eliminates the need for bullnose tiles and works with the rectified, square-edged tiles that dominate today. Here’s how to choose, size, and install edging for a professional finish.
Part of our Tile & Grout guide — explore the full guide →
Why Tile Edges Need Finishing
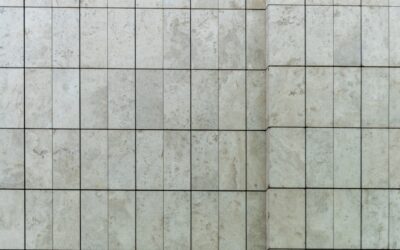
The cut edge of a tile is its weak point. On porcelain and ceramic, the exposed edge shows the unglazed body underneath, which looks raw and is prone to chipping when bumped. For decades the solution was a bullnose tile, a matching tile with one rounded, glazed edge. But many modern tiles, especially rectified large-format and designer lines, don’t come in bullnose, leaving installers with an unfinished edge.
Metal and composite edging profiles fill that gap. They cap the edge with a durable, finished border that protects the tile from chipping, creates a clean transition to adjacent surfaces, and adds a deliberate design line. For outside corners, niches, countertop fronts, and the top edge of a wainscot or backsplash, edging is the go-to finish.
The Main Profile Types
Square-Edge (Modern) Profile
A clean, angular profile with a square reveal. This is the contemporary favorite, giving a crisp, minimal metal line along the tile edge. It suits modern and transitional designs and pairs perfectly with square-edged rectified tile.
Rounded-Edge Profile
A curved, bullnose-like profile that mimics the soft rounded edge of traditional bullnose tile. It’s the choice when you want a gentler, more classic transition or a finger-friendly rounded corner.
Round-Edge for Outside Corners
Specialized profiles wrap outside corners cleanly, protecting the most vulnerable spot in any tile job, where two tiled planes meet at a 90-degree external corner.
Decorative and Stepped Profiles
Profiles with a small reveal, step, or accent detail that add a design element along with edge protection.
Materials and Finishes
Edging comes in a range of materials, and the choice affects durability, look, and price:
- Anodized aluminum: The most common and affordable, available in brushed and polished finishes. Durable for most interior dry and damp areas
- Stainless steel: The most durable, ideal for high-traffic, wet, and demanding areas. More expensive but extremely tough and corrosion-resistant
- Brass and bronze: Warm metallic tones that have surged in popularity alongside brass fixtures. A designer accent
- PVC and composite: Budget-friendly, available in many colors to blend with grout, and a good choice where a metal look isn’t wanted
Finish matters for coordination. Match or complement your fixtures and hardware; brushed nickel edging with brushed nickel faucets, or brass edging with brass accents, ties a room together. A satin or brushed finish hides fingerprints and minor scuffs better than a high polish.
Sizing the Profile to Your Tile
This is the step people get wrong. Edging profiles are sized to the thickness of your tile. The vertical leg of the profile, the part that shows along the edge, must match your tile thickness so the metal sits flush with the tile face, with no lip and no gap.
Measure your tile thickness precisely, including any difference once it’s bedded in thinset. Common tile thicknesses run from about 1/4 inch to 1/2 inch, and profiles are sold in matching heights. If the profile is too short, the tile stands proud of the metal; too tall, and the metal edge sticks up above the tile, catching and looking wrong. When between sizes, choose the profile that sits flush or just barely below the tile face, never above it.
How to Install Tile Edging
Edging installs as part of the tile-setting process, embedded in the same thinset, which is why it has a perforated anchoring leg. The steps:
- Plan the layout so the edging falls at the finished edge, outside corner, or transition where you want it
- Cut the profile to length with a hacksaw or metal snips, and miter the ends at 45 degrees where two profiles meet at a corner for a clean joint
- Spread thinset on the substrate where the edge tiles and profile go
- Press the perforated anchoring leg into the thinset, so it sits under the adjacent tiles and bonds in place
- Set the tile tight against the vertical face of the profile, leaving a small grout-joint gap as you would between tiles
- Check that the profile sits flush with the tile face and is straight, adjusting before the thinset sets
- Grout the joint between the tile and the profile along with the rest of the tile, filling the gap cleanly
The anchoring leg buried in thinset is what holds the profile permanently; it isn’t surface-glued or screwed on afterward. That’s why edging has to be planned and set during tiling, not added later.
Common Mistakes to Avoid
- Wrong profile height, leaving the metal proud of or recessed below the tile face
- Adding edging after tiling, when it’s meant to be embedded in the thinset during the set
- Skipping the mitered corners, which leaves an ugly butt joint where profiles meet
- Forgetting to grout the profile joint, leaving a gap that collects grime
- Mismatched finish that clashes with the room’s fixtures and hardware
Is It Worth Using
For any tile job with an exposed edge, an outside corner, or a transition, edging is the detail that elevates the whole installation. It protects the most chip-prone part of the tile, eliminates the need to source matching bullnose, and adds a crisp, designer line that ties into your fixtures. Match the profile height to your tile thickness, set it in the thinset as you tile, miter the corners, and choose a finish that coordinates with the room. Get those right, and a few dollars of edging makes a tile job look like it was finished by a pro.
Prefer to explore on your own?
See how new flooring looks in your actual room in seconds — free, no signup.
Try the free Floor Studio →