An uninsulated shed swings 30 to 40 degrees past the outdoor temperature — a metal-roofed 10×12 can hit 120°F inside on a 90°F afternoon and drip condensation on your tools every cold morning. Shed insulation tames both problems for a few hundred dollars, but the right approach depends entirely on what the building is for: a storage shed needs condensation control more than warmth, while a workshop you heat in January needs a real thermal envelope. Sheds also break the normal house rules — most have no HVAC, no vapor drive from living space, and framing too shallow for standard batts — so copying house methods wastes money. Here is how to match material to mission and install it correctly.
- Decide the Goal First: Storage vs Workshop
- The Three Materials That Make Sense in a Shed
- Rigid Foam Board — the Shed Workhorse
- Fiberglass Batts — Cheapest R Per Dollar, With Conditions
- Reflectix and Radiant Barriers — Narrow but Real Use Case
- Storage Shed Recipe (No Heat, ~$150-$300 for 8×10)
- Workshop Recipe (Heated/Cooled, ~$500-$1,100 for 10×12)
- The Vapor Barrier Trap in Unconditioned Buildings
- Costs at a Glance
- Three Mistakes to Avoid
Decide the Goal First: Storage vs Workshop
Everything downstream follows from one question: will you condition the space? A storage shed — mowers, bikes, holiday boxes — needs to stop radiant heat gain and roof-condensation drip; modest insulation and good airflow do that, and chasing high R-values is wasted money. A workshop, office, or gym that you will heat or cool needs continuous insulation, air sealing, and a deliberate vapor strategy, because you are creating the indoor-outdoor temperature differences that cause trouble. A middle case — protecting paint, glue, and batteries from freezing — usually means workshop-level walls plus a 250-watt thermostat-controlled heater rather than more foam. Be honest about the goal; the budget difference between the two builds is roughly 3x.
The Three Materials That Make Sense in a Shed
Rigid Foam Board — the Shed Workhorse
Foam board suits sheds better than anything else because most shed walls are framed with 2x3s or 2x4s at odd spacings, and boards cut to fit any cavity. Your options at the big-box store: XPS (blue/pink board, R-5 per inch, about $25 to $32 for a 1-inch 4×8 sheet), polyiso (foil-faced, R-6 to R-6.5 per inch, $28 to $36 per 1-inch sheet), and EPS (white beadboard, R-3.8 to R-4 per inch, $16 to $22 per sheet — the budget pick). Cut pieces 1/8 inch small, press into the stud bays, and seal the perimeter of every piece with canned foam (Great Stuff, about $6 a can — budget 4 to 6 cans for a small shed). That foam sealing is not optional; unsealed board edges leak air and let moist air reach the cold sheathing behind the foam.
Fiberglass Batts — Cheapest R Per Dollar, With Conditions
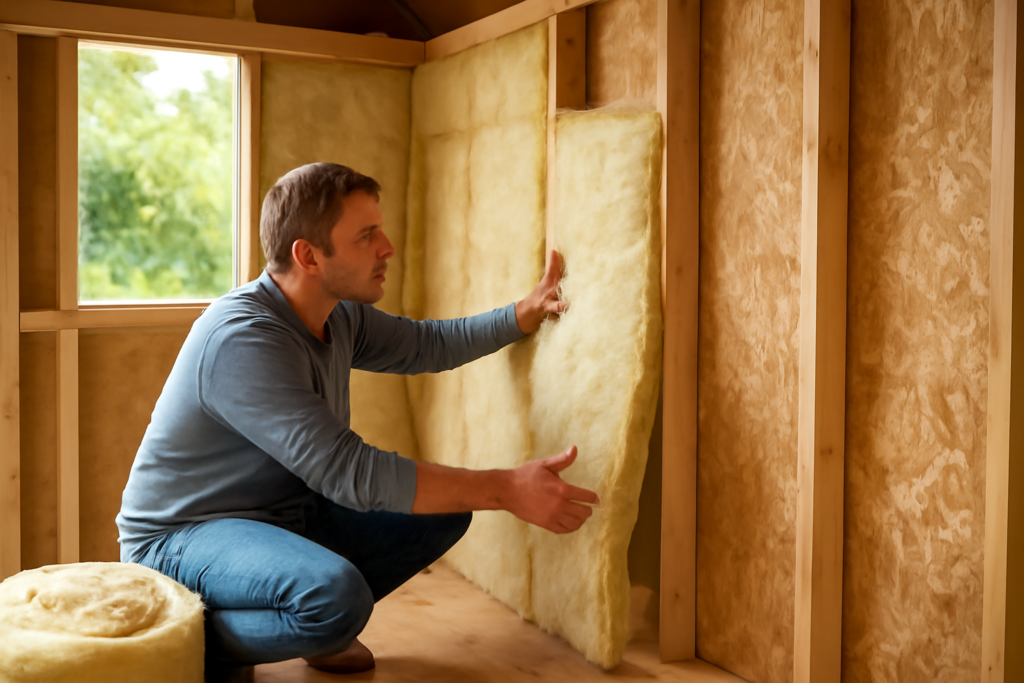
R-13 kraft-faced batts cost about $0.55 to $0.75 per square foot — half of foam board’s price at equivalent R — and make sense in a shed with true 2×4 framing at 16 or 24 inches on center that you plan to heat and finish with an interior wall covering. Fiberglass has two shed-specific weaknesses: mice love nesting in exposed batts (cover them with plywood or OSB, not just for looks), and wet fiberglass is dead fiberglass, so fix every roof and siding leak first. Skip faced batts stapled into a shed you will never heat; the kraft facing does nothing useful there and the exposed paper is a code-flagged fire issue in some jurisdictions anyway.
Reflectix and Radiant Barriers — Narrow but Real Use Case
Reflectix (double-bubble foil, about $45 to $60 for a 24-inch x 50-foot roll) is widely misused. As cavity insulation it is only about R-1; its real job is blocking radiant heat, which requires a 3/4-inch air gap facing the foil. The one place it shines in a shed: stapled under the roof rafters or metal roof purlins with an air gap, where it cuts summer radiant gain dramatically and doubles as a condensation drip barrier under metal roofing. Use it on the roof of a storage shed; do not waste it on walls in place of real insulation.
Storage Shed Recipe (No Heat, ~$150-$300 for 8×10)
- Staple Reflectix or install 3/4-inch EPS under the roof framing with an air gap to kill radiant gain and stop metal-roof drip.
- Leave walls uninsulated or add 3/4-inch EPS if the shed bakes in full sun.
- Add ventilation — two gable vents (about $12 each) or a ridge-and-soffit combination sized to cross-ventilate. Airflow, not insulation, is what keeps a closed storage shed dry.
- Get moisture off the floor: seal a concrete slab, or lay 6-mil poly under the floor of a wood shed on skids if ground moisture wicks up.
Workshop Recipe (Heated/Cooled, ~$500-$1,100 for 10×12)
- Air-seal first. Canned foam at every gap, sill, and penetration; caulk where siding meets framing. Small buildings lose a huge fraction of heat to raw air leakage.
- Walls: R-13 batts in 2×4 bays, or 1.5 to 2 inches of foil-faced polyiso foam-sealed into shallower framing. Target R-13 to R-15.
- Roof: the biggest loss surface. Two inches of polyiso between rafters (R-12 to R-13) with sealed edges, leaving a 1-inch vent channel above it from eave to ridge if the roof has vents; or fill rafter bays with R-19 batts under a vented channel. Cathedral-style shed roofs with no venting path should use foam board only, not fiberglass.
- Floor: often skipped, always regretted. On a wood floor over skids, lift a few deck boards or work from below and add R-13 batts in the joist bays over hardware-cloth mouse screening, or glue 1-inch XPS under a new 1/2-inch plywood overlay on top (costs about 1 inch of headroom, takes 20 minutes).
- Cover the walls: 7/16 OSB (about $14 to $18 a sheet) protects insulation, adds shear strength, and gives you screw-anywhere tool walls. Drywall works but hates shed humidity swings.
- Heat/cool sizing: once insulated, a 10×12 workshop holds with a 1,500-watt electric heater in most climates, or a 6,000-BTU window unit / cheapest mini-split for summer.
The Vapor Barrier Trap in Unconditioned Buildings
The most common shed insulation mistake is wrapping interior walls in 6-mil poly because “houses have vapor barriers.” A house has a warm, humid interior all winter driving vapor outward; an unheated or occasionally heated shed does not — its interior tracks outdoor conditions, and moisture can drive in either direction depending on the day. Poly sheeting in that environment becomes a condensation plane that traps water against framing. The right strategy: rely on air sealing (sealed foam-board edges, caulked penetrations) rather than vapor films; use kraft facing at most on heated builds; and keep some drying path — vapor-open in at least one direction — in every assembly. The exception is under metal roofing, where a condensation barrier (Reflectix with an air gap, or purpose-made anti-condensation felt) earns its place, and under floors against ground moisture.
Costs at a Glance
- 8×10 storage package (roof Reflectix + vents): $150 to $250 DIY
- 10×12 walls-and-roof in EPS foam board: $350 to $550
- 10×12 full workshop (R-13 batts, polyiso roof, floor, OSB skin): $700 to $1,100
- Hiring it out: insulation contractors mostly won’t touch sheds; a handyman at $50 to $75 per hour turns any of these into a $500 to $1,500 labor add. This is genuinely DIY territory — a 10×12 takes one long weekend.
Three Mistakes to Avoid
First, insulating a leaky shed — water beats every material; fix roof, flashing, and grade drainage before spending on foam. Second, blocking all ventilation in a storage shed to “keep heat in” when there is no heat to keep; you will trade a temperature problem for a mold problem. Third, leaving foam board exposed in a heated, occupied workshop — building codes require a thermal barrier (typically 1/2-inch drywall or an approved coating) over foam plastics in occupied spaces because of fire behavior, and OSB alone does not always satisfy it. Check your local rules if the shed doubles as an office; for pure tool storage, enforcement interest is near zero, but the fire logic still applies wherever you run a wood stove or heater.