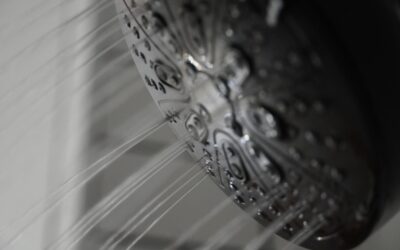
A fixed shower head does one thing, and it does it from one angle. The moment you need to rinse conditioner off a toddler, bathe a dog, or scrub down the tile walls, you understand why shower heads with handheld spray have become the default upgrade in remodeled bathrooms. The handheld wand pulls off a cradle on a flexible hose, usually 60 to 72 inches long, giving you directed water anywhere in the enclosure. Better yet, most of today’s units are combos: a fixed rain head plus a detachable wand sharing a single valve, so you get the luxury of an overhead soak and the utility of a handheld in one fixture.
Part of our Bathroom Remodeling & Flooring guide — explore the full guide →
Here is how to choose the right style, understand flow rates, and install one without calling a plumber for most jobs.
The Three Main Configurations
Not all handheld setups are built the same. Pick the layout that matches how you actually shower.
- Handheld only: A single wand on a hose, mounted to a bracket or slide bar. Simplest and cheapest, ideal for tubs and accessible baths.
- Dual combo (fixed + handheld): A rain or standard head plus a separate wand, controlled by a diverter that runs one, the other, or both at once. The most popular choice for a full remodel.
- Slide bar handheld: The wand rides up and down a vertical bar so users of different heights can lock it at a comfortable angle, effectively working as a height-adjustable fixed head.
Flow Rate and Water Efficiency
Federal law caps shower head flow at 2.5 gallons per minute (GPM) at 80 psi. Many modern heads run 1.75 or 2.0 GPM to save water, and California and Colorado enforce a stricter 1.8 GPM limit. On a combo unit, the diverter matters: if you can run the fixed head and the wand simultaneously, each may deliver less pressure, so check whether the total flow is shared or whether the diverter forces you to pick one.
Look for a WaterSense label if efficiency is a priority. A WaterSense head uses no more than 2.0 GPM while still meeting spray-force standards, saving a typical family around 2,700 gallons a year. If your home has low water pressure, avoid the lowest-flow models and choose a head with pressure-boosting nozzles instead.
Spray Settings Worth Having
Cheap wands offer one weak spray. Quality models give you three to seven settings selected by a rotating collar. The genuinely useful ones are a full drenching spray, a concentrated massage or pulse for sore muscles, a wide rinse, and a pause or trickle setting that cuts flow to a dribble while you lather without losing your temperature mix. A pause button on the wand itself is a small feature that saves real water.
Rubber or silicone nozzle tips are worth seeking out because you can wipe mineral deposits off with a thumb, which keeps spray patterns crisp in hard-water homes.
Finish, Material, and Build Quality
Match the finish to your existing fixtures: polished chrome and brushed nickel are the most common, with matte black and brushed gold on trend. Chrome hides water spots best and is easiest to clean. For the hose, stainless steel braided is far more durable and kink-resistant than a plain vinyl hose, and it resists cracking for years.
Weigh the wand in your hand if you can. An all-plastic head is light and cheap, running $20 to $40, while a metal-bodied handheld with a solid diverter and braided hose runs $50 to $120. A full designer combo with a large rain head can reach $150 to $300. Avoid the very cheapest units where the plastic cradle cracks within a year.
Installation: A True 30-Minute Job
Swapping a shower head is one of the friendliest plumbing upgrades because it happens entirely outside the wall, with no need to shut off the main water supply.
- Unscrew the old head counterclockwise by hand or with a wrench padded by a cloth to protect the finish.
- Clean the shower arm threads and wrap them clockwise with three to five turns of PTFE (plumber’s) tape.
- For a handheld-only setup, thread on the mounting bracket or diverter. For a combo, install the diverter body first, then the fixed head and the hose.
- Hand-tighten, then give a quarter turn with the padded wrench. Do not overtighten plastic threads.
- Run the shower and check every connection for drips. A weeping joint just needs another wrap of tape.
If you want to add a wand to a wall that only has a tub spout, a slip-on tub-spout diverter avoids any wall work. Anything that requires opening the wall, moving the valve, or adding a second outlet is a job for a licensed plumber.
Accessibility and Family Use
Handheld sprays are the backbone of aging-in-place bathrooms. Pair a wand on a 24 or 30-inch slide bar with a properly anchored grab bar and a shower seat, and a person can bathe seated with full control of the water. The hose length lets a caregiver assist comfortably, and the pause setting conserves warmth between rinses. For families, the same wand that bathes a baby handles muddy kids and pets without a fuss.
Diverter Types and How They Work
On a combo unit, the diverter is the small valve that decides where the water goes, and understanding it prevents frustration. A three-way diverter lets you run the fixed head only, the handheld only, or both at once, which is the most flexible option but splits pressure when both run together. A simpler two-way diverter toggles between one outlet and the other. The diverter usually sits on the shower arm behind the fixed head or is built into a mounting bracket.
Cheap plastic diverters are the first part to fail, sticking or leaking after a couple of years, so a solid brass diverter body is worth paying for. If you notice water dribbling from the fixed head while using the wand, a worn diverter washer is usually the culprit and is a quick fix.
Water Temperature and Pressure Considerations
Handheld sprayers work with any standard valve, but the shower’s thermostatic or pressure-balancing valve behind the wall controls temperature safety. If your home has old plumbing without a pressure-balancing valve, a sudden flush or faucet use elsewhere can cause a temperature swing at the wand. Upgrading the mixing valve is a job for a licensed plumber and improves safety for everyone, especially in homes with children or older adults.
For low-pressure homes, avoid the most aggressive water-saving heads and instead look for models with pressure-boosting nozzle technology that maintains a strong spray at lower flow. If you have hard water, a wand with self-cleaning silicone nozzles keeps the spray consistent far longer than smooth metal faceplates that clog with scale.
Frequently Asked Questions
Can I add a handheld sprayer without replacing my fixed shower head?
Yes. A diverter that threads onto the existing shower arm splits the flow, letting you keep your current fixed head and add a handheld wand on a hose. It installs in minutes with no wall work.
What hose length should I get?
Standard hoses run 60 inches, but 72-inch and 80-inch options give more reach for bathing pets, cleaning, or assisting another person. Longer hoses coil more, so match the length to your enclosure size.
Do handheld shower heads lose water pressure?
A quality handheld maintains strong pressure because the nozzles are engineered for it. Pressure drops mainly happen with clogged nozzles, a low-flow rating below 1.8 GPM, or when a diverter runs a fixed head and wand at the same time.
Are handheld shower heads hard to keep clean?
No. Models with flexible rubber or silicone nozzle tips let you rub off mineral scale by hand. For deeper cleaning, soak the wand in a bag of white vinegar for an hour to dissolve hard-water buildup.
How much does a good handheld shower head cost?
Plan on $50 to $120 for a durable metal wand with a braided hose and multiple spray settings. Full combo systems with a large rain head plus a handheld run $150 to $300 depending on finish and brand.