The single part that decides whether a barn door glides silently or rattles across the room is not the door itself, it is the rail it hangs from. A quality sliding barn door track carries the entire weight of a slab that can top 100 pounds, absorbs the momentum of daily use, and anchors into your wall framing with margin to spare. Homeowners routinely obsess over the wood species and finish, then bolt it to a bargain rail that sags within a season.
Part of our Windows & Doors guide — explore the full guide →
Choosing the right track means matching length to your opening, verifying weight capacity, and mounting into solid backing rather than drywall alone. Get those three factors right and the door becomes the quiet, satisfying centerpiece the style promises.
- How a Sliding Barn Door Track Works
- Sizing the Track to Your Opening
- Weight Capacity and Door Compatibility
- Track Materials and Finishes
- The Backer Board: The Step People Skip
- Installing the Track Step by Step
- Quieting a Noisy Slide
- Single, Bypass, and Bi-Part Configurations
- Budgeting for the Project
How a Sliding Barn Door Track Works
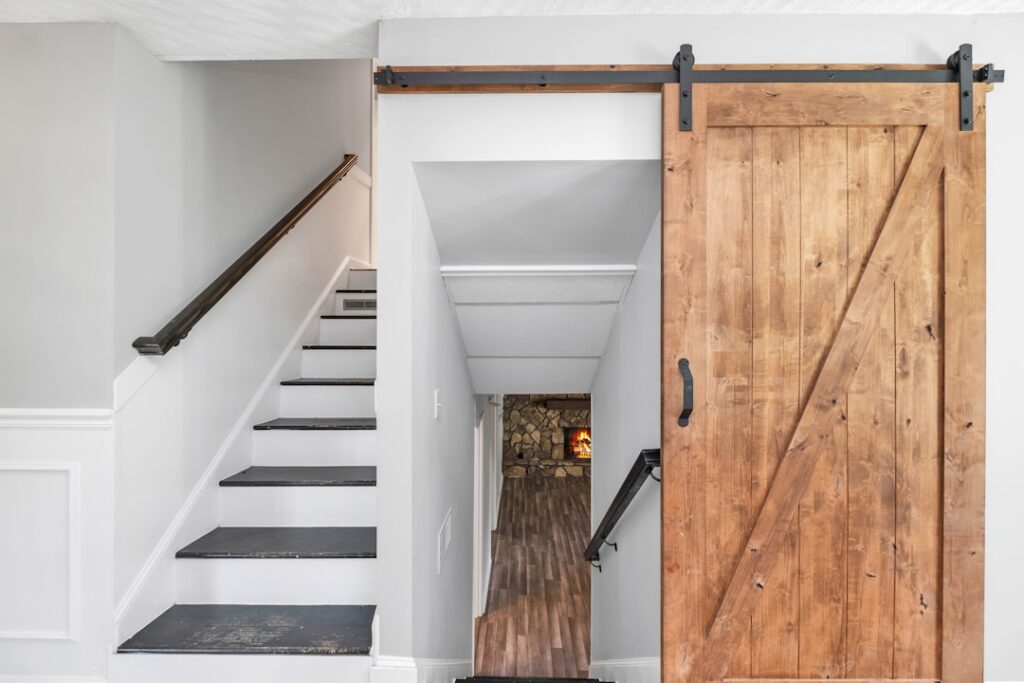
The system is elegantly simple. A steel rail mounts horizontally above the doorway, two rollers (called hangers or straps) bolt to the top edge of the door, and the door hangs from those rollers so it slides side to side rather than swinging on hinges. A floor guide at the bottom keeps the panel from swaying against the wall, and end stops prevent the rollers from running off either end of the rail.
Because the door hangs entirely from the top, every ounce of weight transfers to the wall through the track’s mounting bolts. That is why the rail, the fasteners, and the backing behind the drywall matter far more than the roller design. A smooth-rolling bearing means nothing if the rail flexes under load.
Sizing the Track to Your Opening
The rule that governs every installation is straightforward: the track must be twice the width of the door. A 36-inch door needs a 72-inch rail so the panel can slide fully clear of the opening on one side. Standard rail lengths run 6.6 feet for a single 36-inch to 40-inch door and 8 feet for wider slabs up to 48 inches.
You also need adequate wall space beside the opening. Measure from the edge of the door frame to the nearest obstruction, an electrical outlet, a light switch, a window casing, or an adjacent wall. That clear run must equal or exceed the door width, otherwise the panel will not open completely. Bypass kits exist for two doors sharing a wider opening, but they use a double-rail track and different math.
Weight Capacity and Door Compatibility
Read the load rating before anything else. Entry-level kits handle 150 to 200 pounds, which covers most hollow-core and standard solid-pine doors. Reclaimed lumber, solid oak, and doors with glass panels can push past 200 pounds and demand a heavy-duty rail rated for 250 pounds or more. Weigh or estimate your door first:
- Hollow-core slab: roughly 25 to 40 pounds, easily handled by any kit
- Solid pine or MDF: 50 to 80 pounds, comfortable for standard 200-pound rails
- Solid hardwood or reclaimed barnwood: 90 to 130 pounds, choose a 250-pound rail
- Glass or metal-framed door: 100 to 150 pounds, use the heaviest-duty hangers available
Buy for the door you have plus a safety margin. A rail loaded to 90 percent of its rating will wear its bearings faster and is more likely to develop the metallic clatter that makes cheap installations sound like a subway car.
Track Materials and Finishes
Most rails are cold-rolled or powder-coated steel, prized for strength and the industrial look the barn door trend leans into. Matte black remains the dominant finish because it hides fingerprints and complements nearly any decor, but you will also find raw steel, brushed nickel, oil-rubbed bronze, and stainless for coastal or high-humidity rooms.
Stainless steel is worth the premium in bathrooms and beach houses where salt air and moisture corrode powder coating over time. For a dry hallway or bedroom, standard powder-coated steel lasts for decades. Avoid aluminum tracks marketed as budget options; the metal is softer, the rollers wear a groove into it, and the door develops a slight droop after a year of use.
The Backer Board: The Step People Skip
This is the detail that separates a professional installation from one that fails. You cannot mount a barn door track to drywall and hope the studs happen to line up. Studs sit 16 inches apart on center, but the track’s mounting holes rarely align with them, and lag bolts driven into hollow drywall will rip out under 80 pounds of hanging door.
The reliable solution is a backer board: a horizontal 1-inch by 6-inch board, ideally stained or painted to match your trim, screwed into every stud along the top of the opening. Mount the track to this continuous board and your bolt placement becomes irrelevant because the entire board is anchored to framing. If you prefer no visible board, locate the studs precisely and buy a track whose hole spacing matches 16-inch centers, then reinforce any bolt that lands in a bay with a heavy-duty toggle.
Installing the Track Step by Step
With materials in hand, the installation itself moves quickly. Work with a helper because the rail is long and awkward to hold level alone.
- Mark a level line above the opening, positioning the track so the bottom of the hung door will clear the floor by about half an inch.
- Install the backer board first, driving 3-inch screws into each stud, then confirm it is dead level.
- Hold the rail against the board, mark your bolt holes, and pre-drill pilot holes to prevent splitting.
- Bolt the track down with the provided spacers, which hold the rail off the wall far enough for the rollers to clear.
- Mount the rollers to the door, lift the door onto the rail, and install the anti-jump discs that keep the rollers from bouncing off.
- Add the floor guide and end stops last, adjusting the guide so the door slides freely without scraping.
Take your time leveling the rail. Even a slight tilt causes the door to drift open or closed on its own, a maddening flaw that is far easier to prevent than to correct after the bolts are torqued.
Quieting a Noisy Slide
A well-installed sliding barn door track should whisper. If yours squeaks or clatters, the usual culprits are dry bearings, a rail that flexes between mounting points, or rollers set too loose. Add a drop of dry silicone lubricant to the bearings, never petroleum grease, which attracts dust and gums up over time.
Nylon-covered or sealed-bearing rollers run noticeably quieter than bare steel wheels and are worth seeking out if silence matters, as in a bedroom or nursery. Anti-jump discs also cut noise by holding the roller firmly against the rail so it cannot rattle as the door moves.
Single, Bypass, and Bi-Part Configurations
Not every opening suits a single sliding panel, and understanding the three main track configurations helps you match the hardware to your space. A single-door setup is the classic look, one panel sliding to one side, and it demands clear wall space beside the opening equal to the door’s width. This is the simplest and least expensive arrangement, ideal for pantries, bathrooms, and closets.
When an opening is too wide for one door or lacks clear wall space on either side, a bypass system solves the problem. Two doors hang on a double-depth track, one in front of the other, and slide past each other so you can access either half of the opening. Bypass hardware costs more and the doors overlap slightly, but it needs no extra wall space, making it perfect for wide closet openings where a single door would have nowhere to go.
A bi-parting configuration uses two doors that meet in the center and slide apart in opposite directions, each running on its own end of a long single track. This delivers a dramatic, symmetrical look for wide openings like a formal dining room or a primary suite, and it requires clear wall space on both sides equal to each door’s width. Choose the configuration first, because it determines the track length, the number of rollers, and how much wall you need to keep clear.
Budgeting for the Project
Complete kits including rail, rollers, floor guide, and hardware run $60 to $150 for standard steel systems and $150 to $300 for heavy-duty or stainless setups. Add $15 to $30 for a backer board and fasteners, and a soft-close damper accessory costs another $40 to $70 if you want the door to ease shut instead of thudding into the stop.
For most homeowners the total lands between $100 and $250 for a single door, not counting the door slab itself. Spending on the upper end of the track budget pays off in quieter operation and a rail that will not sag, which is exactly where a sliding barn door track earns its keep over the years you will open and close that door thousands of times.