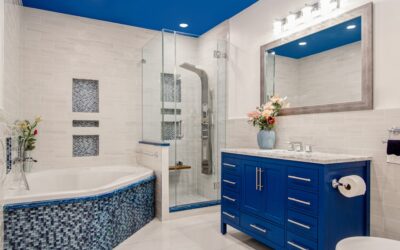
A full glass shower enclosure feels luxurious until you realize it costs $2,500 minimum and shows every water spot. A solid floor-to-ceiling tile wall keeps cost down but makes a small bathroom feel like a cave. The compromise is a small bathroom half wall shower — a knee or chest-height wall that contains water, supports a glass panel, and opens up the space dramatically. Done right, it’s the smartest 36 inches of tile work in the entire room.
Part of our Bathroom Remodeling & Flooring guide — explore the full guide →
Why Half Walls Work in Tight Bathrooms
A half wall typically runs 36 to 48 inches tall — chest height for most adults. It blocks splashing water from hitting the toilet or vanity while letting light and sight lines flow above. In a 5-by-8 foot bathroom, that visual openness is the difference between feeling cramped and feeling intentional.
The structural side is straightforward. A 2×4 stud wall framed off the slab supports a tiled curb, a waterproof membrane, and an optional fixed glass panel on top. Total wall thickness with tile finishes out to roughly 5-1/2 to 6 inches.
Pick the Right Height for the Space
- 36 inches (knee wall): Containing splash only, best with a glass panel above
- 42 to 48 inches (chest wall): Full privacy from the toilet, blocks more spray, glass optional
- 60 inches (shoulder wall): Almost-full privacy, dramatic with glass topper
- 78 to 84 inches (full but partial): Walk-in style, no door needed if depth allows
The 42-inch height is the most-installed in modern remodels. It hits the sweet spot between privacy and openness, and it lines up with standard 6×36 inch subway tile or a 12×24 inch field tile cut in half.
Framing a Half Wall Step by Step
- Mark the wall location on the subfloor and adjacent wall. Confirm it is plumb and square.
- Cut a pressure-treated 2×4 bottom plate and fasten it to the slab or subfloor with Tapcon screws (3/16 by 2-3/4 inch).
- Cut studs at the desired wall height minus 3 inches for the top and bottom plates.
- Frame studs 16 inches on center for full tile support.
- Add solid blocking at 12 and 24 inches above the floor for grab bar reinforcement.
- Top-cap with a 2×6 plate to provide a wider mounting surface for glass anchors.
- Sheath both sides with 1/2 inch cement backer board like HardieBacker ($14 a sheet at Home Depot).
- Tape seams with alkali-resistant fiberglass mesh tape.
The whole frame goes up in a couple of hours. Tile and waterproofing take significantly longer.
Waterproofing the Half Wall
Water hits the half wall on the shower side at high velocity. Any failure here floods the cavity, rots the framing, and shows up as a mildew stain on the dry side. Use one of two reliable systems:
- Schluter Kerdi membrane: Fabric-backed waterproofing applied with unmodified thinset. The Kerdi-Band at corners and Kerdi-Kerek inside corners seal seams. Costs about $2 per square foot.
- Laticrete Hydro Ban liquid membrane: Brush- or roller-applied to backer board, two coats. About $1.20 per square foot. Easier to handle in tight spaces.
Whatever system you choose, run the membrane up the wall to the top, around the curb, and down to the shower pan. The 12-month moisture warranty on most membranes assumes proper installation, which means following the manufacturer’s overlap and detail instructions exactly.
Glass Topper Options
A 3/8 inch tempered glass panel set on top of the wall extends the splash barrier without breaking sight lines. Three common configurations:
- Fixed panel: Single piece of glass clipped to the top plate with stainless brackets. About $400 to $700 installed.
- Pivot or hinged door with return: Glass door hung off the half wall. About $800 to $1,400 installed.
- Sliding bypass glass: Two glass panels on a top track. Best for wide openings, $1,200 to $2,000 installed.
For most small bathrooms, the fixed panel is the right move. It costs the least, has no moving parts to fail, and creates a clean modern look. Custom-cut glass from a local fabricator usually runs less than national brands.
Plumbing and Code Considerations
The shower valve, spout, and showerhead all live on the wet wall opposite the half wall. The half wall itself rarely carries plumbing unless you build a body-spray system into it. Either way, the IRC P2708.1.1 requires a minimum 30 by 30 inch shower compartment (24 by 24 minimum at the entry), so measure carefully before framing.
Slope the shower pan 1/4 inch per foot toward the drain. Pre-sloped foam pans like the Schluter Kerdi-Shower-T ($350 for a 32×60 inch pan) save hours of mud work and produce a perfectly graded surface.
Tile Choices That Make Small Bathrooms Feel Bigger
Large-format tiles (12×24 or 24×48) on the half wall reduce grout lines and make the space read as cleaner and larger. Vertical orientation visually raises the ceiling. Light colors (white, pale gray, sand) reflect more light than dark tiles.
The Daltile RevoTile, Florida Tile Time 2.0, and MSI Lavaliere series all come in formats that work on half walls without complex cuts. Stick to one tile across the half wall and the shower wall for visual continuity, then switch to a contrasting accent only in a niche or pencil-tile border if at all.
Budget Expectations
- DIY half wall with waterproofing and tile: $400 to $900 in materials
- Contractor-built half wall, tile, and waterproofing: $1,500 to $3,500
- Plus fixed glass panel: Add $400 to $700
- Plus full glass enclosure with door: Add $1,200 to $2,000
For a small bathroom remodel, the half wall plus glass topper hits a sweet spot of cost-to-impact. The investment is real but recoverable on resale, and the daily experience of a bright, open shower beats a dark, walled-in alternative every time.