A small walk-in shower does not have to feel cramped. The right tile choices can visually expand the space, add character, and create a shower that feels open and inviting despite its compact footprint. From large-format tiles that minimize grout lines to light-reflecting glass mosaics and clever pattern layouts, the design possibilities for small showers are far more varied than most homeowners realize.
Part of our Bathroom Remodeling & Flooring guide — explore the full guide →
This guide covers the best tile ideas for small walk-in showers, with practical advice on tile size, color, pattern, layout, and design features that maximize the perception of space. For a complete overview of tile options and installation, see our tile flooring guide.
- Why Tile Choice Matters More in Small Showers
- Large-Format Tiles: Fewer Grout Lines, Bigger Feel
- Light Colors to Open Up the Space
- Glass Mosaic Accents
- Curbless Entry Design
- Linear Drains for Larger Floor Tiles
- Shower Niche Design
- Tile Patterns That Expand the Space
- Additional Design Tips
- Final Thoughts
Why Tile Choice Matters More in Small Showers
In a large shower, tile selection is primarily an aesthetic decision. In a small shower, it becomes a spatial strategy. Every design choice either opens up or closes in the space. Busy patterns and dark colors make small showers feel like a box. Clean lines, light tones, and continuous surfaces make them feel airy and spacious.
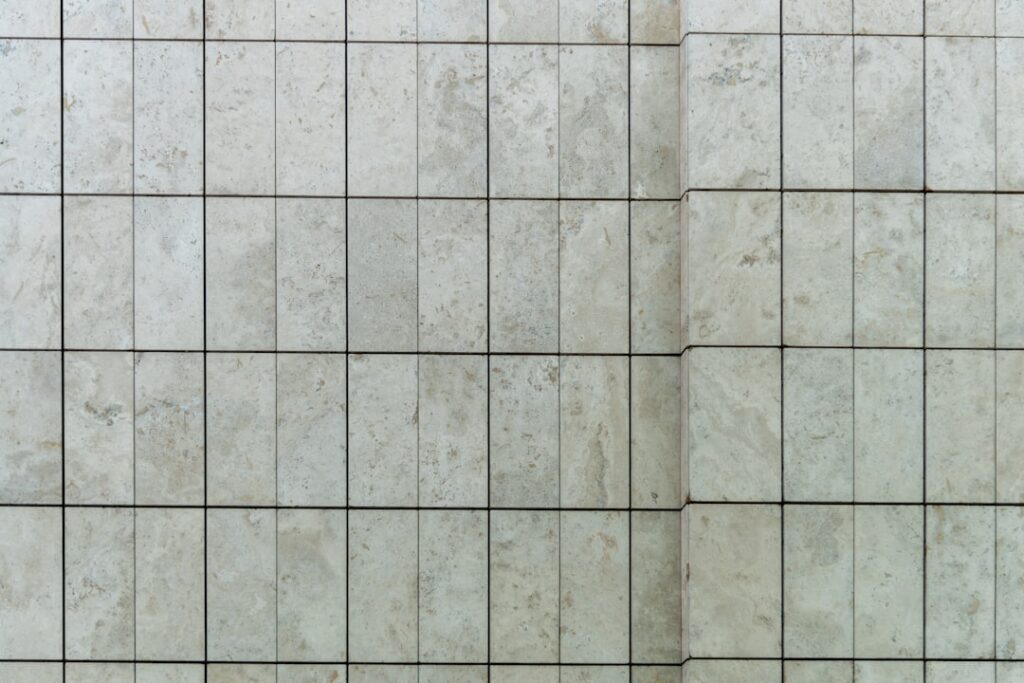
Grout lines are the biggest visual disruptor in a small shower. Each grout line creates a visual boundary that the eye registers as a break in the surface. More grout lines mean more visual fragmentation, which makes the space feel smaller and busier. Reducing grout lines through larger tiles, matching grout color, or using minimal-joint installation techniques is the single most effective way to make a small shower feel bigger.
Large-Format Tiles: Fewer Grout Lines, Bigger Feel
The most impactful design choice for a small walk-in shower is using large-format tiles. Tiles measuring 12×24 inches, 24×24 inches, or even larger cover more surface area with fewer grout joints, creating a cleaner, more continuous surface that visually expands the space.
A common misconception is that large tiles look out of proportion in small spaces. In reality, the opposite is true. Large tiles with minimal grout lines create an unbroken visual plane that tricks the eye into perceiving a larger area. Small mosaic tiles, while beautiful, create a dense grid of grout lines that can make a compact shower feel busy and confined.
For walls, 12×24-inch tiles installed horizontally (with the long edge running side to side) are especially effective. The horizontal orientation emphasizes width and makes narrow showers feel wider. Vertical installation draws the eye upward and emphasizes ceiling height, which is a better strategy for showers that feel low rather than narrow.
On the shower floor, large-format tiles are more challenging because the floor must slope toward the drain. Smaller tiles (2×2-inch or hexagonal mosaics) conform to the slope more easily. However, linear drains allow the use of larger floor tiles by concentrating the slope along one axis, enabling 12×24-inch or larger tiles on the shower floor.
Light Colors to Open Up the Space
Light-colored tiles reflect more light and make enclosed spaces feel open and airy. White, cream, light gray, soft beige, and pale blue are all excellent base colors for small walk-in showers. These colors bounce natural and artificial light around the space, reducing shadows and creating a sense of brightness that counteracts the enclosed feeling of a compact shower.
This does not mean your small shower must be all white. Warm whites, greiges (gray-beige blends), and soft neutral tones add visual warmth without darkening the space. The key is maintaining a light overall value, meaning the tiles reflect more light than they absorb.
If you want to incorporate darker or bolder colors, use them strategically as accents rather than as the dominant surface. A dark accent stripe, a colored niche, or a single feature wall in a deeper tone adds visual interest without shrinking the space. The 80/20 rule works well: 80 percent light tiles, 20 percent accent or feature tiles.
Glass Mosaic Accents
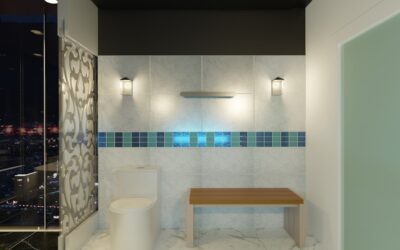
Glass mosaic tiles are a powerful design tool for small showers. Glass reflects and refracts light, adding sparkle and depth to the space. A band of glass mosaics used as an accent stripe, niche liner, or border introduces color and texture while enhancing the feeling of brightness and openness.
Popular applications for glass mosaics in small showers include accent bands running horizontally around the shower at eye level or chair-rail height, full coverage inside shower niches to create a jewel-box effect, vertical accent strips in the corner or along the edges of the shower, and waterfall strips running from floor to ceiling for a dramatic vertical accent.
Linear glass mosaic tiles (1×4 inches or 1×6 inches) in a stacked or staggered pattern create a modern, elongated look that emphasizes either width or height depending on orientation. Small square glass mosaics (1×1 inch) provide maximum sparkle and color variation.
When using glass mosaics in a small shower, keep the color palette cohesive with the surrounding tile. Glass mosaics that blend with the wall tile color (but add shimmer and variation) are more effective at expanding the space than high-contrast glass that draws the eye to a single area.
Curbless Entry Design
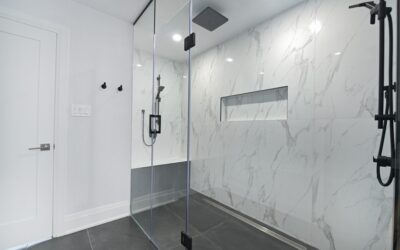
A curbless (also called zero-threshold or barrier-free) shower entry eliminates the raised step between the shower floor and the bathroom floor. This design choice has a dramatic effect on the perceived size of a small shower because the continuous floor plane visually merges the shower space with the rest of the bathroom.
From a practical standpoint, curbless showers require the entire shower floor to slope toward the drain, which means the bathroom floor near the shower may also need to be lowered or the shower floor recessed. Linear drains along one wall simplify the slope requirements and allow larger tile formats on the floor.
To maximize the space-expanding effect of a curbless entry, use the same tile on both the shower floor and the adjacent bathroom floor. This continuous tiling eliminates the visual boundary between the two spaces entirely, making the bathroom and shower read as one unified area.
Curbless showers also improve accessibility, which adds practical value alongside the aesthetic benefits. They are easier to clean, accommodate mobility aids, and comply with universal design principles that make the bathroom usable for people of all ages and abilities.
Linear Drains for Larger Floor Tiles
Traditional center-point drains require the shower floor to slope from all four sides toward the center, creating a pyramid-like surface. This compound slope works fine with small mosaic tiles but makes it difficult to use large-format floor tiles, which cannot conform to slopes in multiple directions without cutting.
Linear drains solve this problem. Installed along one wall (usually the wall opposite the shower entry or along a side wall), a linear drain requires the floor to slope in only one direction. This single-plane slope allows the use of 12×24-inch or even larger floor tiles, dramatically reducing grout lines and creating a sleeker, more spacious appearance.
Linear drains also look more modern and streamlined than traditional round drains. Available in stainless steel, brushed nickel, and tile-insert styles (where a piece of the floor tile sits inside the drain cover for a nearly invisible drain), they complement the clean, minimal aesthetic that works best in small showers.
Shower Niche Design
A recessed shower niche provides built-in storage for shampoo, soap, and other shower products without taking up any floor or wall space. In a small shower, a well-designed niche is both practical (it replaces bulky corner caddies and hanging organizers) and decorative (it creates a focal point that adds depth and interest to the tile design).
Position the niche at a comfortable reaching height, typically between 48 and 60 inches from the floor. Standard niche sizes range from 12×12 inches to 12×24 inches, though custom sizes can be built to fit your specific needs. A horizontal niche spanning the full width of a wall creates a sleek, modern look and provides maximum storage in a single opening.
Lining the niche interior with a contrasting tile is one of the most effective accent strategies for small showers. A niche lined with metallic mosaic, glass tile, or a complementary color provides a pop of visual interest in a contained area without overwhelming the space. Consider adding a small LED light strip at the top of the niche for both function and ambiance.
Tile Patterns That Expand the Space
Horizontal Stack Bond
Subway tiles or rectangular tiles installed in a horizontal stack bond (straight rows with aligned joints) create strong horizontal lines that emphasize width. This clean, modern pattern is especially effective in narrow showers, making them feel wider than they are.
Vertical Stack Bond
The same rectangular tiles installed vertically draw the eye upward and make low-ceiling showers feel taller. Vertical stack bond is a popular choice in contemporary shower design and pairs well with floor-to-ceiling tile installations.
Herringbone
Herringbone patterns (tiles laid in a V-shape at 45-degree angles) add movement and visual energy to a small shower. The diagonal lines draw the eye in multiple directions, creating a sense of dynamic space. Use herringbone on a single accent wall or the shower floor to add interest without overwhelming a compact space.
Diagonal Layout
Setting square tiles on a diagonal (diamond pattern) makes floors and walls appear larger because the diagonal measurement of a tile is longer than its side measurement. The angled lines also redirect the eye away from the true dimensions of the space. This works particularly well on shower floors.
Floor-to-Ceiling Installation
Tiling from the floor to the ceiling (rather than stopping at a certain height) eliminates a horizontal line that visually caps the space. Continuous tile from bottom to top makes the walls feel taller and the shower feel more expansive. This is one of the simplest and most effective space-enhancing strategies for any small shower.
Additional Design Tips
Use glass shower doors or panels instead of curtains. A clear glass enclosure allows the eye to see through to the back wall of the shower, maintaining the visual depth of the bathroom. Shower curtains create an opaque barrier that visually amputates the shower from the rest of the room.
Frameless glass is better than framed. Thick metal frames around shower glass create visual clutter. Frameless or semi-frameless enclosures are cleaner and more transparent, maximizing the open feeling.
Match grout color to tile. Contrasting grout emphasizes the grid pattern and makes the space feel busier. Color-matched grout minimizes grout visibility, creating the seamless surface that makes small showers feel larger.
Consider polished or semi-polished tile for walls. A slight sheen on wall tiles reflects light and adds depth. Avoid high-gloss on floors (it is slippery when wet) but a satin or polished finish on walls enhances brightness.
Limit your color palette. Two to three colors maximum keeps a small shower feeling cohesive and open. Too many colors and materials fragment the space visually.
Final Thoughts
Designing a small walk-in shower is an exercise in smart choices rather than compromise. Large-format tiles, light colors, minimal grout lines, curbless entries, and thoughtful accent placement can make even the most compact shower feel open, bright, and stylish. Focus on creating visual continuity and maximizing light reflection, and your small shower will feel far more spacious than its square footage suggests.