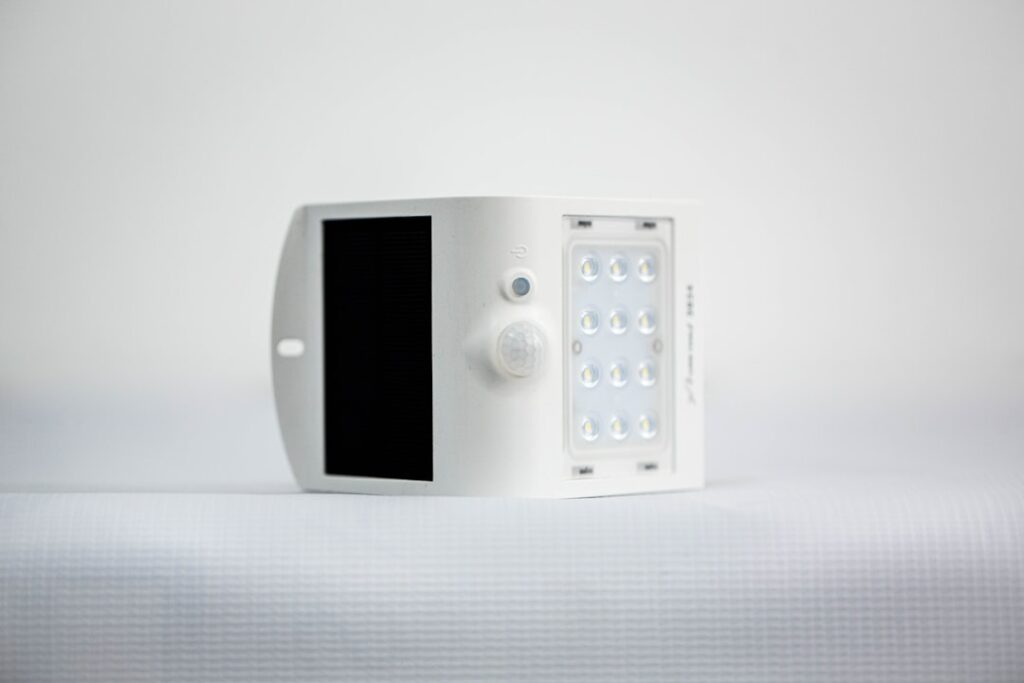
A solar powered motion sensor light delivers bright, automatic security lighting to any corner of your property without a single wire, running bill, or electrician’s fee. It charges itself by day from a built-in panel, stores the energy in a battery, and switches on the moment it detects movement after dark. For sheds, fence lines, driveways, and back doors where running power would be expensive or impossible, these fixtures are the easiest lighting upgrade you can make, and modern LED and lithium battery technology has made them genuinely bright and reliable.
This guide explains how they work, the specs that matter, where to mount them for the best charge and coverage, and how to choose a model that lasts rather than dying after one winter.
- How Solar Motion Lights Work
- Key Specs to Compare
- Lighting Modes
- Where to Mount for Best Results
- Real-World Battery Life and Charging
- Solar vs. Wired: When to Choose Solar
- Common Mistakes to Avoid
- Integrated vs. Separate-Panel Designs
- Seasonal Performance and Winter Tips
- Choosing the Right Light
- Tuning Solar Powered Motion Detector Lights: Placement, Range, and Sensitivity
How Solar Motion Lights Work
The system is elegantly simple and has four parts working together. A photovoltaic solar panel converts sunlight into electricity during the day. That power charges an internal rechargeable battery, almost always lithium in good modern units. A passive infrared (PIR) sensor watches for the body heat of a person, animal, or car moving across its field of view. When it detects motion after dark, it triggers the bright LED head for a set period, then shuts off to conserve the battery. Because everything is self-contained, installation is nothing more than mounting the fixture where the panel gets sun.
Key Specs to Compare
Not all solar lights are created equal, and cheap ones disappoint. Focus on these specifications:
- Lumens: Brightness ranges widely. A small path light might be 200 lumens, while a serious security floodlight delivers 1,000 to 3,000 lumens. For entry and driveway security, look for at least 800 to 1,500 lumens.
- Battery type and capacity: Choose lithium (LiFePO4 or lithium-ion) over older nickel-cadmium. Higher milliamp-hour (mAh) ratings mean more runtime through long nights and cloudy stretches.
- Solar panel size and rating: A larger, higher-wattage monocrystalline panel charges faster and performs better in weak winter sun.
- Weatherproofing: Look for an IP65 rating or higher so the fixture survives rain, snow, and heat.
- Detection range and angle: Better sensors reach 25 to 50 feet across a wide 120 to 180-degree arc.
Lighting Modes
Most quality solar motion lights offer selectable modes that balance brightness against battery life. A pure motion-only mode keeps the light off until triggered, maximizing runtime and impact. A dusk-to-dawn plus motion mode glows at low brightness all night and jumps to full output on movement, giving constant baseline visibility. A dim-then-bright mode is the middle ground. For security, motion-only or the dim-to-bright mode makes the most of the sudden burst that startles intruders, while a walkway benefits from constant low light.
Where to Mount for Best Results
Placement is even more critical for solar lights than wired ones because the panel must charge. Follow these guidelines:
- Mount where the solar panel gets direct, unobstructed sun for as much of the day as possible. In the Northern Hemisphere, a south-facing exposure charges best.
- Set the fixture 7 to 10 feet high so the sensor covers a wide area and is out of easy reach.
- Aim the sensor so people cross its field sideways, since PIR sensors detect side-to-side motion far better than someone walking straight toward them.
- Keep the panel clear of tree limbs, gutters, and eaves that cast shade during the day.
If the ideal lighting spot is shaded, choose a model with a separate, cable-connected panel you can mount in the sun while the light head goes where you need it, up to 10 or more feet away.
Real-World Battery Life and Charging
Manage your expectations by climate and season. In summer, a good solar light easily runs all night and has power to spare. In winter, with short days, low sun angles, and snow on the panel, runtime drops and cheap units may die before dawn. Lithium batteries handle cold far better than older chemistries, which is why battery type matters so much. A quality panel fully charges the battery in a few hours of good sun. To keep performance up, wipe dust, pollen, and snow off the panel a few times a year, since even a light film cuts charging significantly. Rechargeable batteries eventually wear out after two to four years, so choose a model with a user-replaceable battery to avoid tossing the whole fixture.
Solar vs. Wired: When to Choose Solar
Solar shines wherever wiring is impractical: detached sheds and garages, fence perimeters, gate posts, RV and cabin sites, and the far corners of a large yard. It installs in minutes, adds nothing to your electric bill, and keeps working during a power outage. The tradeoffs are weather-dependent brightness and periodic battery replacement. For a primary front-door light you rely on every single night in a cloudy northern climate, a hardwired fixture is more dependable. But for supplemental security and hard-to-wire locations, solar is the clear winner.
Common Mistakes to Avoid
The number one mistake is mounting the panel in shade to put the light exactly where you want it, then wondering why it dies at midnight; always prioritize sun for the panel or use a remote-panel model. Buying the cheapest unit with a tiny panel and nickel-cadmium battery leads to dim output and a fixture that quits within a year. Aiming the sensor at a street, HVAC vent, or reflective surface causes constant false triggers. And forgetting to clean the panel lets grime slowly starve the battery. Avoid these and a solar light will serve reliably for years.
Integrated vs. Separate-Panel Designs
Solar motion lights come in two physical arrangements, and choosing the right one solves the most common frustration with solar lighting. An integrated design puts the solar panel, battery, and LED all in one housing, which is simple to install but forces a compromise: the light must go wherever the panel gets sun, even if that is not where you most need illumination. These all-in-one units work well for open, sunny locations like a garage wall or a fence post that faces south.
A separate-panel design connects the solar panel to the light head with a cable, typically 10 to 16 feet long. This lets you mount the panel up high in full sun, on a south-facing roof edge or the top of a wall, while placing the light head down where it lights a doorway, a shaded walkway, or the underside of an eave. For any location where the best lighting spot is shaded, the separate-panel design is the clear answer and eliminates the number-one cause of poor solar performance. When shopping, check the cable length to be sure it reaches from your sunniest mounting point to where the light needs to go. The modest extra cost of a split design pays off in reliable charging and correct light placement.
Seasonal Performance and Winter Tips
Solar lighting performance is not constant through the year, and understanding the seasonal swing prevents disappointment. In summer, with long days and a high sun angle, even a modest panel banks more energy than the light uses overnight, so runtime and brightness are excellent. In winter, the days are short, the sun rides low, and snow can bury the panel, all of which cut charging dramatically. A light that ran flawlessly in July may struggle to last until dawn in December, especially in northern states.
Several steps keep solar lights working through the cold months. Choose units with lithium batteries, which tolerate cold far better than older nickel-cadmium chemistry that loses capacity as temperatures drop. Mount the panel at a steeper angle in winter climates so it faces the low sun more directly and sheds snow rather than collecting it. Brush snow and ice off the panel after storms, since even a thin covering blocks most charging. Position panels where they catch the most winter sun, avoiding spots shaded by bare trees or the house itself when the sun is low. And in motion-only mode, a light draws far less power than dusk-to-dawn mode, so switching to motion-only for the winter can keep a marginal unit running reliably. With these adjustments, solar lights remain useful year round even in challenging climates.
Choosing the Right Light
To get a solar powered motion sensor light you will be happy with, prioritize at least 800 to 1,500 lumens for security use, a lithium battery, a generously sized monocrystalline panel, and an IP65 or better weather rating. Mount the panel in full sun, set the head 7 to 10 feet high with the sensor angled across likely paths, and clean the panel occasionally. Match the model to the job, and you will get years of free, automatic lighting exactly where running a wire never made sense.
Tuning Solar Powered Motion Detector Lights: Placement, Range, and Sensitivity
With solar powered motion detector lights, every false trigger costs stored energy. A wired fixture that flicks on for a swaying branch wastes a few cents; a solar unit that does the same thing twenty times a night can drain its battery before the person you actually want to see arrives. Dialing in placement, range, and sensitivity is how you protect the battery and get reliable detection at the same time.
Shape the Detection Zone. The tilt of the sensor head sets how far out the zone reaches. Angling it slightly downward pulls the far edge of detection closer, which keeps a light above a garage from reacting to cars on the street. Angling it more level extends the reach across a long yard. After mounting, do a walk test at night: approach from each likely direction, note where the light first comes on, and adjust the tilt until the trigger point lands where you want it, usually a few steps before a door, gate, or step.
Set Sensitivity for the Season. Passive infrared sensors look for heat contrast, so they tend to detect people farther away on cold nights and less reliably on hot summer evenings. If the light misses you in summer, raise sensitivity a notch; if it fires constantly in winter or on windy nights, lower it. Trimming shrubs and moving the sensor away from dryer vents and heat pump fans often solves more false triggers than any setting change.
Cover Long Runs With Overlapping Units
- For a long fence, driveway, or side yard, two or three moderate lights with overlapping zones usually outperform a single high-output fixture at one end.
- Stagger them so each sensor’s view begins where the previous one ends, and aim each across the walking path rather than down it.
- Keep sensors from pointing at each other or at a porch light; a light sensor that sees another lamp can read it as daylight and refuse to switch on.
Also avoid aiming the panel or sensor at reflective windows, pools, or light-colored walls that bounce heat and glare. After any adjustment, give the fixture a full sunny day to recharge before judging its overnight performance, and repeat the walk test once each season as foliage and sun angle change.