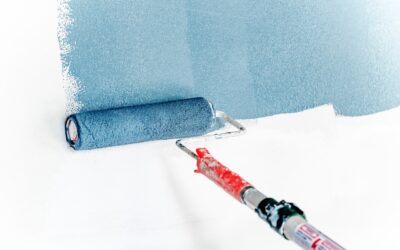
Scuffed, chipped or mismatched risers can make an otherwise nice staircase look tired, and toe kicks from every trip upstairs only make it worse. Stair riser covers are thin overlay panels that attach directly over the existing vertical face of each step, giving you a clean, new surface without tearing out the stairs. They are one of the fastest ways to refresh a staircase on a weekend.
Part of our Stairs & Stair Flooring guide — explore the full guide →
Most riser covers are 1/4 to 1/2 in. thick and come in solid wood, wood veneer, vinyl, primed MDF for painting, or decorative printed and patterned finishes. You measure each riser individually, cut the cover to fit, and fasten it with construction adhesive, brad nails or both. Paired with matching tread caps, they can transform carpeted or worn stairs into a finished look.
Below you will find how to choose a material, how to measure accurately (stairs are rarely as square as they look), a step-by-step installation, and common problems with fixes.
Types of Stair Riser Covers
The right choice depends on the look you want, how much abuse the stairs take, and whether you plan to paint or stain.
Solid wood and wood veneer
Oak, maple and hickory risers match hardwood treads and can be stained. Solid wood is durable and can be sanded later; veneered plywood is lighter, more stable and usually less expensive. Both are the classic pairing with hardwood tread caps.
Primed MDF
Painted white risers with stained treads remain a popular combination. Primed MDF risers take paint beautifully and cut cleanly, but they dent more easily than hardwood and do not like water, so seal the edges and avoid them on basement stairs prone to dampness.
Vinyl and laminate risers
Matching vinyl or laminate riser boards are made to coordinate with LVP and laminate stair nosing and treads. They resist moisture and scuffs well, which makes them a strong option for busy family stairs and basements.
Decorative and patterned covers
Printed tile-look panels, peel-and-stick decals and embossed designs add personality. Adhesive decals are the easiest and most renter-friendly, but they are thinner and do not hide dents or deep gouges the way a rigid panel does.
| Material | Finish | Best for |
|---|---|---|
| Solid wood | Stain or paint | Hardwood stairs, long life |
| Primed MDF | Paint only | Painted risers, dry areas |
| Vinyl or laminate | Prefinished | LVP stairs, basements |
| Decals | Printed | Quick, low-cost style |
Measuring Each Riser
Never assume every riser is identical. Building codes allow slight variation, and settling, drywall and old carpet tack strip all change the dimensions. Measure and label each step separately.
- Remove old coverings. Pull carpet, pad, tack strips and staples, and scrape off any bumps. Check for loose treads and fix squeaks by screwing the tread to the stringer before covering anything.
- Measure the width at the top and bottom of each riser, wall to wall or skirt to skirt. Use the shorter measurement if they differ, or scribe the cover to the wall.
- Measure the height from the tread surface below to the underside of the nosing above, at both ends. If you are adding tread caps, account for their thickness, since the cap on the lower tread will reduce the visible riser height.
- Check for square. Hold a framing square against the tread and wall. Out-of-square corners are common; a cardboard template transfers odd angles more accurately than numbers.
- Record everything on a sketch with each riser numbered from bottom to top, and mark the back of each cover to match.
Tools and Materials
- Stair riser covers, one per step plus a spare
- Tape measure, framing square, pencil and cardboard for templates
- Circular saw or table saw with a fine-tooth blade, and a jigsaw for notches
- Construction adhesive or panel adhesive compatible with the riser material
- Brad nailer with 1 to 1-1/4 in. brads (or finish nails and a hammer)
- Stud finder, sanding block, wood filler or color-matched putty
- Paint, stain or finish if the covers are unfinished; caulk for painted edges
How to Install Stair Riser Covers
- Plan your order. If you are also installing tread caps, many installers fit risers first, working from the bottom up, so each tread overhangs the top of the riser below and hides the joint. Follow the tread manufacturer’s order if it differs.
- Cut each cover. Cut about 1/16 in. under your measured width so the panel slides in without binding. Cut the height to match. Test-fit before applying glue and plane or sand high spots.
- Finish before installing. Staining and sealing on sawhorses is far cleaner than doing it on the stairs. For paint-grade MDF, prime cut edges and apply at least one finish coat now.
- Apply adhesive. Run a zigzag bead of construction adhesive across the back of the cover, keeping it about 1 in. from the edges to limit squeeze-out.
- Press and fasten. Set the cover tight against the tread below and press it firmly against the old riser. Add brad nails near the top and bottom edges and into the stringers at each end, spaced roughly 6 to 8 in. apart.
- Fill and touch up. Set nail heads, fill with putty, and caulk joints on painted risers. Let adhesive cure per the label before heavy use.
Adhesive vs brad nails
Adhesive alone works for lightweight vinyl and decorative panels on a flat, clean riser, and it leaves no holes to fill. Nails alone can let a panel buzz or rattle when kicked. For wood and MDF, the most reliable method combines both: adhesive for full contact and brads to clamp the panel while the glue cures. Peel-and-stick decals rely solely on their backing, so clean the riser thoroughly and follow the product’s surface-prep instructions.
Pairing Riser Covers With Tread Caps
Riser covers look best when the treads get attention too. Retrofit tread caps (overlay treads with an integrated nosing) slide over cut-back existing treads and cover the joint at the top of the riser. Matching wood species or coordinating LVP finishes creates a continuous look. If you install tread caps, confirm that the final rise of every step stays consistent; uneven step heights are a trip hazard, especially on the first and last steps where added thickness often creates a difference.
Troubleshooting
Gaps at the wall or skirtboard
Scribe the next cover to the wall using a compass, or fill small gaps with paintable caulk on painted risers and color-matched caulk on stained ones. A slim cove or shoe molding can hide larger gaps.
The cover rattles when kicked
There is an air gap behind it or too little adhesive. Add brads into the stringers or, if possible, remove and re-glue with fuller adhesive coverage.
Paint chips on the risers
Toes hit risers constantly. Use a durable enamel or a floor-rated paint, and consider vinyl risers on high-traffic stairs where painted MDF keeps chipping.
Old riser is bowed or damaged
Plane or sand high spots and fill low areas so the cover sits flat. A severely damaged riser may need to be replaced, not covered.
General Cost Ranges
Riser covers are typically sold individually or in packs. Decorative decals and primed MDF sit at the lower end, often a few dollars to around twenty dollars per riser, while prefinished hardwood and matching vinyl risers cost more. A standard 13-step staircase can be covered for a modest materials budget, plus adhesive, nails and finish. Professional installation of risers with tread caps is usually quoted per step and rises with species, custom cuts and finishing work.
When to Call a Pro
Call a carpenter or stair specialist if treads are loose or cracked, stringers are damaged, steps vary noticeably in height, or the staircase has open sides and returns that need mitered nosings. A pro is also worth it for curved or winder stairs, where every riser is a different shape. For straight stairs with solid framing, installing stair riser covers is a very approachable DIY project that delivers a big visual change for the effort.
Frequently Asked Questions
Can stair riser covers go over existing painted risers?
Yes. Clean the surface, scuff glossy paint with sandpaper for better adhesion, and make sure the riser is flat. Then glue and brad-nail the cover in place like any other overlay.
How thick should a stair riser cover be?
Most covers are 1/4 to 1/2 in. thick. Thinner panels keep step dimensions closer to the original, while thicker wood covers hide damage better and feel more solid.
Do I install risers or treads first?
Many installers fit risers first so the tread above overhangs and hides the joint. Always check the tread cap manufacturer’s instructions, since some systems call for a different order.
Do I need to remove carpet before adding riser covers?
Yes. Remove carpet, pad, tack strip and staples so the cover can sit flat against the solid riser. Covering over carpet leaves a soft, uneven surface that will not hold adhesive.
Are peel-and-stick riser decals durable?
They hold up reasonably well on low-traffic stairs if the riser is clean and smooth, but they are thin and will not hide dents. Rigid wood, MDF or vinyl covers last longer on busy staircases.