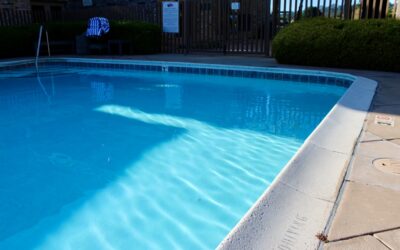
Poured a slab of plain gray concrete around a pool and you’ve got a functional deck. Stamp and color that same slab and you’ve got something that reads like natural flagstone, brick, or cut slate — for a fraction of the price of the real material. Stamped concrete around pool decks has become the default upgrade for homeowners who want a high-end look without the per-piece cost and shifting joints of pavers. Done well, it lasts 25 years and ties the whole backyard together.
What Stamped Concrete Actually Is
Stamped concrete is a standard poured slab that gets imprinted with textured rubber mats while the concrete is still plastic. Color comes from two sources: an integral color mixed into the batch, and a release powder or a contrasting “antique” accent that settles into the grout lines. The result mimics stone, wood plank, or tile with surprising realism from a few feet away.
Because it’s a monolithic pour rather than individual units, there are no gaps for weeds to sprout or ants to colonize, and the surface stays flatter over time than a paver field that can heave and settle unevenly.
Popular Patterns and Colors for Pool Decks
Around water, you want a pattern that looks natural and a color that won’t roast bare feet. The favorites:
- Ashlar slate — irregular rectangular “cut stone” that reads upscale and hides dirt well.
- Random stone/flagstone — organic shapes that suit resort-style and naturalistic pools.
- Roman slate and seamless texture — subtle stone grain that emphasizes color over pattern.
- Wood plank — a modern look for contemporary pools, stamped to mimic gray or driftwood boards.
On color, lean toward light and mid tones — buff, sand, tan, light gray. Dark charcoal and deep brown look striking but absorb heat and can become genuinely uncomfortable in direct summer sun.
The Heat Question — Solve It Before You Pour
This is the single most common regret. Dark stamped concrete in full sun can reach 130°F or more, hot enough to hurt bare feet. Two fixes matter. First, choose a light base color. Second, ask your contractor to add a cool-deck or acrylic cementitious overlay, or blend a reflective additive into the sealer. Some sealers are specifically formulated to lower surface temperature by 10 to 20 degrees. Bring this up during the quote, not after the pour.
Slip Resistance Is Non-Negotiable
A smooth sealed surface next to splashing water is a fall waiting to happen. The standard fix is a non-slip additive — a fine polymer grit broadcast into the sealer coat. It’s inexpensive, invisible once applied, and dramatically improves traction when wet. Textured stamp patterns help too, since the grout lines and stone relief break up the surface. Never let a contractor seal a pool deck without a traction additive.
What Stamped Concrete Around a Pool Costs
Expect to pay $12 to $20 per square foot installed for stamped concrete, versus $6 to $10 for plain concrete and $15 to $30 for natural stone or high-end pavers. A typical 600-square-foot pool deck therefore lands around $7,200 to $12,000. Complex multi-color jobs, hand-detailed borders, and intricate stone patterns push toward the top of that range.
The value proposition is clear: you get 80 percent of the flagstone look for roughly half the flagstone cost, with a faster, cleaner installation.
The Installation Process
A quality pool-deck pour follows a tight sequence:
- Excavate and grade so water drains away from the pool, then compact a gravel base.
- Set forms and lay steel rebar or wire mesh for crack control.
- Pour the slab, typically 4 inches thick, and screed it flat.
- Broadcast color hardener and release agent, then press the stamp mats before the concrete sets.
- Cut control joints to manage cracking, wash off residual release powder after a day or two, and apply sealer.
Timing is everything with stamping — the crew has a narrow window while the concrete is workable. This is not a beginner DIY job around an expensive pool; hire a contractor who can show you finished pool decks they’ve poured.
Sealing and Long-Term Maintenance
Sealer is what keeps the color vivid and the surface protected from pool chemicals and freeze-thaw. Plan to reseal every 2 to 3 years. Use a sealer rated for pool environments and reapply the non-slip additive each time. Beyond that, maintenance is easy: rinse or blow off debris, and clean occasional stains with a mild detergent. Avoid harsh acids and de-icing salts, which can etch and spall the surface over winters.
Is It the Right Choice for You?
Choose stamped concrete if you want a seamless, low-weed, design-flexible deck at a mid-range price and you’re comfortable resealing every few years. Consider pavers instead if you live in a severe freeze-thaw climate where cracking is a bigger concern, or if you value being able to lift and reset individual units. For most homeowners, though, stamped concrete around pool decks hits the sweet spot of looks, cost, and durability — as long as you nail the light color, the cool-deck treatment, and the slip additive up front.
Get those three details right, hire a proven contractor, and you’ll have a pool deck that looks like a resort and behaves like one for decades.