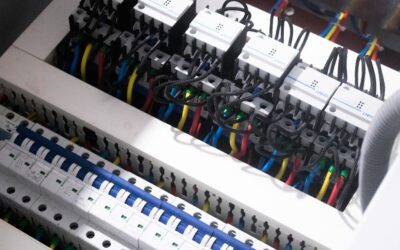
Adding a workshop, finishing a basement, or running power to a detached garage almost always means installing a subpanel. Done right, sub panel wiring is straightforward — four conductors, isolated neutrals and grounds, and a properly sized feeder breaker. Done wrong, it’s one of the most common code violations inspectors flag, usually because the installer bonded the neutral and ground bars together at the subpanel like they would in a main panel. Get the four-wire feeder, the isolation, and the breaker sizing right, and you’ve built a panel that will pass inspection on the first try.
Sub Panel vs Main Panel: The Critical Difference
The main panel is where the neutral and ground bond — typically through a green bonding screw or a bonding strap. Every other panel downstream is a subpanel, and in those panels the neutrals and grounds must remain separate. The neutral bar floats on plastic isolators; the ground bar bonds directly to the metal enclosure.
This is non-negotiable per NEC 250.24 and 250.32. Bond the neutral at the subpanel and you create parallel paths for current to flow on the equipment grounds, which can energize metal enclosures and cause nuisance GFCI tripping miles away.
Sizing the Feeder and Subpanel
Calculate your expected load before sizing anything. Add up the continuous loads (lighting, EV charger, refrigerator) at 125% and the non-continuous loads at 100%. A typical detached garage with a 30-amp EV charger, a few outlets, and lighting needs at least a 60-amp feeder. A finished basement with HVAC, kitchenette, and lighting often justifies 100 amps.
Common subpanel/feeder pairings:
- 60 amp subpanel: 6/3 NM-B copper or 4/3 aluminum, 60-amp double-pole breaker at main
- 100 amp subpanel: 4/3 copper or 2/3 aluminum, 100-amp double-pole breaker
- 125 amp subpanel: 2/3 copper or 1/0 aluminum SER cable
- 200 amp subpanel: 4/0 aluminum SER (for service-rated panels)
Distance matters. Voltage drop on a 100-foot run to a detached garage often forces you to upsize one wire gauge. Use a voltage drop calculator and aim for 3% or less.
The Four-Conductor Feeder Rule
Modern code (NEC 2008 onward) requires four conductors between a main and subpanel: two hots, one neutral, and one equipment ground. This applies whether the subpanel is in the same building or a detached structure. Older three-wire feeders to detached buildings were grandfathered for a while but are no longer compliant for new installs.
Use a separate green or bare copper conductor for the equipment ground. Do not use the neutral as a combined neutral-ground in a new installation.
Step-by-Step Installation
- Pull permits and schedule rough-in and final inspections with your local building department.
- Shut off the main breaker at the main panel and confirm with a voltage tester. The bus bars remain live even with the main off if the utility hasn’t pulled the meter — be aware.
- Mount the subpanel enclosure at the planned location, 6 feet to the breaker handle from the floor, with 30 inches of clear working space in front per NEC 110.26.
- Run the feeder cable from the main panel to the subpanel. Secure with cable staples every 4.5 feet on NM, or in conduit if exposed or buried.
- Land the feeder at the subpanel: black and red hots to the main lugs, white neutral to the floating neutral bar, bare copper ground to the bonded ground bar.
- Verify isolation: No bonding screw between the neutral bar and the enclosure. The ground bar bolts directly to the metal back. Confirm with a multimeter set to continuity — you should read open circuit between the neutral bar and the can.
- Install the feeder breaker at the main panel sized to match your feeder ampacity.
- Land branch circuits at the subpanel: hots to breakers, neutrals to the neutral bar, grounds to the ground bar. Keep them separated even at the branch level.
- Label every breaker and the panel itself (“Fed from Main Panel, 100A”).
- Restore power, test each circuit, and call for inspection.
Grounding Requirements for Detached Buildings
If your subpanel sits in a detached structure — garage, shop, ADU — you also need a grounding electrode at that building. Two 8-foot ground rods driven 6 feet apart and bonded to the subpanel ground bar with #6 copper satisfies the requirement. Some jurisdictions allow a single rod with a measured resistance below 25 ohms; two rods avoid the resistance test entirely.
Critically, the grounding electrodes connect to the equipment ground bar — never to the neutral. The neutral remains isolated even with the local grounding electrodes.
Common Mistakes Inspectors Catch
- Neutral-ground bond at the subpanel: The single most-flagged violation
- Wrong size feeder breaker: A 100-amp panel on a 60-amp feeder won’t deliver expected loads; a 60-amp panel on a 100-amp feeder is a fire risk
- Missing grounding electrodes at detached buildings
- Sharing knockouts between feeders and branch circuits in a way that pinches insulation
- Insufficient working clearance in front of the panel — code requires 30 inches wide, 36 inches deep, and 6.5 feet tall
- No labeling of breakers or the source panel
Tools and Materials Worth Buying
A residential 100-amp subpanel installation runs $400-$700 in materials. Specifics that matter:
- Square D Homeline HOM2040M100PC (100-amp, 20-space subpanel, around $115)
- Eaton CH series for higher quality and tighter bus tolerances
- Klein 11055 wire strippers and a 9-inch lineman’s pliers
- Klein NCVT-2 non-contact voltage tester
- Anti-oxidant compound (Noalox) for any aluminum lug terminations
- Torque screwdriver for breaker and lug torque specs (typically 35-50 in-lb for branch breakers, 250-275 in-lb for main lugs)
When to Hire an Electrician
Sub panel wiring sits at the upper end of homeowner DIY. If you’ve never opened a live panel, never pulled a permit, or feel uncertain about working around live bus bars, hire a licensed electrician. Expect $1,200-$2,500 for a 100-amp subpanel installation in an attached space, $2,500-$5,000 for a detached structure with conduit and grounding electrodes. The cost of a mistake — fire, electrocution, failed inspection on a remodel — dwarfs the labor savings of doing it yourself.
Done correctly, a subpanel adds capacity, organizes circuits by zone, and makes future expansion easy. Get the four-wire feeder, the neutral isolation, and the breaker sizing right, and the rest is just running branch circuits.