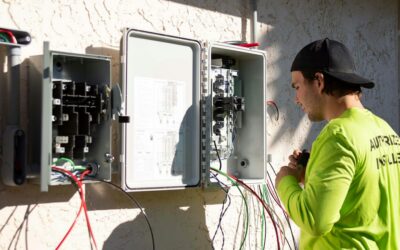
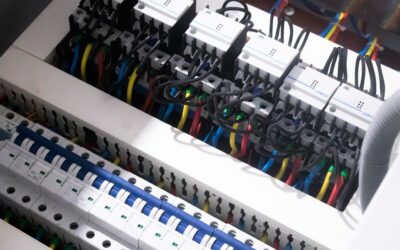
Most people undersize a garage sub panel on the first try. They count the lights and a couple of outlets, buy a small 30 amp setup, and then discover two years later that the welder, the air compressor and the new EV charger cannot share it. Sizing comes down to three questions: what will run at the same time, how far the feeder has to travel, and whether the building is attached to the house or standing on its own.
For a typical detached garage with lights, general outlets and one or two power tools, a 60 amp feeder feeding a panel with 8 to 12 spaces is the comfortable middle ground. A light shed with a few lights and a charging station can live on a 30 amp feeder and a very small panel. A real shop with a 240 volt welder, a large compressor, a heater and an EV charger usually needs 100 amps. Most of the remaining sizing work is confirming which of those categories you actually fall into.
- Garage Sub Panel Sizing: Start With a Load List
- Picking a Feeder: 30, 60 or 100 Amps
- Detached Buildings: Grounding and Disconnect Rules
- Choosing the Panel Itself
- Small Sub Panel for a Shed
- Step-by-Step Planning Process
- Troubleshooting Common Subpanel Problems
- Garage Sub Panel Cost Ranges
- When to Call a Licensed Professional
- Frequently Asked Questions
One point up front: running a feeder and installing a subpanel means working in your main panel and creating new circuits. In most of the US that is permitted, inspected work, and it belongs to a licensed electrician unless your jurisdiction allows a homeowner permit and you have real experience. Use the planning steps that follow to talk to your electrician with clear numbers in hand.
Garage Sub Panel Sizing: Start With a Load List
Every good garage sub panel plan begins on paper. Walk through the building and list every load you have now and every load you expect to add in the next ten years. Write the nameplate amperage and voltage for each one. If a tool lists watts instead of amps, divide watts by the voltage to get amps.
Typical numbers to start your list:
- LED shop lighting: often under 5 amps for an entire two-car garage.
- General 120 volt outlets: plan two or three 20 amp circuits for benches, chargers and a shop vacuum.
- Air compressor: small portable units draw 12 to 15 amps at 120 volts; larger stationary units often want a dedicated 240 volt, 30 amp circuit.
- Stick or MIG welder: hobby 240 volt welders commonly call for a 30 to 50 amp circuit.
- Electric garage heater: a 4,000 to 5,000 watt unit at 240 volts draws roughly 17 to 21 amps and usually lands on a 30 amp circuit.
- EV charger (Level 2): commonly a 40 or 50 amp circuit, and it runs for hours at a time.
- Mini-split or window AC: 15 to 20 amps at 240 volts for most single-zone units.
- Table saw, dust collector, planer: 15 to 20 amps each, often 240 volts for larger machines.
Next, mark which loads can realistically run together. You might run the heater, the lights and the dust collector at once, but you are unlikely to weld while the table saw is running. An electrician will apply formal load calculations, yet your simultaneous-use list is what makes those numbers match real life. EV charging and heating count as continuous loads, so they get extra headroom.
Picking a Feeder: 30, 60 or 100 Amps
Once you have a realistic peak load, the feeder size usually falls into one of three tiers.
30 Amp Feeder
Good for sheds and light garages: lighting, a few 120 volt outlets, a battery charger station, maybe a small window AC. A 30 amp, 240 volt feeder commonly uses 10 gauge copper conductors on a short run. It cannot support an EV charger plus anything else of consequence.
60 Amp Feeder
The most popular choice for a detached two-car garage. It handles lighting, several outlet circuits, a heater or a compressor, and a moderate 240 volt tool, as long as they are not all running at full draw together. Copper feeders for 60 amps are commonly 6 gauge; aluminum feeders commonly step up to 4 gauge.
100 Amp Feeder
The choice for a serious shop or a garage that will host an EV charger alongside heating and power tools. Copper feeders at 100 amps commonly run 3 gauge, while aluminum often uses 1 gauge. Before choosing 100 amps, confirm your main service has room. A house on a 100 amp service usually cannot spare a 100 amp feeder, and a load calculation on the whole home may point toward a service upgrade first.
Those conductor sizes are common starting points, not final answers. Distance changes everything. A feeder that runs 150 feet to a back-lot shop may need to be upsized one or two gauges to keep voltage drop under about 3 percent, which matters for motor-driven tools that bog down and overheat on low voltage.
Detached Buildings: Grounding and Disconnect Rules
An attached garage subpanel is mostly a branch extension of the house. A detached garage or shed adds rules that trip up DIY plans.
- Four-wire feeder: modern practice runs two hots, a neutral and a separate equipment grounding conductor from the main panel to the outbuilding. Older three-wire feeders are no longer allowed for new work in most places.
- Separate neutral and ground bars: in any subpanel, neutrals and grounds must sit on separate, isolated bars. The bonding screw or strap that ties them together belongs only in the main service panel.
- Grounding electrode at the outbuilding: a detached building usually needs its own grounding electrode system, typically one or two ground rods driven near the building and connected to the subpanel ground bar.
- Disconnecting means: the outbuilding needs a way to shut off all power at the building, which is often a main breaker in the subpanel.
- Single feeder: a detached building is generally limited to one feeder or branch supply, so plan the size properly instead of adding a second line later.
Underground runs add their own requirements: burial depth depends on whether you use direct-burial cable or conduit, and the type of conduit. Call 811 before anyone digs, because gas, water and communication lines often cross the same yard path.
Choosing the Panel Itself
Subpanels are sold as load centers with a rated bus amperage and a number of spaces. Pick a bus rating at least as large as the feeder breaker, then choose more spaces than you think you need. A 60 amp feeder can land in a 100 amp, 12-space load center without any problem, and the extra spaces cost little compared with replacing a full panel later.
For a detached building, a main-breaker load center is the easy way to provide the required disconnect. For any building where the panel sits outside or in a damp unheated space, choose an outdoor subpanel load center with a rain-tight enclosure. If you work with sawdust, keep the panel away from the dust collector exhaust and leave the required clear working space in front of it, typically about 3 feet deep and 30 inches wide.
Small Sub Panel for a Shed
Sheds rarely need much. If your shed hosts a light, two outlets and a battery charger, a small sub panel with 2 to 6 spaces fed by a 30 amp feeder is plenty. These small breaker boxes are compact, inexpensive and often sold as outdoor-rated units with a main breaker included.
Shoppers often ask for the smallest sub panel they can buy. Compact 2-space and 4-space units exist, and for a true storage shed they work fine. The trap is future use. A shed that becomes a potting room with a heater, or a backyard office with a mini-split, will outgrow a 2-space box quickly. If there is any chance of growth, buy at least 6 to 8 spaces and run a feeder one size larger than today’s need. Pulling new feeder wire through a buried conduit is far more expensive than buying a bigger breaker box today.
For the smallest loads (one light and one outlet), a single 20 amp, 120 volt branch circuit to the shed may be all you need, with no subpanel at all. Your electrician can tell you whether that simpler route fits.
Step-by-Step Planning Process
- Write the load list with amps, voltage and expected simultaneous use.
- Check the main panel: note the service size (100, 150, 200 amps) and whether there are two open spaces for a double-pole feeder breaker.
- Measure the route from the main panel to the garage, including vertical runs inside walls.
- Pick a feeder tier (30, 60 or 100 amps) and let the electrician confirm wire size for distance.
- Choose the panel with a bus rating that matches or exceeds the feeder and room for growth.
- Plan the trench or conduit path and call 811 for utility locates.
- Pull the permit and schedule rough and final inspections.
Safety reminder for anyone touching the main panel: turn off the main breaker and confirm power is off with a non-contact voltage tester before removing the cover. Remember that the service lugs at the top of the main panel stay energized even with the main breaker off, which is one reason this work is best left to a licensed electrician. Never work on powered wires.
Troubleshooting Common Subpanel Problems
- Feeder breaker trips under load: the panel is undersized for real simultaneous use. Stagger heavy tools or upgrade the feeder.
- Lights dim when the compressor starts: voltage drop on a long run or an undersized feeder. An electrician can check connections with the power off and evaluate wire size.
- Shocks or tingles from tools: stop using the circuit. This often points to a missing ground or a bonded neutral in the subpanel. Shut off the feeder breaker and call an electrician.
- GFCI outlets tripping in a damp garage: moisture in boxes or a failing tool. Garage and outdoor receptacles generally require GFCI protection, so do not bypass them.
- No room for new breakers: tandem breakers sometimes help if the panel allows them, but a larger panel is often the cleaner fix.
Garage Sub Panel Cost Ranges
Costs swing with distance, trenching and your local labor rates. As general ranges, a garage sub panel in an attached garage often runs $800 to $2,000 installed. A detached garage with a 60 amp underground feeder commonly lands between $1,500 and $4,000, and a 100 amp feeder with a long trench can exceed that. The panel itself is a small share of the cost; copper feeder wire, conduit, trenching and labor make up most of it. Permit fees are usually modest. Upsizing the feeder at installation is cheap compared with replacing it later.
When to Call a Licensed Professional
Bring in a licensed electrician for any feeder, subpanel or new circuit. Most jurisdictions require a permit and inspection, and insurers may question unpermitted work after a fire. An electrician will run a proper load calculation on your house, confirm the service can handle the new feeder, size conductors for distance, install the grounding electrode system and keep neutrals and grounds separated. Call a pro right away if you smell burning plastic, see scorched breakers or feel shocks from tools. If your plan includes an EV charger plus heat, ask whether a service upgrade makes more sense than squeezing a large feeder from an existing panel.
Frequently Asked Questions
What size sub panel do I need for a garage?
Most detached two-car garages do well with a 60 amp feeder and a 100 amp rated panel with 8 to 12 spaces. Add an EV charger, heater and welder and you are usually looking at 100 amps.
Can I put a 100 amp sub panel on a 100 amp service?
It is sometimes allowed on paper, but in practice the house load usually leaves too little capacity. A load calculation decides it, and many homes need a service upgrade first.
Does a detached garage need a ground rod?
Generally yes. A detached building normally needs its own grounding electrode, usually ground rods, connected to the subpanel ground bar, plus a separate grounding conductor in the feeder.
What is the smallest sub panel for a shed?
Compact 2-space to 4-space units exist and suit a storage shed with a light and an outlet. If the shed may gain a heater or AC, choose 6 to 8 spaces.
Can I install a garage sub panel myself?
Some areas allow homeowner permits, but the work involves the main panel and new circuits. A licensed electrician is the safer choice and is required in many jurisdictions.